Sysadmin notes: post-only mailing lists with GNU Mailman

Need for notification mailing lists

I found several people looking for a way to implement post-only mailing lists with GNU Mailman. However, I couldn’t find solutions that are described in sufficient detail.

In particular, this type of list is useful for notification mailing lists. In Bootlin’scase, whenever someone pushes commits to our public git trees, a notification e-mail is sent. Sometimes, internal discussions can follow, but we do not wish to make them public. This is why we do not want the list e-mail address to be shown in the messages that are sent. If the list address doesn’t appear in the To, CC or in Reply-To headers, members who are authorized to post messages without moderation won’t post replies to the list by mistake by using the “Reply to all” functionality of their e-mail client.

The problem is that the current version of GNU Mailman doesn’t support this type of list yet, at least with the parameters in the list administration interface. You can turn on the “Full personalization” option, which will send messages to each member individually, so that the list address doesn’t appear in the To header. You can also customize the Reply-To header, to an address that is different from the list address. However, the CC header will still hard-code the list address.

A possibility is to hack the /usr/lib/mailman/Mailman/Handlers/CookHeaders.py file, but this solution would apply to all the lists at once, and the changes you could make may interfere with Mailman updates. A much nice solution is to extend Mailman, to modify its behavior for specific mailing lists.

A working solution

This solution is based on explanations given on the Mailman wiki, and was implemented on Ubuntu 12.04.

First, create a list-test mailing list. Some of the commands below will assume that you named your new list this way. Now, go to its administration interface and enable “Full Personalization” in “Non-digest” options. In “General options”, in the “Reply-To: header munging” section, specify a reply-to address.

If you send a test message to your new list, you will see that the list address is still in the CC header of the message that you receive.

Now, create a RemoveCC.py file in the Handlers directory (/usr/lib/mailman/Mailman/Handlers/RemoveCC.py on Ubuntu 12.04):

# Your comments here

"""Remove CC header in post-only mailing lists

This is to avoid unmoderated members to reply to messages,
making their replies public. Replies should instead go to a private list.
"""

def process(mlist, msg, msgdata):
    del msg['Cc']

This will be yet another filter the list messages will go through. Now compile this file in the directory where you put it:

pycompile RemoveCC.py

The next thing to do is to modify the default filter pipeline for your new list. You can do it by creating a /var/lib/mailman/lists/list-test/extend.py file with the below contents:

import copy
from Mailman import mm_cfg
def extend(mlist):
    mlist.pipeline = copy.copy(mm_cfg.GLOBAL_PIPELINE)
    # The next line inserts MyHandler after CookHeaders.
    mlist.pipeline.insert(mlist.pipeline.index('CookHeaders') + 1, 'RemoveCC')

This will add your new filter right after the CookHeaders one. To enable this, you have to run:

/usr/sbin/config_list -i /var/lib/mailman/lists/list-test/extend.py list-test

You can now send a new test message, and you will see that the CC header is now gone.

Notes

  • Of course, you can reuse the same extend.py file for multiple mailing lists. However, the solution doesn’t work if you don’t put the file inside /var/lib/mailman/lists/list-name (distributions other than Ubuntu 12.04 may have different paths).
  • I didn’t manage to undo this change. The Mailman wiki gives a solution based on creating a file containing del mlist.pipeline and running /usr/sbin/config_list -i this-file list-name, but it didn’t work for me. Please post a comment below if you find a way to implement this, and return to “factory” settings.
  • Don’t hesitate to share other ways of implementing this kind of functionality!

Linux kernel 3.8 released, Bootlin top #17 contributor

Thomas Petazzoni and Grégory Clement, Bootlin kernel engineers
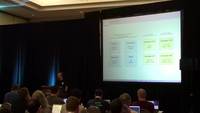
Thomas Petazzoni (front) and Grégory Clement (back) at the Embedded Linux Conference 2013 in San Francisco, discussing ARM Linux kernel issues.
Early last week, version 3.8 of the Linux kernel has been released by Linus Torvalds. The KernelNewbies web site, has, as usual, a great summary of what’s new in this release, together with lots of links to the relevant LWN articles. With 12394 commits, 3.8 has been the busiest ever kernel release cycle, the previous record being held by 2.6.25 with 12243 commits.

Despite this huge activity, Bootlin has been the 17th most active employer during the 3.8 cycle, with 128 commits merged into the mainline Linux kernel, representing a bit more than 1% of the total number of commits. See the statistics by employer at http://www.remword.com/kps_result/3.8_whole.html and in the traditional LWN article. This puts Bootlin before Nvidia, Qualcomm, ARM or Oracle in number of commits, and just a few commits behind Freescale. See the Git repository for the list of our contributions.

In detail, Bootlin contributions for 3.8 have been:

  • A large number of contributions related to the support of the Marvell Armada 370 and Armada XP SoCs, done by Grégory Clement and Thomas Petazzoni. Contributions included: a new network driver for the Armada 370 and Armada XP, support for the Armada XP-based OpenBlocks AX3 platform, support for the Armada 370-based Globalscale Mirabox platform, a big number of improvements and Device Tree support for the Marvell XOR engine driver, beginning of Device Tree support for the older Marvell Orion5x SoC family, support for the L2 cache found in Armada 370/XP, clock drivers for Armada 370/XP, SMP support for Armada XP, enabling of SATA on Armada 370/XP platforms.
  • The contribution of the initial support for a new SoC family in the mainline Linux kernel: the Allwinner A10 and Allwinner A13 ARM SoCs. This support has been contributed by Maxime Ripard, who has become the maintainer for this new ARM sub-architecture.
  • A driver for the I2C-based SSD1304 OLED display, a nice 128×32 pixels monochrome OLED display, contributed by Maxime Ripard.
  • A number of improvements in the support for the Crystalfontz i.MX28-based platforms, the CFA10036 and its expansion board the CFA10049. These contributions have also been made by Maxime Ripard.

Through these contributions, Bootlin have gained a good expertise in support for ARM SoCs and boards inside the Linux kernel. If you are interested in having us help you bring the support of your ARM board or ARM SoC into the mainline Linux kernel, do not hesitate to contact us, you will be directly answered by our engineers doing Linux kernel development!

Android seminar slides

Android robotWe have delivered two seminars about Android during the last quarter of 2012. The seminars were held in Belfort and Grenoble, France, and were organized by Captronic, a French public program to support innovation in electronic systems.

This one day seminar targets people who wish to understand the constraints and implications of using Android in embedded products, and know the steps to follow. The seminar is led by Maxime Ripard, Bootlin’sAndroid expert. Maxime is also the creator of Bootlin’sAndroid system development course.

Agenda

Morning

  • General introduction to Android
  • Opportunities to use Android in embedded systems which are neither phones nor tablets
  • Details on Android’s architecture and how to customize it:
    • Source code and compiling
    • Android changes to the Linux kernel
    • Bootloaders for Android
    • Supporting new hardware
    • Android filesystem layout
    • Android native layers and calling a C program to access specific hardware
    • Introduction to application development
    • Customizing the system
    • Using adb (Android Debug Bridge) for debugging and device remote access
    • Advice and resources

Afternoon

  • Completing the morning presentations (if necessary)
  • Demonstrating multiple aspects of system development with Android:
    • Getting sources and compiling
    • Android emulator demonstration
    • Starting Android on an electronic board with an ARM OMAP3530 processor, using a serial console.
    • Adding support for specific buttons. “Back” button example.
    • Using adb: installing, accessing system logs, accessing a command line interface on the device, exchanging files with the PC.
    • Customizing the system: change the product name, the default wallpaper, add new properties.
    • To access specific hardware (such as a USB device), development of a native library and accessing this functionality from the Android framework through a specific class and JNI library.
    • Describing an application that allows to control a USB device.
    • Questions and answers

Presentation slides

Note: see updates to these materials.

Creative commonsPresentation slides are available in PDF and LaTeX source formats. As usual, they are released under the terms of the Creative Commons Attribution – ShareAlike 3.0 license. This means that you can reuse and modify them according to your own needs.

If you are interested in having one of us run such a seminar on your own part of the world, giving the audience the opportunity to ask all the questions they can have on the use of Android in embedded systems, don’t hesitate to contact us.

Videos of the Embedded Linux Conference Europe 2012

With the approaching Embedded Linux Conference, to be held February 20-22 in San Francisco, we felt that it was time to finally fight with ffmpeg/libav and get the videos we had taken from the last Embedded Linux Conference Europe talks, encode them and publish them online. So here they are, as what we could consider a late Christmas gift.

There are so many talks that it might be hard to watch everything. So I’d like to share with you my preferred talks from this last ELCE (of course, I haven’t been able to see all talks, but only a third of them, so the following selection is only taken from the talks I have seen) :

  • For sure, the talk I have preferred is the Understanding PREEMPT_RT (The Real-Time Patch) talk from Steven Rostedt (Redhat). In an hour, Steven explained some very interesting internals of PREEMPT_RT, in a very clear way. Definitely a must see, in my opinion.
  • I also enjoyed the ARC Linux: From a Tumbling Toddler to a Graduating Teen talk from Vineet Gupta (Synopsys). While talking about a specific new CPU architecture that probably most of us have never used, Vineet is able to tell a very nice story by bringing you through various issues they had while porting Linux on this new CPU architecture, giving interesting and funny technical details in the process.
  • The talk about Regmap: The Power of Subsystems and Abstractions from Mark Brown (Wolfson Microelectronics) was also very good, in that it clearly explained the need for this new kernel subsystem, how the API works, etc. Definitely the kind of talk I’d like to see about more kernel subsystems: in an hour, you learn the philosophy of the subsystem, why it’s there, how it has been designed to solve the original problems, and the basics of its APIs. It’s often what’s missing from an API documentation: the philosophy behind it. Hour long talks that are capable of conveying this philosophy are therefore highly useful.
  • As usual, David Anders talk, this time about Board bringup: you, me and I2C has been very nice as well. It is a good introduction about electronics related to I2C, it doesn’t go very far for anyone having an existing experience of I2C, but is indeed a very good introduction for those who don’t. I really enjoyed the good explanation about pull-up resistors.
  • Finally, another talk that was great is Samuel Ortiz (Intel) talk about Near Field Communication with Linux. A bit like the Regmap talk, the great benefit of Samuel talk is that in an hour, he went through the different hardware available for NFC in Linux, the architecture of the software stack, the different software components that exist, their strenghts and weaknesses and so on. So without any prior knowledge about NFC, you get at the end of the talk a very good coverage of how this technology is supported by Linux today.

Well, enough with my suggestions, here is the complete list of videos:

Matt RanostayVideo capture
Beaglebone: The Perfect Telemetry Platform?
Slides
Video (24 minutes):
full HD (153M), 800×450 (74M)

Jim HuangVideo capture
0xlab
Implement Checkpointing for Android
Slides
Video (43 minutes):
full HD (291M), 800×450 (168M)

Wolfram SangVideo capture
Pengutronix e.K.
Maintainer’s Diary: Devicetree and Its Stumbling Blocks
Slides
Video (49 minutes):
full HD (329M), 800×450 (160M)

Matthias BruggerVideo capture
ISEE 2007 S.L.
A War Story: Porting Android 4.0 to a Custom Board
Slides
Video (34 minutes):
full HD (230M), 800×450 (106M)

Kishon Vijay AbrahamVideo capture
Texas Instruments
USB Debugging and Profiling Techniques
Slides
Video (40 minutes):
full HD (245M), 800×450 (109M)

Alan OttVideo capture
Signal 11 Software
Wireless Networking with IEEE 802.15.4 and 6LoWPAN
Slides
Video (52 minutes):
full HD (339M), 800×450 (156M)

João Paulo Rechi VitaVideo capture
INdT
Bluetooth Smart devices and Low Energy support on Linux
Slides
Video (36 minutes):
full HD (250M), 800×450 (116M)

Peter StugeVideo capture
OpenOCD: Hardware Debugging and More
Video (47 minutes):
full HD (316M), 800×450 (155M)

Alessandro RubiniVideo capture
PF_ZIO: Using Network Frames to Convey I/O Data and Meta-Data
Slides
Video (48 minutes):
full HD (317M), 800×450 (141M)

Joo-Young HwangVideo capture
Samsung
A New File System Designed for Flash Storage in Mobile
Slides
Video (54 minutes):
full HD (369M), 800×450 (152M)

Alexandre BelloniVideo capture
Adeneo Embedded
Boot Time Optimizations
Slides
Video (39 minutes):
full HD (261M), 800×450 (129M)

Philipp ZabelVideo capture
Pengutronix e.K.
Modular Graphics on Embedded ARM
Slides
Video (32 minutes):
full HD (217M), 800×450 (100M)

Karim YaghmourVideo capture
Opersys
Inside Android’s User Interface
Slides
Video (42 minutes):
full HD (284M), 800×450 (117M)

Samuel OrtizVideo capture
Intel
Near Field Communication with Linux
Slides
Video (35 minutes):
full HD (232M), 800×450 (92M)

Arnout VandecappelleVideo capture
Essensium/Mind
Upgrading Without Bricking
Slides
Video (56 minutes):
full HD (373M), 800×450 (172M)

Tim BirdVideo capture
Sony Network Entertainment
BoFs: Developer Tools and Methods: Tips & Tricks
Slides
Video (62 minutes):
full HD (395M), 800×450 (160M)

Matt LockeVideo capture
Texas Instruments
Are We Headed for a Complexity Apocalypse in Embedded SoCs?
Video (27 minutes):
full HD (167M), 800×450 (76M)

Sascha HauerVideo capture
Pengutronix e.K.
Barebox Bootloader
Slides
Video (47 minutes):
full HD (313M), 800×450 (134M)

Benjamin ZoresVideo capture
Alcatel-Lucent
Dive Into Android Networking: Adding Ethernet Connectivity
Slides
Video (46 minutes):
full HD (270M), 800×450 (118M)

Jiyoun ParkVideo capture
Samsung
Experiences as an OEM with Development of UI Frameworks
Video (42 minutes):
full HD (282M), 800×450 (158M)

Keshava MunegowdaVideo capture
Texas Instruments
FFSB and IOzone: File system Benchmarking Tools, Features and Internals
Slides
Video (56 minutes):
full HD (367M), 800×450 (171M)

Chris SimmondsVideo capture
2net Limited
The End of Embedded Linux (As We Know It)
Slides
Video (47 minutes):
full HD (324M), 800×450 (150M)

Steven RostedtVideo capture
Red Hat
Understanding PREEMPT_RT (The Real-Time Patch)
Slides
Video (61 minutes):
full HD (412M), 800×450 (186M)

Klaas van GendVideo capture
Vector Fabrics
Application Parallelization for Multi-Core Android Devices
Slides
Video (44 minutes):
full HD (293M), 800×450 (124M)

David AndersVideo capture
Texas Instruments
Board Bringup: You, Me, and I2C
Slides
Video (38 minutes):
full HD (217M), 800×450 (97M)

Rama PallalaVideo capture
Intel
Linux Power Supply Charging Subsystem
Video (35 minutes):
full HD (213M), 800×450 (83M)

Agusti FontquerniVideo capture
ISEE 2007 S.L.
Embedded Linux RADAR Device
Slides
Video (50 minutes):
full HD (331M), 800×450 (140M)

Matt PorterVideo capture
Texas Instruments
What’s Old Is New: A 6502-based Remote Processor
Slides
Video (58 minutes):
full HD (389M), 800×450 (181M)

Thomas PetazzoniVideo capture
Bootlin
Your New ARM SoC Linux Support Check-List
Slides
Video (56 minutes):
full HD (362M), 800×450 (150M)

Tracey M. Erway and Nithya A. RuffVideo capture
Intel and Synopsys
Can You Market an Open Source Project?
Slides
Video (43 minutes):
full HD (272M), 800×450 (103M)

Lars KnollVideo capture
Qt Project
Qt on Embedded Systems
Video (50 minutes):
full HD (337M), 800×450 (175M)

Koen KooiVideo capture
Circuitco
Supporting 200 Different Expansionboards: The Broken Promise of Devicetree
Slides
Video (37 minutes):
full HD (232M), 800×450 (102M)

Anna DushistovaVideo capture
Eclipse and Embedded Linux Developers: What it Can and Cannot Do For You
Slides
Video (58 minutes):
full HD (378M), 800×450 (167M)

Dave StewartVideo capture
Intel
Yocto Project Overview and Update
Video (52 minutes):
full HD (338M), 800×450 (139M)

Vineet GuptaVideo capture
Synopsys
ARC Linux: From a Tumbling Toddler to a Graduating Teen
Slides
Video (44 minutes):
full HD (269M), 800×450 (113M)

Laurent PinchartVideo capture
Ideas on Board
DRM/KMS, FB and V4L2: How to Select a Graphics and Video API
Slides
Video (48 minutes):
full HD (328M), 800×450 (145M)

Frank RowandVideo capture
Sony Network Entertainment
Practical Data Visualization
Slides
Video (46 minutes):
full HD (308M), 800×450 (141M)

Marcin JuszkiewiczVideo capture
Linaro
ARM 64-Bit Bootstrapping with OpenEmbedded
Slides
Video (32 minutes):
full HD (208M), 800×450 (88M)

Wim DecroixVideo capture
TPVision
Practical Experiences With Software Crash Analysis in TV
Slides
Video (35 minutes):
full HD (224M), 800×450 (87M)

Mark BrownVideo capture
Wolfson Microelectronics
Regmap: The Power of Subsystems and Abstractions
Video (44 minutes):
full HD (282M), 800×450 (124M)

Hans VerkuilVideo capture
Cisco Systems
Video4Linux: Current Status and Future Work
Slides
Video (33 minutes):
full HD (217M), 800×450 (100M)

Holger BehrensVideo capture
Wind River
Yocto Layer for In-Vehicle Infotainment
Slides
Video (43 minutes):
full HD (284M), 800×450 (123M)

Tero KristoVideo capture
Texas Instruments
Debugging Embedded Linux (Kernel) Power Management
Slides
Video (36 minutes):
full HD (241M), 800×450 (108M)

Martin BisVideo capture
BIS
Real-Time Linux in Industrial Appliances
Slides
Video (48 minutes):
full HD (323M), 800×450 (145M)

Jens GeorgVideo capture
Openismus GmbH
Rygel: Open Source DLNA, ready for Customer Products?
Slides
Video (33 minutes):
full HD (215M), 800×450 (88M)

Yoshitake KobayashiVideo capture
Toshiba
Improvement of Scheduling Granularity for Deadline Scheduler
Slides
Video (31 minutes):
full HD (195M), 800×450 (82M)

Tsugikazu ShibataVideo capture
NEC
LTSI (Long-Term Stable Initiative) Status Update
Slides
Video (44 minutes):
full HD (278M), 800×450 (111M)

Thomas GleixnerVideo capture
Linutronix
UBI Fastmap
Slides
Video (45 minutes):
full HD (299M), 800×450 (121M)

Videos of the Embedded track at FOSDEM 2012

Better late than never: we finally found the time to update our video encoding scripts, and therefore encode and upload the videos we had taken of the embedded track at FOSDEM 2012. Amongst many other interesting talks, you’ll notice two talks given by Bootlin engineers: one by Maxime Ripard on the IIO subsystem, a kernel subsystem for Industrial I/O devices, and another by Thomas Petazzoni about the usage of the Qt framework for non-graphical applications in embedded Linux systems.

Cédric BailVideo capture
EFL the upcoming embedded UI toolkit
Slides
Video (51 minutes):
full HD (337M), 800×450 (138M)

Julius Baxter, Olof KindgrenVideo capture
OpenCores.org
The OpenRisc Project
Slides
Video (28 minutes):
full HD (184M), 800×450 (74M)

Jeremy BennettVideo capture
Embecosm
Open Source Software Meets Open Source Hardware, OpenCores and the OpenRisc 1000
Video (28 minutes):
full HD (165M), 800×450 (71M)

Vasilis GeorgitzikisVideo capture
PMH: Home Automation made right
Slides
Video (27 minutes):
full HD (187M), 800×450 (81M)

Thomas PetazzoniVideo capture
Bootlin
Using Qt for non-graphical applications
Slides
Video (47 minutes):
full HD (307M), 800×450 (129M)

Jean PihetVideo capture
Texas Instruments
Linux (SoC) power management
Slides
Video (39 minutes):
full HD (268M), 800×450 (117M)

Maxime RipardVideo capture
Bootlin
IIO, a new subsystem for I/O devices
Slides
Video (35 minutes):
full HD (211M), 800×450 (97M)

Arnoult VandecappelleVideo capture
Mind
Safe upgrade of embedded systems
Slides
Video (47 minutes):
full HD (320M), 800×450 (138M)

Bootlin customer project on Kickstarter!

For about 6 months, we’ve been working with Crystalfontz America on an imx28-based board, targeted at the hackers and DIYers. We’ve been working on the BSP, adding support to Linux and in Buildroot for this board. Support in the mainline Linux kernel is also in pretty good shape, and we continue to post patches to improve it.

The CFA-10036 is actually a computer-on-module with a small OLED display, and comes with two (for now) breakout boards, the CFA-10037, which adds USB and Ethernet connectivity, and an awful lot of exposed GPIOs, and the soon-to-be announced CFA-10049, which is more targeted to industrial or robotic uses, with additional ADCs, fan controller, 1-wire, LCD, rotary encoder, and so on. See more details.

The project is getting close to completion, since Crystalfontz started its funding campaign on Kickstarter.

For those who are not familiar with Kickstarter, it’s a way for creators to get funding and sense customer interest in their projects. If you find the device interesting you can either make a small pledge to show that you like the project, or make a bigger one and will receive board(s) and accessories corresponding to how much you pledged. If the project doesn’t meet its funding goals, you won’t be charged at all. I advise you to read the Kickstarter FAQ to understand Kickstarter better.

Super fast Linux splashscreen

Bobsleigh race picture

Here’s a simple trick that I recently rediscovered when I worked on a boot time reduction project for a customer. It’s not rocket science, but you may not be aware of it.

Our customer was using fbv to display its logo right after the system booted. This is a way to show that the system is available while you’re starting the system’s main application:

fbv -d 1 /root/logo.bmp > /dev/null 2>&1

With Grabserial and using simple instrumentation with messages issued on the serial console before and after running the command, we found that this command was taking 878 ms to execute. The customer’s system had an AT91SAM9263 ARM SOC from Atmel, running at 200 MHz.

Even if fbv is a simple program (22 KB on ARM, compiled with shared libraries), decoding the logo image is still expensive. Here’s a way to get this compute cost out of your boot sequence. All you have to do is display your logo on your framebuffer, and then capture the framebuffer contents in a file:

fbv -d 1 /root/logo.bmp
cp /dev/fb0 /root/logo.fb

The new file is now a little bigger, 230400 bytes instead of 76990. However, displaying your boot logo can now be done by a simple copy:

dd if=/root/logo.fb of=/dev/fb0 bs=230400 count=1 > /dev/null 2>&1

This command now runs in only 54 ms. That’s only 6% of the initial execution time! The advantage of this approach is that it works with any kind of framebuffer pixel format, as long as you have at least one program that knows how to write to your own framebuffer.

Note that the dd command was used to read and write the logo in one shot, rather than copying in multiple chunks. We found that the equivalent cp and cat commands were slightly slower. Of course, the benchmark results will vary from one system to another. Our customer had heavily optimized their NOR flash access time. If you run this on a very slow storage device, using a much faster CPU, the time to display the logo may be several impacted by the time taken to read a bigger file from slower storage.

To get even better performance, another trick is to compress the framebuffer contents with LZO (supported by BusyBox), which is very fast at decompressing, and requires very little memory to run:

lzop -9 /root/logo.fb

The new /root/logo.fb.lzop file is now only 2987 bytes big. Of course, the compression rate will depend on your logo image. In our case, the splashscreen contains mostly white space and a simple monochrome company logo. The new command to put in your startup scripts is now:

lzopcat /root/logo.fb.lzo > /dev/fb0

The execution time is now just 52.5 ms! With a faster CPU, the time reduction would have been even bigger.

The ultimate trick for having a real and possibly animated splashscreen would be to implement your own C program, directly writing to the framebuffer memory in mmap() mode. Here’s a nice tutorial showing how easy it can be.

Managing flash storage with Linux

Note: this article was first written for the German edition of Linux Magazine, and was later posted in the English edition too. We negotiated the right to publish it on our blog after the print editions. Here is the original version (the paper versions were modified by the editors to make them more concise).

In the family tree of computers, personal computers (PCs) are the parents, while the children and teenagers are mobile devices. PCs are no longer physically attractive, getting close to retirement. They produce a lot of heat, and make all sorts of unpleasant noise when you are next to them. Noise is caused by keyboard presses, by fans that are essential to avoid computer meltdown, and by rotating disks that sound like nothing but something that rotates.

The last chance for this generation to survive a few more years is to send them to a remote place where nobody can see their old bodies and hear their annoying noise any more. This place is called The Cloud. Perhaps because it gets these systems closer to the final destination: heaven.

If you have a device that you feel like putting on your knees (without getting burned) and caress its skin (oops screen), and doesn’t make any noise but the pleasant sounds that you feel like listening too, chances are you have a device from the last generation.

One reason why your device doesn’t make any unwanted sound is because it doesn’t have rotating disks, but flash storage instead. Most modern devices have flash storage, and most of these devices run Linux. This article gives technical details about how Linux supports flash storage devices. It should mostly interest people creating embedded and multimedia devices using the Linux kernel to get the best performance out of their hardware. People who wish to hack the devices they own should be interested too.

Flash storage

USB flash drive pictureFlash storage, also called solid state, has multiple advantages over rotating storage. First, the absence of mechanical and moving parts eliminate noise, increase reliability and resistance to shock and vibrations, and also reduces heat dissipation as well as power consumption. Second, random access to data is also much faster, as you no longer have to move a disk head to the right location on the medium, which can take milliseconds.

Flash also has its shortcomings, of course. First, for the same price, you have about 10 times less solid state storage than rotating storage. This can be an issue with operating systems that require Gigabytes of disk space. Fortunately, Linux only needs a few MB of storage. Second, writing to flash storage has special constraints. You cannot write to the same location on a flash block multiple times without erasing the entire block, called an “erase block”. This constraint can also cause write speed to be much lower than read speed. Third, flash blocks can only withstand a rather limited number of erases (from a few thousand for today densest NAND flash to one million at best). This requires to implement hardware or software solutions, called “wear leveling”, to make sure that no flash block gets written to much too often that the others.

NOR flash was the first type of flash storage that was invented. NOR is very convenient as it allows the CPU to access each byte one by one, in random order. This way, the CPU can execute code directly from NOR flash. This is very convenient for bootloaders, which do not have to be copied to RAM before executing their code.

NAND flash is today’s most popular type of flash storage, as it offers more storage capacity for a much lower cost. The drawback is that NAND storage is on an external device, like rotating storage. You have to use a controller to access device data, and the CPU cannot execute code from NAND without copying the code to RAM first. Another constraint is that NAND flash devices can come out of the factory with faulty blocks, requiring hardware or software solutions to identify and discard bad blocks.

Two types of NAND flash storage are available today. The first type emulates a standard block interface, and contains a hardware “Flash Translation Layer” that takes care of erasing blocks, implementing wear leveling and managing bad blocks. This corresponds to USB flash drives, media cards, embedded MMC (eMMC) and Solid State Disks (SSD). The operating system has no control on the way flash sectors are managed, because it only sees an emulated block device. This is useful to reduce software complexity on the OS side. However, hardware makers usually keep their Flash Translation Layer algorithms secret. This leaves no way for system developers to verify and tune these algorithms, and I heard multiple voices in the Free Software community suspecting that these trade secrets were a way to hide poor implementations. For example, I was told that some flash media implemented wear leveling on 16 MB sectors, instead of using the whole storage space. This can make it very easy to break a flash device.

The second type is raw flash. The operating system has access to the flash controller, and can directly manage flash blocks. Counting the number of times a block has been erased is also possible (“block erase count”). The Linux kernel implements a Memory Technology Device (MTD) subsystem that allows to access and control the various types of flash devices with a common interface. This gives the freedom to implement hardware independent software to manage flash storage, in particular filesystems. Freedom and independence is something we have learned to care about in our community.

The Linux MTD architecture

Linux MTD partitions

The first thing you can do is access raw flash storage and partitions. It is similar to accessing raw block devices through devices files like /dev/sda (whole device) and /dev/sda1, /dev/sda2, etc. (partitions).

MTD devices are usually partitioned. This is useful to define areas for different purposes, such as:

Example MTD partitions

Raw means that no filesystem is used. This is not needed when you just have one binary to store, instead of multiple files.

Declaring partitions as read-only is also a way to make sure that Linux won’t allow to make changes to such partitions. This way, the bootloader and root filesystem partitions can be protected against mistakes and unauthorized modification attempts. You can also note that partitions cannot be bypassed by accessing the whole device at a given offset, as Linux offers no device file to access the whole storage.

What’s special in MTD partitions is that there is no partition table as in block devices. This is probably because flash is an unsafe location to store such critical system information, as flash blocks may become bad during system life.

Instead, partitions are defined in the kernel. An example is found in the arch/arm/mach-omap2/board-omap3beagle.c file in the kernel sources, defining flash partitions for the Beagle board:

static struct mtd_partition omap3beagle_nand_partitions[] = {
        /* All the partition sizes are listed in terms of NAND block size */
        {
                .name           = "X-Loader",
                .offset         = 0,
                .size           = 4 * NAND_BLOCK_SIZE,
                .mask_flags     = MTD_WRITEABLE,        /* force read-only */
        },
        {
                .name           = "U-Boot",
                .offset         = MTDPART_OFS_APPEND,   /* Offset = 0x80000 */
                .size           = 15 * NAND_BLOCK_SIZE,
                .mask_flags     = MTD_WRITEABLE,        /* force read-only */
        },
        {
                .name           = "U-Boot Env",
                .offset         = MTDPART_OFS_APPEND,   /* Offset = 0x260000 */
                .size           = 1 * NAND_BLOCK_SIZE,
        },
        {
                .name           = "Kernel",
                .offset         = MTDPART_OFS_APPEND,   /* Offset = 0x280000 */
                .size           = 32 * NAND_BLOCK_SIZE,
        },
        {
                .name           = "File System",
                .offset         = MTDPART_OFS_APPEND,   /* Offset = 0x680000 */
                .size           = MTDPART_SIZ_FULL,
        },
};

Fortunately, you can override these default definitions without having to modify the kernel sources.

You first need to find the name of the MTD device to partition, as you may have multiple ones. Look at the
kernel log at boot time. In the Beagle board example, the MTD device name is omap2-nand.0:

omap2-nand driver initializing
ONFI flash detected
NAND device: Manufacturer ID: 0x2c, Chip ID: 0xba (Micron NAND 256MiB 1,8V 16-bit)
Creating 5 MTD partitions on "omap2-nand.0":
0x000000000000-0x000000080000 : "X-Loader"
0x000000080000-0x000000260000 : "U-Boot"
0x000000260000-0x000000280000 : "U-Boot Env"
0x000000280000-0x000000680000 : "Kernel"
0x000000680000-0x000010000000 : "File System"

Fortunately, you can define your own partitions without having to modify the kernel sources. The Linux kernel offers an mtdpartss boot parameter to define your own partition boundaries.

You can now add an mtdparts definition to the kernel command line (change it through the bootloader):

Example:

mtdparts=omap2-nand.0:128k(X-Loader)ro,256k(U-Boot)ro,128k(Environment),4m(Kernel)ro,32m(RootFS)ro,-(Data)

We have just defined 6 partitions in the omap2-nand.0 device:

  • First stage bootloader (128 KiB, read-only)
  • U-Boot (256 KiB, read-only)
  • U-Boot environment (128 KiB)
  • Kernel (4 MiB, read-only)
  • Root filesystem (16 MiB, read-only)
  • Data (remaining space)

Note that partition sizes must be a multiple of the erase block size. The erase block size can be found in /sys/class/mtd/mtdx/erasesize on the target system.

Now that partitions are defined, you can display the corresponding MTD devices by viewing /proc/mtd (the sizes are in hexadecimal):

dev:    size   erasesize  name
mtd0: 00020000 00020000 "X-Loader"
mtd1: 00040000 00020000 "U-Boot"
mtd2: 00020000 00020000 "Environment"
mtd3: 00400000 00020000 "Kernel"
mtd4: 02000000 00020000 "File System"
mtd5: 0dbc0000 00020000 "Data"

Here, you can also see another difference with block devices. Device files names for block device partitions still refer to the complete device name (for example /dev/sda1 for the first partition of the device represented by /dev/sda). MTD partitions are shown as independent MTD devices, and for example mtd1 could either be the second partition of the first flash device, or the first partition of the second flash device. You cannot tell the difference from device names.

Back to our example, you can see that a separate flash partition is dedicated to storing the U-Boot environment variables. Did you know that you can update these variables from Linux, by flashing an image for this partition? At Bootlin, we have contributed a utility to create such an image.

Manipulating MTD devices

You can access MTD device number X through two types of interfaces. The first interface is a /dev/mtdX character device, managed by the mtdchar driver. In particular, this character device provides ioctl commands that are typically used by mtd-utils commands to manipulate and erase blocks in an MTD device.

The second interface is a /dev/mtdblockX block device, handled by the mtdblock driver. This device is mostly used to mount MTD filesystems, such as JFFS2 and YAFFS2, because the mount command primarily works with block devices. You may be tempted to use this device to write to the MTD device, but the corresponding driver isn’t elaborate enough for use in production. When you attempt to write to a given block, the previous contents are copied to RAM, the MTD block is erased, and the updated contents are written to the block. As you can see, there is no wear leveling of any sort, as a series of writes to the same part of the block device could very quickly damage the corresponding erase blocks. Worse, mtdblock isn’t even bad block aware. If you copy a filesystem image directly to /dev/mtdblockX, and your NAND storage has bad blocks, your filesystem will be corrupted because of the failure to write parts of the filesystem image.

Therefore, the clean way to manipulate MTD devices is through the character interface, and using the mtd-utils commands. Here are the most common ones:

  • mtdinfo to get detailed information about an MTD device
  • flash_eraseall to completely erase a given MTD device
  • flashcp to write to NOR flash
  • nandwrite to write to NAND flash
  • UBI utilities (see later)
  • Flash filesystem image creation tools: mkfs.jffs2, mkfs.ubifs

These commands are available through the mtd-utils package in GNU/Linux distributions and can also be cross-compiled from source by embedded Linux build systems such as Buildroot and OpenEmbedded. Simple implementations of the most common commands are also available in BusyBox, making them much easier to cross-compile for simple embedded systems.

JFFS2

Journaling Flash File System version 2 (JFFS2), added to the Linux kernel in 2001, is a very popular filesystem for flash storage. As expected in a flash filesystem, it implements bad block detection and management, as well as wear leveling. It is also designed to stay in a consistent state after abrupt power failures and system crashes. Last but not least, it also stores data in compressed form. Multiple compressing schemes are available, according to whether matters more: read/write performance or the compression rate. For example, zlib compresses better than lzo, but is also much slower.

Implementing flash filesystems has special constraints. When you make a change to a particular file, you shouldn’t just go the easy way and copy the corresponding blocks to RAM, erase them, and flash the blocks with the new version. The first reason is that a power failure during the erase or write operations would cause irrecoverable data loss. The second reason is that you could quickly wear out specific blocks by making multiple updates to the same file.

Another solution is to copy the new data to a new block, and replace references to the old block by references to the new block. However, this implies another write on the filesystem, causing more references to be modified until the root reference is reached.

JFFS2 uses a log-structured approach to address this problem. Each file is described through a “node”, describing file metadata and data, and each node has an associated version number. Instead of making in-place changes, the idea is to write a more recent version of the node elsewhere in an erase block with free space. While this simplifies write operations, this complicates read ones, as reading a file requires to find the most recent node for this file.

To optimize performance, JFFS2 keeps an in-memory map of the most recent nodes for each file. However, this requires to scan all the nodes at mount time, to reconstitute this map. This is very expensive, as JFFS2’s mount time is proportional to the number of nodes. Embedded systems using JFFS2 on big flash partitions incurred big boot time penalties because of this. Fortunately, a CONFIG_JFFS2_SUMMARY kernel option was added, allowing to store this map on the flash device itself and dramatically reduce mount time. Be careful, this option is not turned on by default!

Back to node management, older nodes must be reclaimed at some point, to keep space free for newer writes. A node is created as “valid” and is considered as “obsolete” when a newer version is created. JFFS2 managed three types of flash blocks:

  • Clean blocks, containing only valid nodes
  • Dirty blocks, containing at least one obsolete node
  • Free blocks, not containing any node yet

JFFS2 runs a garbage collector in the background that recycles dirty blocks into free blocks. It does this by collecting all the valid nodes in a dirty block, and copying them to a clean block (with space left) or to a free block. The old dirty block is then erased and marked as free. To make all the erase blocks participate to wear leveling, the garbage collector occasionally consumes clean blocks too. See Wikipedia for more details about JFFS2.

There are two ways of using JFFS2 on a flash partition. The first way is to erase the partition and format it for JFFS2, and then mount it:

flash_eraseall -j /dev/mtd2
mount -t jffs2 /dev/mtdblock2 /mnt/flash

Note that flash_eraseall -j both erases the flash partition and formats it for JFFS2. You can then fill the partition by writing data into it.

The second way, which is more convenient to program production devices, is to prepare a JFFS2 image on a development workstation, and flash this image into the partition:

flash_eraseall /dev/mtd2
nandwrite -p /dev/mtd2 rootfs.jffs2

To prepare the JFFS2 image, you need to use the mkfs.jffs2 command supplied by mtd-utils. Do not be confused by its name: unlike some other mkfs commands, it doesn’t create a filesystem, but a filesystem image.

You first need to find the erase block size (as explained earlier). Let us assume it is 256 MiB.

Then create the image on your workstation:

mkfs.jffs2 --pad --no-cleanmarkers --eraseblock=256 -d rootfs/ -o rootfs.jffs2
  • -d specifies is a directory with the filesystem contents
  • --pad allows to create an image which size is a multiple of the erase block size.
  • --no-cleanmarkers should only be used for NAND flash.

It is fine to have a JFFS2 image that is smaller than the MTD partition. JFFS2 will still be able to use the whole partition, provided it was completely erased ahead of time.

Note that to prepare production devices, it is much more convenient to flash your MTD partitions from the bootloader, using a bad block aware command, without having to boot Linux. This way, you do not have to put development utilities such as flash_eraseall in the Linux root filesystem. This is another reason why filesystem images are useful. You typically download the filesystem image to RAM through the network, and then copy the image to flash. When you do this, just make sure that you copy the exact image size. With kernel images, we often copy a bigger number of bytes from RAM to flash, as the exact image size can vary, and this creates no issue. With JFFS2 images, if you copy more bytes from RAM to flash, you will end up writing flash with random bytes from RAM after the end of your image, which will corrupt the filesystem. I’m warning you because this is a typical mistake the people make during our training sessions.

YAFFS2

YAFFS2 is Yet Another Flash Filesystem which apparently was created as an alternative to JFFS2. It doesn’t use compression, but features a much faster mount time, as well as better read and write performance than JFFS2. YAFFS2 is available with a dual GPL and Proprietary license, GPL for use in the Linux kernel, and proprietary for proprietary operating systems. Revenue from the proprietary license allowed the fund the development of this filesystem.

YAFFS2 less popular than JFFS2, and this is probably because it is not part of the mainline Linux kernel. Instead, it is available as separate code with scripts to patch most versions of the Linux kernel source. There was an effort to get it mainlined about one year ago, but this attempt failed because the changes the kernel maintainers asked for would have broken the portability to other operating systems, and therefore would have compromised the project business model.

See Wikipedia for implementation details.

To use YAFFS2 after patching your kernel, you just need to erase your partition:

flash_eraseall /dev/mtd2

The filesystem is automatically formatted at the first mount:

mount -t yaffs2 /dev/mtdblock2 /mnt/flash

It is also possible to create YAFFS2 filesystem images with the mkyaffs tool, from yaffs-utils.

UBI and UBIFS

JFFS2 and YAFFS2 had a major issue: wear leveling was implemented by the filesystems themselves, implying that wear leveling was only local to individual partitions. In many systems, there are read-only partitions, or at least partitions that are very rarely updated, such as programs and libraries, as opposed to other read-write data areas which get most writes. These “hot” partitions take the risk of wearing out earlier than if all the flash sections participated in wear leveling. This is exactly what the Unsorted Block Images (UBI) project offers.

UBI is a layer on top of MTD which takes care of managing erase blocks, implementing wear leveling and bad block management on the whole device. This way, upper layers no longer have to take care of these tasks by themselves. UBI also supports flexible partitions or volumes, which can be created and resized dynamically, in a way that is similar to the Logical Volume Manager for block devices.

UBI works by implementing “Logical Erase Blocks” (LEBs), mapping to “Physical Erase Blocks” (PEBs). The upper layers only see LEBs. If an LEB gets written to too often, UBI can decide to swap pointers, to replace the “hot” PEB by a “cold” one. This mechanism requires a few free PEBs to work efficiently, and this overhead makes UBI less appropriate for small devices with just a few MB of space.

UBI Physical and Logical Erase Blocks

UBIFS is a filesystem for UBI. It was created by the Linux MTD project as JFFS2’s successor. It also supports compression and has much better mount, read and write performance.

The first way to use UBIFS is to initialize UBI from Linux:

  • Have /dev/ mounted as a devtmpfs filesystem
  • Erase your flash partition while preserving your erase counters
    ubiformat /dev/mtd1
    
  • Attach UBI to one (of several) of the MTD partitions:
    ubiattach /dev/ubi_ctrl -m 1
    

    This command creates the ubi0 device, which represents the full UBI space stored on MTD device 1 (interfaced by a new /dev/ubi0 character device).

  • Create one or several volumes as in the below examples:
    ubimkvol /dev/ubi0 -N test -s 116MiB
    ubimkvol /dev/ubi0 -N test -m (max available size)
    
  • Mount an empty UBIFS filesystem on the new test volume:
    mount -t ubifs ubi0:test /mnt/flash
    
  • You can then fill the filesystem by copying files to it
  • Note that it is also possible to create a UBIFS filesystem image with the mkfs.ubifs command and copy the image using ubiupdatevol.

The second way is to create an image of the entire UBI space, which can be flashed from the bootloader by a bad block aware command. To do this, first create a ubi.ini file describing the UBI space, its volumes and their contents. Here is an example:

[RFS-volume]
mode=ubi
image=rootfs.ubifs
vol_id=1
vol_size=30MiB
vol_type=dynamic
vol_name=rootfs
vol_flags=autoresize
vol_alignment=1

You can then create the UBI image, for example specifying 128 KiB physical erase blocks and a minimum I/O size of 4096 bytes:

ubinize -o ubi.img -p 128KiB -m 4096 ubi.ini

The last steps are to flash the image file from the bootloader, using a bad block aware command, and add some parameters to the kernel command line:

  • ubi.mtd=1 (equivalent to ubiattach)
  • rootfstype=ubifs root=ubi0:rootfs if you use the UBIFS volume as root filesystem.

LogFS

As its name says, LogFS is another log-structured flash filesystem. It has an innovative design that could compete with UBIFS, and is now part of the mainline Linux kernel since version 2.6.34.

Unfortunately, the last time we tested it, LogFS was unstable and caused kernel oopses at unmount time. Therefore, we couldn’t compare it with the other filesystems. Being in the mainline Linux sources makes its code easier to maintain and fix though, and the bugs may be fixed in the latest kernel version when you read this article.

More details about LogFS can be found on Wikipedia.

SquashFS

For read-only partitions, it is actually possible to use the SquashFS block filesystem on MTD devices. My first idea was to directly copy a SquashFS image to the corresponding /dev/mtdblockx device. After all, this filesystem is read-only, and you don’t need any wear-leveling of any kind, as you never make any write. This worked very well, and I got very good performance results, until I tried to use SquashFS on a device that happened to have bad blocks. Remember that the mtdblock driver isn’t bad block aware. As a consequence, the SquashFS images didn’t get copied properly and the filesystem was corrupted. A bad block aware block device was therefore required.

There are two ways to do this. It is first possible to use the gluebi driver that emulates an MTD device on top of a UBI volume. As UBI discards bad blocks, it is then safe to use the mdtblock driver on top of this new MTD device.

A second possibility is to use the ubiblock driver (first submitted to the Linux Kernel Mailing List in 2011 by Bootlin, and revived by Ezequiel Garcia in November 2012, which implements a block device directly on top of UBI. Our benchmarks showed that this is a more efficient solution, as it doesn’t have to emulate an intermediate MTD device).

Benchmarks

Bootlin has run performance benchmarks to compare the various flash filesystems, with funding from the Linux foundation. The benchmarks and their results are described on eLinux.org.

These benchmarks showed that JFFS2 has the worst performance, and must absolutely be compiled with CONFIG_SUMMARY to have an acceptable boot time. However, JFFS2 is still the best compromise for devices with small flash partitions, for which compression is required, and where UBI would have too much space overhead. This is the reason why JFFS2 is still in use in OpenWRT, a distribution mainly targeting embedded devices like residential gateways and routers, with typically 4 to 16 MB of flash storage.

YAFFS2, thanks to improvements in the last years, shows very good if not best performance in many test scenarios. However, its drawbacks remain the lack of compression and its absence from the mainline Linux kernel sources. It also has weird performance issues managing directories.

UBIFS is now the best solution in terms of performance and space, except for small partitions in which its space overhead is significant. Its only drawback is that it requires a bit more work to deploy, compared to the other filesystems.

At the time of this writing, LogFS is too experimental to be used in production systems, though you can expect its bugs to be fixed over time, as its code is in the mainline kernel sources.

Last but not least, SquashFS can also be used on MTD flash, in systems with read-only partitions. This filesystem exhibits good compression, good mount time, and good read performance as well. The requirement to use SquashFS on top of UBI impairs its mount time performance though. On block filesystems, SquashFS exhibits the best mount time, but it looses a lot of time when it is on top of UBI, which takes a substantial amount of time to initialize (ubiattach operation).

The good news is that it is very cheap to switch filesystems. Applications won’t notice the difference. As our benchmarks have shown, you may get noticeable performance results, according to the size of your partitions, to the size and number of files, to the read and write patterns of your system, and to whether your files can be compressed or not. All you have to do is try the various filesystems, run your application and system tests, and keep the solution that maximizes performance for your particular system.

Back to flash storage with a block interface

We have seen the MTD subsystem and several filesystems allowing for complete control on the way flash blocks are managed. This allows to choose the wear leveling and block management scheme that best matches the various characteristics of the system.
But what to do when you are stuck with flash storage with a block interface, like SD cards for example? With these devices, you have no details about the erase block size and about the wear leveling algorithm. While these media are fine for external storage which just get occasional writes, you may run into deep trouble if you use these as primary storage in a system with intense I/O operations.

This issue is getting all the more critical as NAND flash is being replaced by eMMC in many recent embedded boards. eMMC is NAND flash with an MMC interface, but as opposed to MMC, is soldered on the board, to be immune from reliability issues caused by vibrations. The main advantage of eMMC is its unit price, making it more attractive than individual NAND chips produced in smaller quantities. Another advantage is that the block device is immediately available at boot time, without requiring any intervention and scanning from the operating system. Not having to manage bad blocks and wear leveling also keeps software simpler, of course at the cost of less control as we said. Some board makers, for example the engineers at CALAO Systems, even predict the extinction of raw flash in the next years. Raw flash may just be kept for specific industrial applications, but would then get very expensive because of low production volume.

Fortunately, we are not completely stuck with no clue about the internals of such flash devices. Arnd Bergmann has studied cheap flash media and has developed flashbench, a benchmarking tool to find their erase block size. This allows to optimize file system settings and get huge performance boosts on these flash media, and reduce the number of block erases. Arnd has described is work in a very interesting article on LWN.net.

Other than that, you are still stuck with an opaque wear leveling mechanism, and it’s always wise to use techniques to minimize the number of writes:

  • Do not put a swap area on flash storage
  • Whenever possible, mount your filesystems as read-only, or use read-only filesystems (SquashFS)
  • Keep volatile files such as log files and locks in RAM (tmpfs). You do not need to keep them across reboots anyway, and you do not want to create unnecessary disk activity because of them.

Conclusions and what to remember

If you develop or hack a device with raw flash, your best option is to use the JFFS2 filesystem for small partitions, with the CONFIG_SUMMARY option. For medium to very large partitions, UBIFS will be the best compromise in terms of speed, size and boot time. However, you may get slightly better performance with YAFFS2, but at the expense of size.

If you have a device with only flash storage with a block interface, for example an SD card, download flashbench from Arnd Bergmann and optimize the settings of your filesystems to get the best performance out of your storage, and optimize its lifetime.

If you reached this part of the article, you have the patience and interest required to contribute to the MTD subsystem of the Linux kernel. Contributions, code reviews and new ideas are welcome!

Useful resources

ISEE working on IGEPv5 board with OMAP5

Our partner ISEE is famous for their IGEPv2 board that we use in our embedded Linux course. This board is both powerful (running at 1 GHz) and featureful (on-board WiFi and Bluetooth, many connectors and expansion capabilities).

The good news is that ISEE has started to develop a new IGEPv5 board, which will be based on the new OMAP5 processor from Texas Instruments. This processor features in particular 2 ARM Cortex A15 cores running at up to 2 GHz, DDR3 RAM support, USB3, full HD 3D recording, and supporting 4 displays and cameras at the same time. Can you imagine what systems you could create with such a CPU?

If you are interested in such a board, it is still time for you to give them your inputs and expectations.

What should a perfect OMAP5 board be like? Don’t hesitate to leave your comments on this blog post. Be sure that ISEE will pay attention to them.

ELCE 2012 slides: porting Linux to new ARM SoC

We are just returning from Barcelona, Spain, after participating to the 2012 edition of the Embedded Linux Conference Europe. My colleague Thomas Petazzoni has delivered the below presentation:

Your New ARM SoC Linux Support Check-List

Since Linus Torvalds raised warnings about the state of the ARM architecture support in the Linux kernel, a huge amount of effort and reorganization has happened in the way Linux supports ARM SoCs. From the addition of the device tree to the pinctrl subsystem, from the new clock framework to the new rules in code organization and design, the changes have been significant over the last one and half year in theARM Linux kernel world.

Based on the speaker’s experience on getting the new Marvell Armada 370 and Armada XP SoC supported in the mainline Linux kernel, we will give an overview of those changes and summarize the new rules for ARM Linux support. We aim at helping developers willing to add suppot for new ARM SoCs in the Linux kernel by providing a check-list of things to do.

Thomas Petazzoni is an embedded Linux engineer and trainer at Bootlin since 2008. He has been involved with multiple projects around the Linux kernel, especially the mainlining of Marvell Armada 370/XP SoCs support. He is also a major contributor to the Buildroot embedded Linux build system with more than 1100 patches merged.

The presentation slides and their sources are now available here. We have also shot a video of Thomas’ talk and it should be available in the next weeks. Stay tuned!

Do not hesitate to contact us if you are looking for engineers to port Linux to new hardware.