With DMABUF support tested, it has become possible for Paul to start the work on integrating a GPU-based video output pipeline with Sunxi-Cedrus. Using the GPU should greatly improve performance when it comes to displaying the video frames. As of now, we have been using software untiling, software YUV-to-RGB colorspace conversion and software scaling. We are looking to replace these steps with GPU-based untiling, colorspace conversion and scaling. Shaders are used to implement these operations: they are small programs that are compiled on-the-fly for the GPU’s very specialized instruction set. Most players embed shaders (in their source form, using the GL shading language) for usual operations like colorspace conversion and scaling. However, these players are not ready to handle untiling as of now (or even be notified that the format returned by our VAAPI backend is tiled).
The first step in our plan is to get VLC to cooperate with the X11 flavor of the Mali proprietary blobs that Allwinner has released in the past so that we can use GPU support for colorspace and scaling. This is still a blocking point as of now. Then, we will look into crafting a shader for untiling the VPU output frame and integrating it with our libva-cedrus VAAPI backend.
As a sidenote, the free software Lima driver is being prepared for a first RFC series, bringing the first bits of mainline Linux kernel support for Mali GPUs of the Utgard generation. So even though work on the GPU only concerns the proprietary blob for now, the work will eventually become useful to the free software driver as well.
We have also tested Sunxi-Cedrus on the H3 and started looking at integrating the display part (which differs from earlier SoCs by using a revised display engine: DE2). However, since this is a strech goal of the fundraiser and that we have many other tasks left to tack among our main goals, this is by far not our priority at the moment.
We finally worked more on the libva-dump and cedrus-frame-test for H264, which will hopefully allow us to test our first H264 decoding next week!
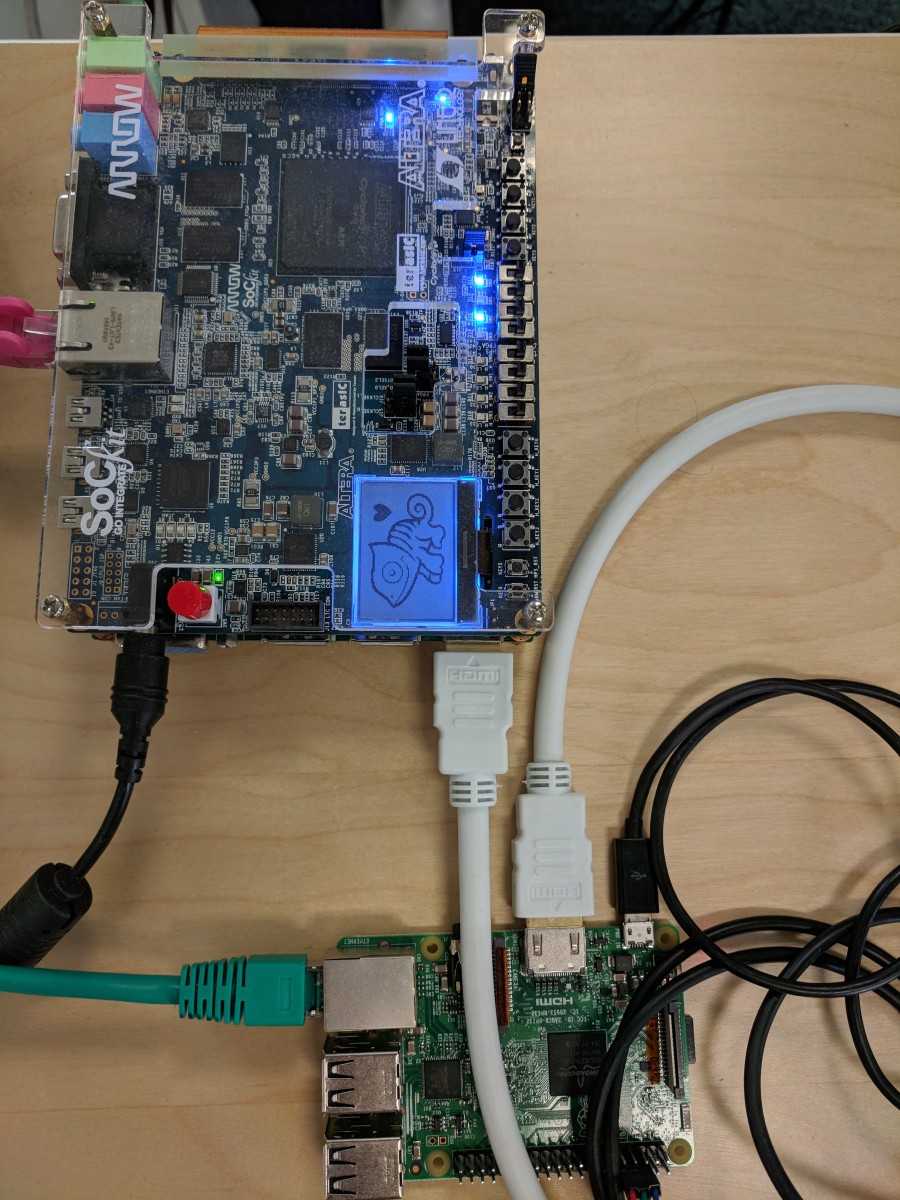
As part of our ongoing work with the RaspberryPi Foundation, we’ve been working on a number of display-related topics recently. Besides the work done by my colleague Boris Brezillon on improving the kernel side support for a number of features (such as the GPU performance counters support, memory management improvements, etc.), I’ve been working on improving the CI infrastructure for display driver testing.
Indeed, the current workflow is not automated at all and doesn’t allow to detect breakages in the display driver. We thus needed to improve that. To do so, we’ve relied on a board developed by Google as part of the ongoing CI-effort on ChromeOS that is called the Chamelium. The Chamelium is based on an ARM board powered by an Altera SoC+FPGA platform that Google extended with an extension board with video connectivity: VGA, HDMI and DisplayPort. They then developed a firmware for the FPGA to allow the board to emulate a screen.
A RaspberryPi and the Chamelium
Using this, you can simulate improper EDIDs, simulate hotplug events, HDCP screens, etc. and see how the device under test reacts to that. One of the interesting things you can do with it is to dump a CRC of the frame received on the display link, or a raw capture of a given number of frames. The usefulness of such a feature is obvious for a CI effort: you connect the device to test over HDMI, VGA or DP to the Chamelium, and then you can setup a test pattern on the device you want to test, capture the frame received on the other end, and compare the two frames. In an ideal scenario, the two are identical, and if your driver has a regression, you’ll notice as the two frames would no longer be identical.
The intel-gpu-tools suite (also called i-g-t), even though historically named with a not-so-generic name, is a standard test suite for the DRM subsystem in Linux. Last summer, the support for the Chamelium has been introduced for exactly this setup, where intel-gpu-tools would setup a test pattern, ask the Chamelium for a CRC of the frames it received and do the comparison.
This was working fine, and after a quick test on the RaspberryPi, it turned out to work on non-Intel hardware out of the box. However, the test was actually quite simple: while it was testing all the resolutions exposed, it was only testing a single pixel format, and we wanted to do more in order to catch regressions in less common formats, and ideally the RaspberryPi proprietary formats as well.
When it comes to pixel formats, there are two main families involved:
the RGB formats, sometimes prefixed with an A (for alpha, the opacity) or X (for padding), and the YCbCr family (also called abusively YUV). The former will have different values for each primary color, encoded on a number of bits following the RGB prefix. XRGB1555 for example will be a 16 bits format (1 + 5 + 5 + 5), with 1 bit of padding, and 5 bits for red, green and blue in that order.
the YCbCr formats, based on the property of the human eye that it perceives better the changes in luminosity than in color and will thus store the luminance (Y) and chrominance (Cb and Cr) in separate fields, with possibly a different number of bits. While RGB is usually preferred by computer graphics, video is very fond of the YCbCr formats since you can compress the Cb and Cr fields, resulting in a denser pixel format, without degrading the image quality too much.
The format initially supported by intel-gpu-tools was the XRGB8888 (8 bits of padding, 8 bits for red, green and blue, in that order). The RaspberryPi supports the RGB formats XRGB8888, ARGB8888, ABGR8888, XBGR8888, RGB565, BGR565, ARGB1555, XRGB1555, RGB888, BGR888.
Like we said, i-g-t was on the contrary using only an XRGB8888 format for the test pattern. This unfortunately was based on a few assumptions, the first one being that the test pattern would be generated with Cairo. However, Cairo supports a very limited range of formats. On the formats supported on the RaspberryPi, Cairo only supported ARGB8888, XRGB8888 and RGB565. This was obviously not enough, but we didn’t really want to extend Cairo since our goal was to be able to run the test suite on as many devices as possible. One option would have been to update the version of Cairo in use to support a larger number of formats, but that was not considered to be the most appropriate solution. We thus evaluated our options, and it turned out pixman supports most of the RGB formats, and it was already a dependency of intel-gpu-tools.
So in a patch series that we submitted recently to the intel-gpu-tools project, we:
create an API to allow the core i-g-t functions that handle the buffers to let us simply map the underlying DRM buffer in order to access it, without having to use Cairo and its limited pixel format support
rework the code a bit to be able to use Cairo when relevant, and then fallback to Pixman if the format isn’t supported. Pixman list of formats supported isn’t ideal either, especially in the YCbCr family, but we focused on RGB first. In order to allow for additional fallbacks, we hid it behind an API so that it’s transparent to the users
create a custom pattern solely for the Chamelium test, which was needed to deal with the difference of sampling size for each color component
glue those functions into the Chamelium test suite and add one sub-test for each format, so that we can detect both regressions in handling the format itself, but also regressions in the list of formats exposed
All this work has then be submitted to the intel-gpu-tools mailing list for review, and while the development was done on a RaspberryPi, it should benefit the whole community.
This week has seen considerably less advancement than the ones before it due to bank holidays in France. Nevertheless, we managed to prepare and send V3 of the Sunxi-Cedrus Linux kernel driver on Monday. While this new version contains several incremental improvements, a number of tasks (described in the series’ cover letter) have yet to be completed before the driver can be merged in mainline Linux.
Maxime continued to work on the H264 support. The big part of the kernel has been done, and he then moved on to convert libva-dump to be able to dump also H264 buffers. Most of that part has been done as well, so the next item will be to convert cedrus-frame-test to be able to test H264 frames, and see where that takes us.
Paul kept working on DMABUF support, which is now refined and ready both on the kernel side and on the userspace side with cedrus-frame-test. There is now a single DMABUF handle used per buffer plane (instead of per-plane) which allows having all components of the frame displayed correctly. Because there is now as many buffers for display as there are for decoding, it is necessary to register framebuffers associated with each imported buffer and cycle the framebuffers in multi-buffering page-flipping. To tackle this, we have started implementing atomic modesetting in cedrus-frame-test, allowing to set the framebuffer to use per-plane.
Finally, some attention was given to the integration of our video decoding pipeline with the Mali GPU, especially to target Kodi support.
This week, Paul continued working on DMABUF support and succeeded at exporting a buffer allocated by the Sunxi-Cedrus driver on the v4l2 side and importing it on the drm side via DMABUF. Although DMABUF support is still a work in progress in cedrus-frame-test and beyond the current level of support we have with GStreamer, the kernel side of things should be ready.
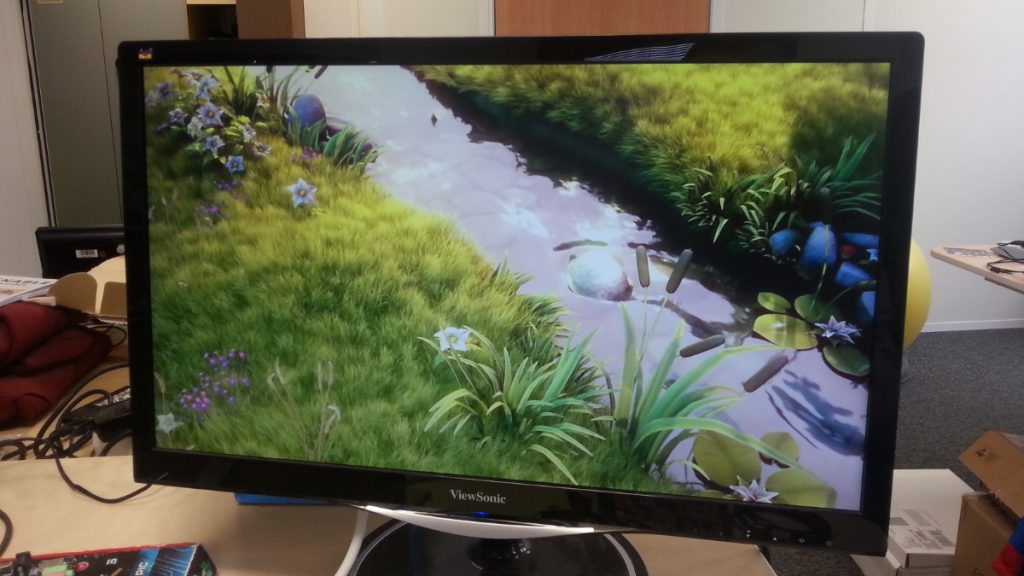
Another excerpt of the Big Buck Bunny video, in 1080p
Test coverage was also improved this week, with significantly more MPEG2 videos tested (including a standard DVD) in different resolutions up to 1080p. Some feedback from the community was also received and a first issue report will need to be investigated. Regarding platform support, initial testing of the A13 was undertaken. Although the VPU driver works apparently just as well on the A13 as already-tested platforms, the DRM driver adaptation (on the display side) for untiling VPU output buffers appears to be broken and will need to be further investigated.
In other news, a new version of the media request API has been submitted without the RFC tag (after 12 previous iterations). While we’ve been testing this new version along the course of its development, we are also taking the occasion to rebase our Sunxi-Cedrus VPU driver on top of this new version and take the received feedback into account.
Maxime continued the work on H264, and almost finished a first draft for the kernel driver side. Most of the code should be there now, the next steps are going to be making sure that no parts are missing and starting to test with cedrus-frame-test!
This week started off with numerous reviews received on the patchset introducing the Sunxi-Cedrus VPU driver. Lots of constructive comments, questions and improvements were discussed, which will help improve the driver for the next iteration of the series. Changes to other drivers will also have to be implemented, in particular to the SRAM controller found on Allwinner platforms, which needs to handle access to the SRAM by the VPU.
Maxime worked on refactoring needed to ease the support for the H264, rebasing on the latest version submitted upstream and making sure that everything still works fine. He eventually pushed them in our 4.17 branch on github, and will now focus on landing H264 support itself.
The work carried out by Paul this week was focused on the libva-cedrus VAAPI backend, which supports the Sunxi-Cedrus kernel driver on the userspace side. The backend is used by VLC (when it is configured to use VAAPI for video decoding) to play MPEG2 videos such as the ones available from the Linaro sample media. libva-cedrus was significantly improved over the week, with around 80 commits featuring a major cleanup of the code that includes, along with other changes:
coding style harmonization
proper error checking and reporting instead of assertions
the removal of the unsupported MPEG4 code
the introduction of dedicated v4l2 helpers based on those developed for cedrus-frame-test
the reorganization of v4l2 source and destination buffers management, where both are now tied to a specific surface and kept in sync
the update of the definitions to match the latest patchset
the implementation of the final rendering at picture end time
This work significantly improved the compatibility with VLC, which was previously dropping several frames. With these changes, VLC is now properly showing the decoded videos playing close to 25 fps when there is no software scaling involved. The performance is not as good with VLC as it is with cedrus-frame-test, which uses a dedicated DRM plane directly while VLC and libva-cedrus use the software untiling code and buffer copies to display each frame.
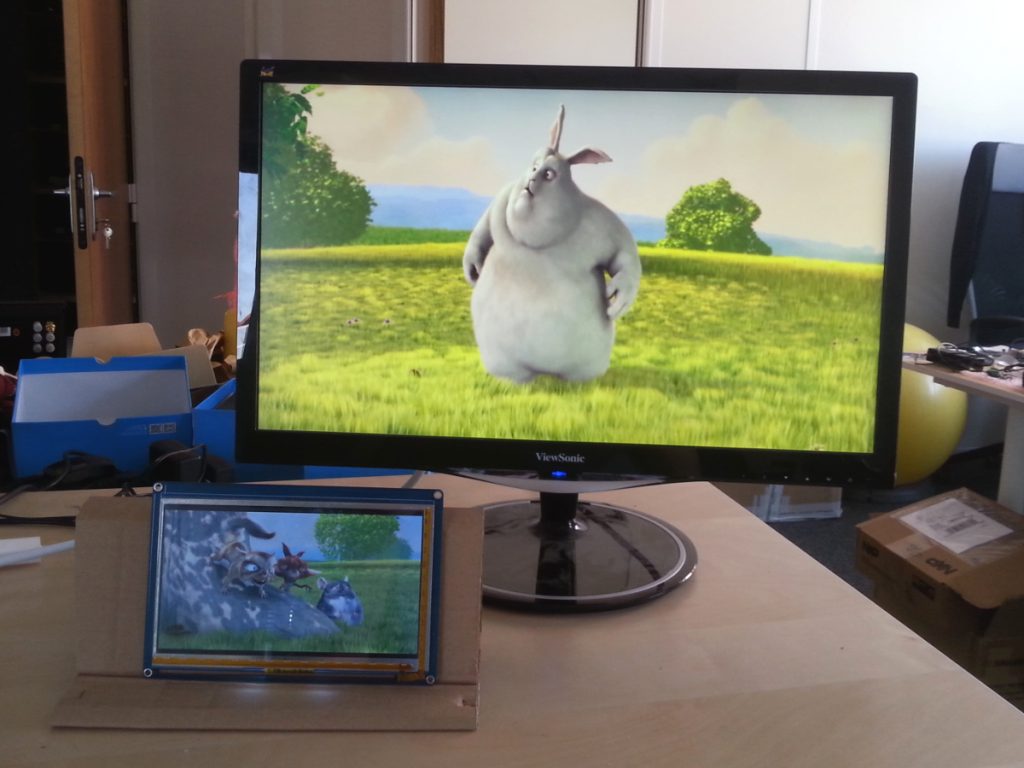
VLC playing the Big Buck Bunny video with libva-cedrus
Some attention was also given to GStreamer over the week. Although compatibility with our VAAPI backend and display pipeline is not there yet, the VAAPI backend rewrite allowed moving forward and GStreamer now displays the first decoded frame. While the operations for decoding the frames are correctly scheduled, they are only requested to be displayed sporadically, with no effect on the screen. This issue will need to be further investigated before a basic decoding pipeline can be used with GStreamer, with a video output either to a regular X window or to a DRM plane directly. MPV was also tested out this week, without much success in coordinating the rendering and display parts involved with the VAAPI pipeline. Thus, MPV support will also require more investigation before it can be properly supported.
While we initially decided to focus on GStreamer for implementing DMABUF buffer sharing between the VPU and the display engine, cedrus-frame-test (the standalone userspace implementation supporting the Sunxi-Cedrus VPU driver) allows us to directly work on implementing DMABUF support. So even though GStreamer does not work with libva-cedrus at this point, DMABUF support was started in a dedicated branch of the cedrus-frame-test repository. DMABUF is currently failing on the kernel side, when validating the page number of the requested DMA buffer. In this area as well, further investigation and work will be needed.
In the meantime, the Sunxi-Cedrus page on the linux-sunxi wiki was updated with the latest status of Sunxi-Cedrus support, instructions to build and install libva-cedrus and cedrus-frame-test as well as configure VLC for decoding MPEG2 videos. Feedback and test reports are welcome, especially regarding videos that are not decoded properly and show visual artifacts. The community around Sunxi-Cedrus hangs out on the #linux-sunxi and #cedrus channels of the freenode IRC network, so it is the best place to ask questions and discuss all things related to Sunxi-Cedrus!
As announced last week, the second revision of the Sunxi-Cedrus driver patchset was submitted for review earlier this week. While this new revision is based on the latest version of the request API, it also includes several fixes for corner-cases of this new API, especially to use it in the context of a M2M driver. Regarding the driver itself, significant reworks were carried out (including both functional and cosmetic changes) and the driver is now more stable. It was tested on the A33 and A20 so far and works nicely on both.
The standalone tool that was developed for testing the driver, called cedrus-frame-test, has seen various improvements that allow reliably testing the Sunxi-Cedrus driver. The tool is now in a state where it can be used nicely from the command line and includes the first few frames of our reference Big Buck Bunny MPEG2 video. It also implements timestamping to have a clear idea of how long frame decoding and frame display take. A target number of frames per seconds can also be set, with error messages printed when the target fps could not be met. Finally, a dummy libVA backend was written to easily dump slices and frame metadata from videos: libva-dump.
cedrus-frame-test displaying Big Buck Bunny frames decoded with Sunxi-Cedrus
Instructions to setup the kernel driver as well as cedrus-frame-test from our trees will be made available on the linux-sunxi wiki page dedicated to Sunxi-Cedrus very soon.
At this point, the time spent decoding each video frame is rather satisfying (around 5 ms as a ballpark figure) for our 854×480 demo video. We are still doing a hard copy of each frame to feed it to the display driver: that’s where the current bottleneck is. There is work left to be done in that area, first by implementing DMAbuf and also by using proper page flipping in cedrus-frame-test. We are also hitting a display issue with 4.16 on the A20, although that problem might have been fixed in 4.17 already.
Next week will be focused on (finally) adding DMAbuf support and getting libVA in shape to work with the new Sunxi-Cedrus kernel driver under VLC and GStreamer. The final patch of the first GStreamer adaptation series submitted some weeks ago was recently merged in GStreamer.
This week, Paul worked on preparing a new version of the patch series introducing support for the Sunxi-Cedrus VPU kernel driver, based upon the latest version of the Request API as submitted for review by Hans Verkuil on Monday. In order to make it easier to test the kernel driver, a standalone tool was written to decode a single frame (that was dumped beforehand). Support for displaying the decoded frame directly into a DRM plane was also added later this week, providing direct visual feedback. Finally, significant work was put into our libVA backend, that saw a significant rewrite of the memory-management logic related to video buffers.
We plan to prepare and release this new standalone tool as well as the libVA improvements when the kernel driver patch series is ready for submission, sometime next week. Specific instructions to get this up and running will also be made available on the Sunxi-Cedrus page of the linux-sunxi wiki, for one of the supported platforms. So far, we have tested the series on A33 and A20, but it is very likely that A10 and A13 will work just as well.
On his side, Maxime continued his effort on the H264 decoding. He first looked at the Chrome OS kernel and userspace code to drive the Rockchip SoCs VPU. This code is of interest because it’s basically the only stack so far that is functional, used and based on the Request API since Google is especially involved in the development of that API. He then went on with mapping the request API controls for H264 to the code for H264 decoding in the libvdpau-sunxi code that already provides an implementation for the Allwinner VPU. He then started to write some kernel code to add support for the kernel part of the API.
During a 3-day week-end, between March 31 and April 2, the Buildroot project organized a hackathon in Paris with six core/active developers of the project. The goal of this meeting was to make progress on outstanding patch series and reduce the backlog of contributions waiting in the project patchwork. Thomas Petazzoni, CTO and embedded Linux engineer at Bootlin participated to the event, joining Arnout Vandecappelle, Peter Korsgaard, Yann E. Morin, Romain Naour and Maxime Hadjinlian in the fantastic location provided by Scaleway.
Buildroot developers in the Jungle Room
Thomas summarized the progress day by day in three separate e-mails sent on the mailing list:
Merge of a patch series from Yann E. Morin that reworks how filesystem images are generated, to make this process compatible with top-level parallel build.
Merge of a patch series from Maxime Hadjinlian (with significant contributions from Yann E. Morin) that implements caching of Git downloads, significantly reducing the time needed to clone different versions of the same project through Git, especially big projects like the Linux kernel. An extensive summary of the changes was posted by Thomas on the mailing list.
Merge of a golang-package infrastructure, contributed by Angelo Compagnucci, to help building packages written in Go, and using the standardized Go build system.
The check-package tool was extended to validate the coding style of files outside the package/ folder, thanks to a contribution from Ricardo Martincoski.
Arnout worked on a significant number of pending Qt5 patches, and specifically merged the bump to Qt 5.10.
The LLVM patch series from Valentin Korenblit was reviewed, and thanks to this work, the initial LLVM package was merged a few days after the hackathon.
Last but not least, a large number of patches sitting in patchwork have been discussed, and either applied (after some rework) or reviewed (with comments made on the mailing list).
Working at Scaleway
In total, 222 commits have been pushed to the master branch during this meeting, and the backlog of patches has reduced from ~350 patches to ~175 patches.
Once again, the Buildroot community would like to thank Scaleway for hosting this event! The next Buildroot meeting will most likely take place right before the Embedded Linux Conference in Edinburgh, on October 20-21.
This week has seen progress on the GStreamer front: the segmentation fault that was a blocker when interfacing our libva backend with gstreamer-vaapi was investigated and understood. An associated bug was reported to the GNOME bug tracker, with all the gory details attached. Since the issue was in fact due to the assembly routine imported from libvdpau-sunxi smashing the malloc heap metadata, the bug report was closed. Using valgrind proved very useful for diagnosing the issue. Since we are not going to keep using the software-based untiling method through this assembly code, no time was spent on investigating and fixing the issue there.
The integration of changes in GStreamer for our case is also moving forward, with the submission of newer iterations of the related patches when requested. There are still issues left to fix with GStreamer, although things are looking better and better. Plenty of small bugs and mistakes have been identified and resolved in both our kernel driver and VAAPI backend in the process.
A new version of the request API has also been submitted for review and comments by Hans Verkuil. We have started rebasing our VPU driver on top of this new version and hope to send out this new version sometime next week.
We also started to look into H264, mostly by setting up a good test scenario for H264 (using the libvdpau-sunxi and an Allwinner kernel), making sure that it can actually decode H264 videos (which it does), and building similar setup with the mainline kernel and our libva implementation.
Stay tuned for more development updates related to Allwinner VPU support in mainline Linux!
Drawing from Mylène Josserand, based on a picture from Samuel Blanc under CC-BY-SA 4.16 out for a week now, it shouldn’t come as a surprise that it’s time for our traditional article summing up our most recent contributions to the latest version of the Linux kernel.
According to LWN statistics, Bootlin stands at the 13th place in the company ranking in terms of number of lines changed and we even have one of our engineers, Miquèl Raynal, appearing in the top 20 contributors with regards to number of lines changed thanks to his complete rework of the Marvell NAND controller driver and his addition of the exec_op() API to the NAND framework.
The main highlights of our contributions are:
For Marvell platforms,
Antoine Ténart improved the inside-secure crypto accelerator driver to support the EIP97 variant of the hardware block, which is used on the Marvell Armada 3700. This driver was already supporting the EIP197 variant, used on Marvell Armada 7K/8K. This new EIP97 support allows to enable the use of the crypto accelerator on the popular EspressoBin platform, a $49 board based on the Marvell Armada 3700,
Antoine Ténart also contributed a number of fixes to the inside-secure crypto accelerator driver,
Antoine Ténart also contributed a few fixes to the mvpp2 network driver, used for the Ethernet controller on the Marvell Armada 7K/8K.
Both Boris Brezillon and Miquèl Raynal contributed numerous fixes,
Miquèl Raynal contributed the exec_op API to simplify how NAND controllers interact with the core with regards to sending NAND operations. For more details about Miquèl’s work, see the video and slides of his talk at the latest ELC,
For Microsemi Ocelot platforms:
Alexandre Belloni added support for Microsemi Ocelot SoC’s pinctrl. This is the very first piece of the support for the Microsemi VSC7513/7514 MIPS processors, with the rest of the basic platform support expected to appear in 4.17,
Maxime Ripard added support for LVDS for the A83T in the DRM subsystem and contributed a few fixes along the way,
Mylène Josserand added ADC support for the audio codec present on the sun8i family,
Alexandre Belloni fixed a few race conditions in the AC100 RTC driver,
Maxime Ripard also contributed a fix for gpiolib failing to defer its probing until a GPIO controller is registered,
Bootlin engineers are not only contributors, but also maintainers of various subsystems in the Linux kernel, which means they are involved in the process of reviewing, discussing and merging patches contributed to those subsystems:
Maxime Ripard, as the Allwinner platform co-maintainer, merged 66 patches from other contributors
Boris Brezillon, as the MTD/NAND maintainer, merged 73 patches from other contributors
Alexandre Belloni, as the RTC maintainer and Atmel platform co-maintainer, merged 23 patches from other contributors
Grégory Clement, as the Marvell EBU co-maintainer, merged 16 patches from other contributors
Here is the commit by commit detail of our contributions to 4.16: