After another long break, here is our new article in the series of blog posts about building a Linux system for the STM32MP1 platform. After showing how to build a minimal Linux system for the STM32MP157 platform, how to connect and use an I2C based pressure/temperature/humidity sensor and how to integrate Qt5 in our system, how to set up a development environment to write our own Qt5 application, how to develop a Qt5 application, and how to setup factory flashing, we are now going to discuss the topic of in-field firmware update.
List of articles in this series:
- Building a Linux system for the STM32MP1: basic system
- Building a Linux system for the STM32MP1: connecting an I2C sensor
- Building a Linux system for the STM32MP1: enabling Qt5 for graphical applications
- Building a Linux system for the STM32MP1: setting up a Qt5 application development environment
- Building a Linux system for the STM32MP1: developing a Qt5 graphical application
- Building a Linux system for the STM32MP1: implementing factory flashing
- Building a Linux system for the STM32MP1: remote firmware updates
Why remote firmware updates?
The days and age when it was possible to build and flash an embedded system firmware, ship the device and forget it, are long behind us. Systems have gotten more complicated, and we therefore have to fix bugs and security issues after the device has been shipped, and we often want to deploy new features in the field into existing devices. For all those reasons, the ability to remotely update the firmware of embedded devices is now a must-have.
Open-source firmware update tools
There are different possibilities to update your system:
- If you’re using a binary distribution, use the package manager of this distribution to update individual components
- Do complete system image updates, at the block-level, replacing the entire system image with an updated one. Three main open-source solutions are available: swupdate, Mender.io and RAUC.
- Do file-based updates, with solutions such as OSTree.
In this blog post, we are going to show how to set up the swupdate solution.
swupdate is a tool installed on the target that can receive an update image (.swu file), either from a local media or from a remote server, and use it to update various parts of the system. Typically, it will be used to update the Linux kernel and the root filesystem, but it can also be used to update additional partitions, FPGA bitstreams, etc.
swupdate implements two possible update strategies:
- A dual copy strategy, where the storage has enough space to store two copies of the entire filesystem. This allows to run the system from copy A, update copy B, and reboot it into copy B. The next update will of course update copy A.
- A single copy strategy, where the upgrade process consists in rebooting into a minimal system that runs entirely from RAM, and that will be responsible for updating the system on storage.
For this blog post, we will implement the dual copy strategy, but the single copy strategy is also supported for systems with tighter storage restrictions.
We are going to setup swupdate step by step: first by triggering updates locally, and then seeing how to trigger updates remotely.
Local usage of swupdate
Add USB storage support
As a first step, in order to transfer the update image to the target, we will use a USB stick. This requires having USB mass storage support in the Linux kernel. So let’s adjust our Linux kernel configuration by running make linux-menuconfig. Within the Linux kernel configuration:
- Enable the
CONFIG_SCSI option. This is a requirement for USB mass storage support
- Enable the
CONFIG_BLK_DEV_SD option, needed for SCSI disk support, which is another requirement for USB mass storage.
- Enable the
CONFIG_USB_STORAGE option.
- The
CONFIG_VFAT_FS option, to support the FAT filesystem, is already enabled.
- Enable the
CONFIG_NLS_CODEPAGE_437 and CONFIG_NLS_ISO8859_1 options, to have the necessary support to decode filenames in the FAT filesystem.
Then, run make linux-update-defconfig to preserve these kernel configurations changes in your kernel configuration file at board/stmicroelectronics/stm32mp157-dk/linux.config.
swupdate setup
In Target packages, System tools, enable swupdate. You can disable the install default website setting since we are not going to use the internal swupdate web server.
Take this opportunity to also enable the gptfdisk tool and its sgdisk sub-option in the Hardware handling submenu. We will need this tool later to update the partition table at the end of the update process.
Now that we have both both USB storage support and the swupdate package enabled, let’s build a new version of our system by running make. Flash the resulting image on your SD card, and boot your target. You should have swupdate available:
# swupdate -h
Swupdate v2018.11.0
Licensed under GPLv2. See source distribution for detailed copyright notices.
swupdate (compiled Mar 4 2020)
Usage swupdate [OPTION]
-f, --file : configuration file to use
-p, --postupdate : execute post-update command
-e, --select , : Select software images set and source
Ex.: stable,main
-i, --image : Software to be installed
-l, --loglevel : logging level
-L, --syslog : enable syslog logger
-n, --dry-run : run SWUpdate without installing the software
-N, --no-downgrading : not install a release older as
-o, --output
Take a USB stick with a FAT filesystem on it, which you can mount:
# mount /dev/sda1 /mnt
If that works, we’re now ready to move on to the next step of actually getting a firmware update image.
Generate the swupdate image
swupdate has its own update image format, and you need to generate an image that complies with this format so that swupdate can use it to upgrade your system. The format is simple: it’s a CPIO archive, which contains one file named sw-description describing the contents of the update image, and one or several additional files that are the images to update.
First, let’s create our sw-description file in board/stmicroelectronics/stm32mp157-dk/sw-description. The tags and properties available are described in the swupdate documentation.
software = {
	version = "0.1.0";
	rootfs = {
		rootfs-1: {
			images: (
			{
				filename = "rootfs.ext4.gz";
				compressed = true;
				device = "/dev/mmcblk0p4";
			});
		}
		rootfs-2: {
			images: (
			{
				filename = "rootfs.ext4.gz";
				compressed = true;
				device = "/dev/mmcblk0p5";
			});
		}
	}
}
This describes a single software component rootfs, which is available as two software collections, to implement the dual copy mechanism. The root filesystem will have one copy in /dev/mmcblk0p4 and another copy in /dev/mmcblk0p5. They will be updated from a compressed image called rootfs.ext4.gz.
Once this sw-description file is written, we can write a small script that generates the swupdate image. We’ll put this script in board/stmicroelectronics/stm32mp157-dk/gen-swupdate-image.sh:
#!/bin/sh

BOARD_DIR=$(dirname $0)

cp ${BOARD_DIR}/sw-description ${BINARIES_DIR}

IMG_FILES="sw-description rootfs.ext4.gz"

pushd ${BINARIES_DIR}
for f in ${IMG_FILES} ; do
	echo ${f}
done | cpio -ovL -H crc > buildroot.swu
popd
It simply copies the sw-description file to BINARIES_DIR (which is output/images), and then creates a buildroot.swu CPIO archive that contains the sw-description and rootfs.ext4.gz files.
Of course, make sure this script has executable permissions.
Then, we need to slightly adjust our Buildroot configuration, so run make menuconfig, and:
- In System configuration, in the option Custom scripts to run after creating filesystem images, add
board/stmicroelectronics/stm32mp157-dk/gen-swupdate-image.sh after the existing value support/scripts/genimage.sh. This will make sure our new script generating the swupdate image is executed as a post-image script, at the end of the build.
- In Filesystem images, enable the gzip compression method for the ext2/3/4 root filesystem, so that a
rootfs.ext4.gz image is generated.
With that in place, we are now able to generate our firmware image, by simply running make in Buildroot. At the end of the build, the output/images/ folder should contain the sw-description and rootfs.ext4.gz files. You can look at the contents of buildroot.swu:
$ cat output/images/buildroot.swu | cpio -it
sw-description
rootfs.ext4.gz
58225 blocks
Partioning scheme and booting logic
We now need to adjust the partitioning scheme of our SD card so that it has two partitions for the root filesystem, one for each copy. This partitioning scheme is defined in board/stmicroelectronics/stm32mp157-dk/genimage.cfg, which we change to:
image sdcard.img {
        hdimage {
                gpt = "true"
        }

        partition fsbl1 {
                image = "tf-a-stm32mp157c-dk2.stm32"
        }

        partition fsbl2 {
                image = "tf-a-stm32mp157c-dk2.stm32"
        }

        partition ssbl {
                image = "u-boot.stm32"
        }

        partition rootfs1 {
                image = "rootfs.ext4"
                partition-type = 0x83
                bootable = "yes"
                size = 256M
        }

        partition rootfs2 {
                partition-type = 0x83
                size = 256M
        }
}
As explained in the first blog post of this series, the /boot/extlinux/extlinux.conf file is read by the bootloader to know how to boot the system. Among other things, this file defines the Linux kernel command line, which contains root=/dev/mmcblk0p4 to tell the kernel where the root filesystem is. But with our dual copy upgrade scheme, the root filesystem will sometimes be on /dev/mmcblk0p4, sometimes on /dev/mmcblk0p5. To achieve that without constantly updating the extlinux.conf file, we will use /dev/mmcblk0p${devplist} instead. devplist is a U-Boot variable that indicates from which partition the extlinux.conf file was read, which turns out to be the partition of our root filesystem. So, your board/stmicroelectronics/stm32mp157-dk/overlay/boot/extlinux/extlinux.conf file should look like this:
label stm32mp15-buildroot
  kernel /boot/zImage
  devicetree /boot/stm32mp157c-dk2.dtb
  append root=/dev/mmcblk0p${devplist} rootwait console=ttySTM0,115200 vt.global_cursor_default=0
For the dual copy strategy to work, we need to tell the bootloader to boot either from the root filesystem in the rootfs1 partition or the rootfs2 partition. This will be done using the bootable flag of each GPT partition, and this is what this script does: it toggles the bootable flag of 4th and 5th partition of the SD card. This way, the partition with the bootable flag will lose it, and the other partition will gain it. Thanks to this, at the next reboot, U-Boot will consider the system located in the other SD card partition. This work will be done by a /etc/swupdate/postupdate.sh script, that you will store in board/stmicroelectronics/stm32mp157-dk/overlay/etc/swupdate/postupdate.sh, which contains:
#!/bin/sh
sgdisk -A 4:toggle:2 -A 5:toggle:2 /dev/mmcblk0
reboot
Make sure this script is executable.
With all these changes in place, let’s restart the Buildroot build by running make. The sdcard.img should contain the new partioning scheme:
$ sgdisk -p output/images/sdcard.img
[...]
Number  Start (sector)    End (sector)  Size       Code  Name
   1              34             497   232.0 KiB   8300  fsbl1
   2             498             961   232.0 KiB   8300  fsbl2
   3             962            2423   731.0 KiB   8300  ssbl
   4            2424          526711   256.0 MiB   8300  rootfs1
   5          526712         1050999   256.0 MiB   8300  rootfs2
Reflash your SD card with the new sdcard.img, and boot this new system. Transfer the buildroot.swu update image to your USB stick.
Testing the firmware update locally
After booting the system, mount the USB stick, which contains the buildroot.swu file:
# mount /dev/sda1 /mnt/
# ls /mnt/
buildroot.swu
Let’s trigger the system upgrade with swupdate:
# swupdate -i /mnt/buildroot.swu -e rootfs,rootfs-2 -p /etc/swupdate/postupdate.sh

Swupdate v2018.11.0

Licensed under GPLv2. See source distribution for detailed copyright notices.

Registered handlers:
	dummy
	raw
	rawfile
software set: rootfs mode: rootfs-2
Software updated successfully
Please reboot the device to start the new software
[INFO ] : SWUPDATE successful !
Warning: The kernel is still using the old partition table.
The new table will be used at the next reboot or after you
run partprobe(8) or kpartx(8)
The operation has completed successfully.
# Stopping qt-sensor-demo: OK
Stopping dropbear sshd: OK
Stopping network: OK
Saving random seed... done.
Stopping klogd: OK
Stopping syslogd: OK
umount: devtmpfs busy - remounted read-only
[  761.949576] EXT4-fs (mmcblk0p4): re-mounted. Opts: (null)
The system is going down NOW!
Sent SIGTERM to all processes
Sent SIGKILL to all processes
Requesting system reboot
[  763.965243] reboot: ResNOTICE:  CPU: STM32MP157CAC Rev.B
NOTICE:  Model: STMicroelectronics STM32MP157C-DK2 Discovery Board
The -i option indicates the firmware update file, while the -e option indicates which software component should be updated. Here we update the rootfs in its slot 2, rootfs-2, which is in /dev/mmcblk0p5. The -p option tells to run our post-update script when the update is successful. In the above log, we see that the system is being rebooted right after the update.
At the next boot, you should see:
U-Boot 2018.11-stm32mp-r2.1 (Mar 04 2020 - 15:28:34 +0100)
[...]
mmc0 is current device
Scanning mmc 0:5...
Found /boot/extlinux/extlinux.conf
[...]
append: root=/dev/mmcblk0p5 rootwait console=ttySTM0,115200 vt.global_cursor_default=0
during the U-Boot part. So we see it is loading extlinux.conf from the MMC partition 5, and has properly set root=/dev/mmcblk0p5. So the kernel and Device Tree will be loaded from MMC partition 5, and this partition will also be used by Linux as the root filesystem.
With all this logic, we could now potentially have some script that gets triggered when a USB stick is inserted, mount it, check if an update image is available on the USB stick, and if so, launch swupdate and reboot. This would be perfectly fine for local updates, for example with an operator in charge of doing the update of the device.
However, we can do better, and support over-the-air updates, a topic that we will discuss in the next section.
Over-the-air updates
To support over-the-air updates with swupdate, we will have to:
- Install on a server a Web interface that allows the swupdate program to retrieve firmware update files, and the user to trigger the updates.
- Run swupdate in daemon mode on the target.
Set up the web server: hawkBit
swupdate is capable of interfacing with a management interface provided by the Eclipse hawkBit project. Using this web interface, one can manage its fleet of embedded devices, and rollout updates to these devices remotely.
hawkBit has plenty of capabilities, and we are here going to set it up in a very minimal way, with no authentication and a very simple configuration.
As suggested in the project getting started page, we’ll use a pre-existing Docker container image to run hawkBit:
sudo docker run -p 8080:8080 hawkbit/hawkbit-update-server:latest \
     --hawkbit.dmf.rabbitmq.enabled=false \
     --hawkbit.server.ddi.security.authentication.anonymous.enabled=true
After a short while, it should show:
2020-03-06 09:15:46.492  ... Started ServerConnector@3728a578{HTTP/1.1,[http/1.1]}{0.0.0.0:8080}
2020-03-06 09:15:46.507  ... Jetty started on port(s) 8080 (http/1.1) with context path '/'
2020-03-06 09:15:46.514  ... Started Start in 21.312 seconds (JVM running for 22.108)
From this point, you can connect with your web browser to http://localhost:8080 to access the hawkBit interface. Login with the admin login and admin password.
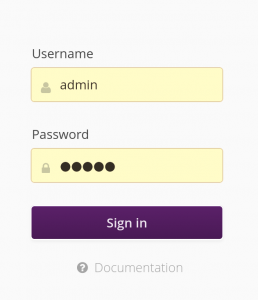
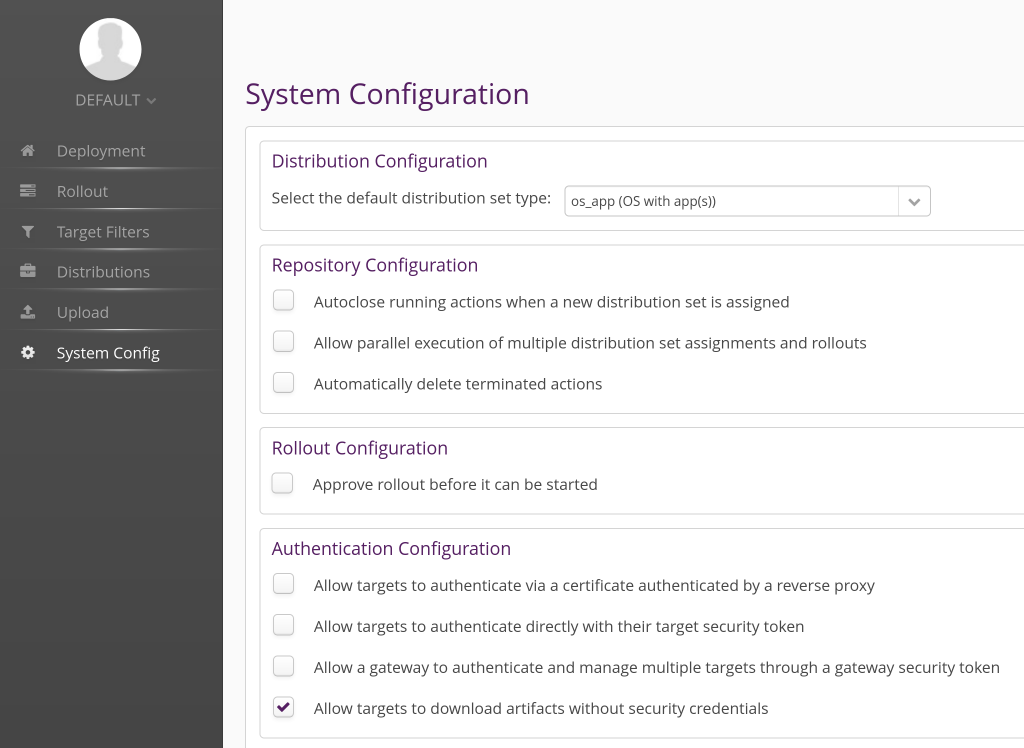
Once in the main hawkBit interface, go to the System Config tab, and enable the option Allow targets to download artifacts without security credentials. Of course, for a real deployment, you will want to set up proper credentials and authentification.
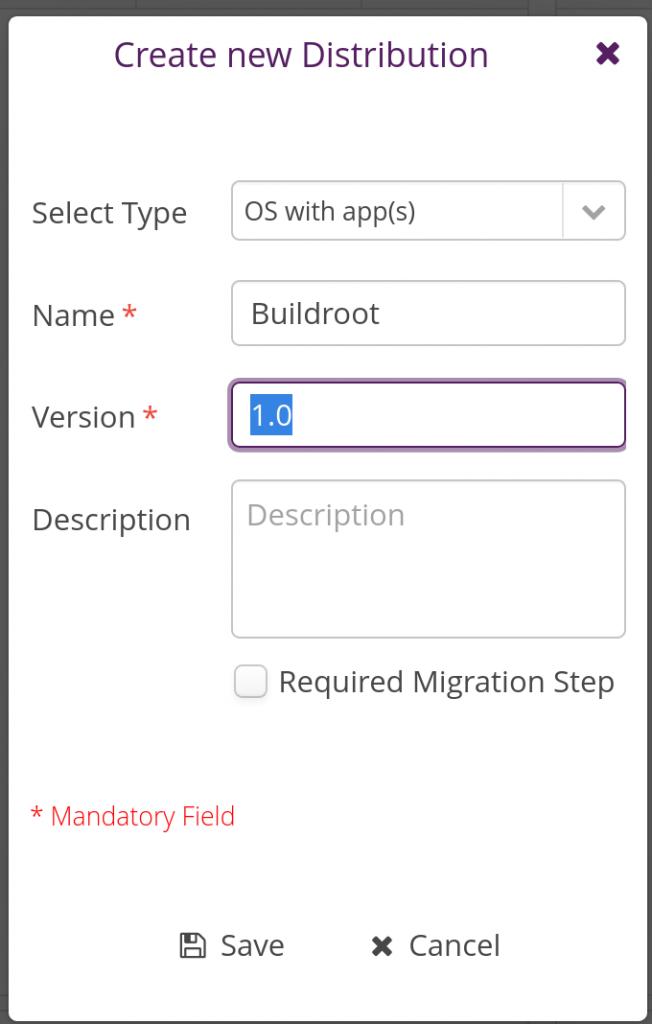
In the Distribution tab, create a new Distribution by clicking on the plus sign in the Distributions panel:
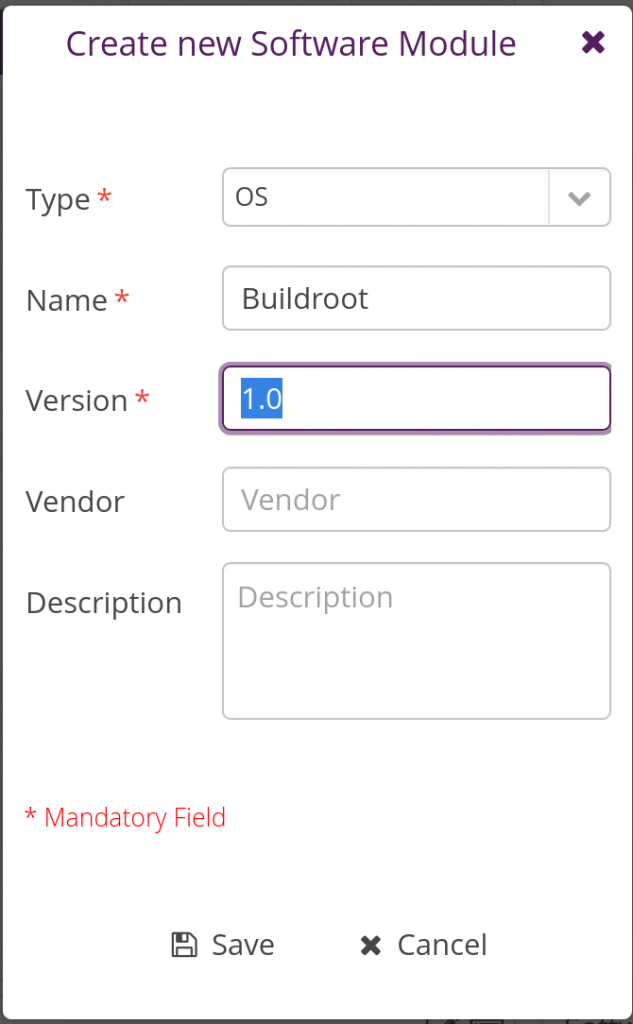
Then in the same tab, but in the Software Modules panel, create a new software module:
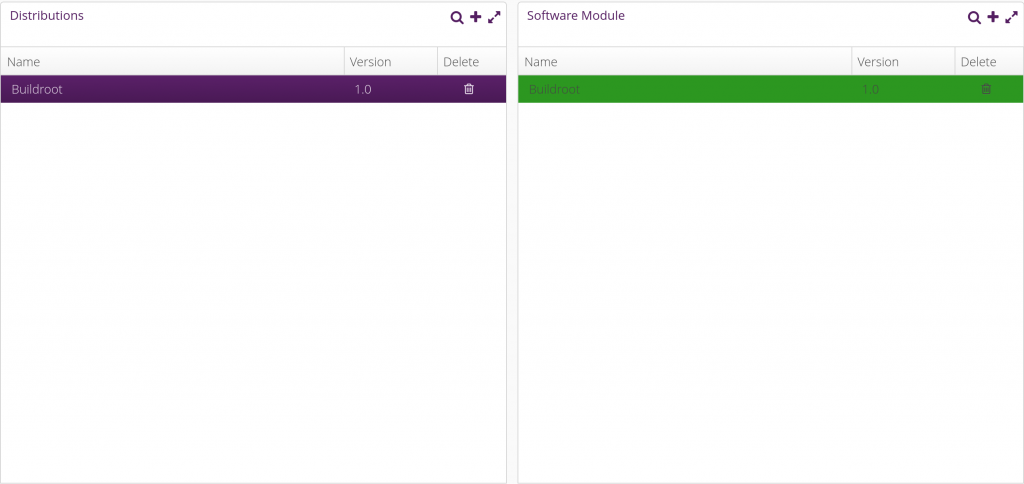
Once done, assign the newly added software module to the Buildroot distribution by dragging-drop it into the Buildroot distribution. Things should then look like this:
Things are now pretty much ready on the hawkBit side now. Let’s move on with the embedded device side.
Configure swupdate
We need to adjust the configuration of swupdate to enable its Suricatta functionality which is what allows to connect to an hawkBit server.
In Buildroot’s menuconfig, enable the libcurl (BR2_PACKAGE_LIBCURL) and json-c (BR2_PACKAGE_JSON_C) packages, both of which are needed for swupdate’s Suricatta. While at it, since we will adjust the swupdate configuration and we’ll want to preserve our custom configuration, change the BR2_PACKAGE_SWUPDATE_CONFIG option to point to board/stmicroelectronics/stm32mp157-dk/swupdate.config.
Then, run:
$ make swupdate-menuconfig
to enter the swupdate configuration interface. Enable the Suricatta option, and inside this menu, in the Server submenu, verify that the Server Type is hawkBit support. You can now exit the swupdate menuconfig.
Save our custom swupdate configuration permanently:
$ make swupdate-update-defconfig
With this proper swupdate configuration in place, we now need to create a runtime configuration file for swupdate, and an init script to start swupdate at boot time. Let’s start with the runtime configuration file, which we’ll store in board/stmicroelectronics/stm32mp157-dk/overlay/etc/swupdate/swupdate.cfg, containing:
globals :
{
	postupdatecmd = "/etc/swupdate/postupdate.sh";
};

suricatta :
{
	tenant = "default";
	id = "DEV001";
	url = "http://192.168.42.1:8080";
};
We specify the path to our post-update script so that it doesn’t have to be specified on the command line, and then we specify the Suricatta configuration details: id is the unique identifier of our board, the URL is the URL to connect to the hawkBit instance (make sure to replace that with the IP address of where you’re running hawkBit). tenant should be default, unless you’re using your hawkBit instance in complex setups to for example serve multiple customers.
Our post-update script also needs to be slightly adjusted. Indeed, we will need a marker that tells us upon reboot that an update has been done, in order to confirm to the server that the update has been successfully applied. So we change board/stmicroelectronics/stm32mp157-dk/overlay/etc/swupdate/postupdate.sh to:
#!/bin/sh

PART_STATUS=$(sgdisk -A 4:get:2 /dev/mmcblk0)
if test "${PART_STATUS}" = "4:2:1" ; then
        NEXT_ROOTFS=/dev/mmcblk0p5
else
        NEXT_ROOTFS=/dev/mmcblk0p4
fi

# Add update marker
mount ${NEXT_ROOTFS} /mnt
touch /mnt/update-ok
umount /mnt

sgdisk -A 4:toggle:2 -A 5:toggle:2 /dev/mmcblk0
reboot
What we do is that we simply mount the next root filesystem, and create a file /update-ok. This file will be checked by our swupdate init script, see below.
Then, our init script will be in board/stmicroelectronics/stm32mp157-dk/overlay/etc/init.d/S98swupdate, with executable permissions, and contain:
#!/bin/sh

DAEMON="swupdate"
PIDFILE="/var/run/$DAEMON.pid"

PART_STATUS=$(sgdisk -A 4:get:2 /dev/mmcblk0)
if test "${PART_STATUS}" = "4:2:1" ; then
	ROOTFS=rootfs-2
else
	ROOTFS=rootfs-1
fi

if test -f /update-ok ; then
	SURICATTA_ARGS="-c 2"
	rm -f /update-ok
fi

start() {
	printf 'Starting %s: ' "$DAEMON"
	# shellcheck disable=SC2086 # we need the word splitting
	start-stop-daemon -b -q -m -S -p "$PIDFILE" -x "/usr/bin/$DAEMON" \
		-- -f /etc/swupdate/swupdate.cfg -L -e rootfs,${ROOTFS} -u "${SURICATTA_ARGS}"
	status=$?
	if [ "$status" -eq 0 ]; then
		echo "OK"
	else
		echo "FAIL"
	fi
	return "$status"
}

stop() {
	printf 'Stopping %s: ' "$DAEMON"
	start-stop-daemon -K -q -p "$PIDFILE"
	status=$?
	if [ "$status" -eq 0 ]; then
		rm -f "$PIDFILE"
		echo "OK"
	else
		echo "FAIL"
	fi
	return "$status"
}

restart() {
	stop
	sleep 1
	start
}

case "$1" in
        start|stop|restart)
		"$1";;
	reload)
		# Restart, since there is no true "reload" feature.
		restart;;
        *)
                echo "Usage: $0 {start|stop|restart|reload}"
                exit 1
esac
This is modeled after typical Buildroot init scripts. A few points worth mentioning:
- At the beginning of the script, we determine which copy of the root filesystem needs to be updated by looking at which partition currently is marked “bootable”. This is used to fill in the
ROOTFS variable.
- We also determine if we are just finishing an update, by looking at the presence of a
/update-ok file.
- When starting swupdate, we pass a few options:
-f with the path to the swupdate configuration file, -L to enable syslog logging, -e to indicate which copy of the root filesystem should be updated, and -u '${SURICATTA_ARGS}' to run in Suricatta mode, with SURICATTA_ARGS containing -c 2 to confirm the completion of an update.
Generate a new image with the updated swupdate, its configuration file and init script, and reboot your system.
Deploying an update
When booting, your system starts swupdate automatically:
Starting swupdate: OK
[...]
# ps aux | grep swupdate
  125 root     /usr/bin/swupdate -f /etc/swupdate/swupdate.cfg -L -e rootfs,rootfs-1 -u
  132 root     /usr/bin/swupdate -f /etc/swupdate/swupdate.cfg -L -e rootfs,rootfs-1 -u
Back to the hawkBit administration interface, the Deployment tab should show one notification:
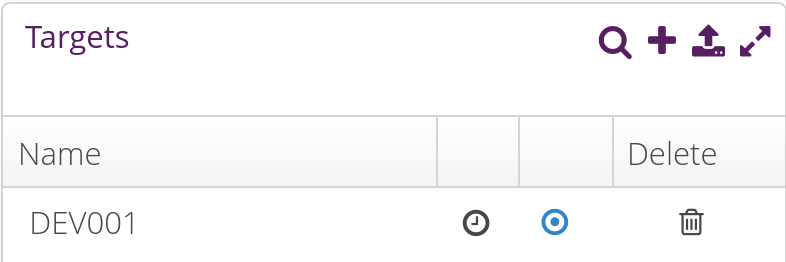
and when clicking on it, you should see our DEV001 device:
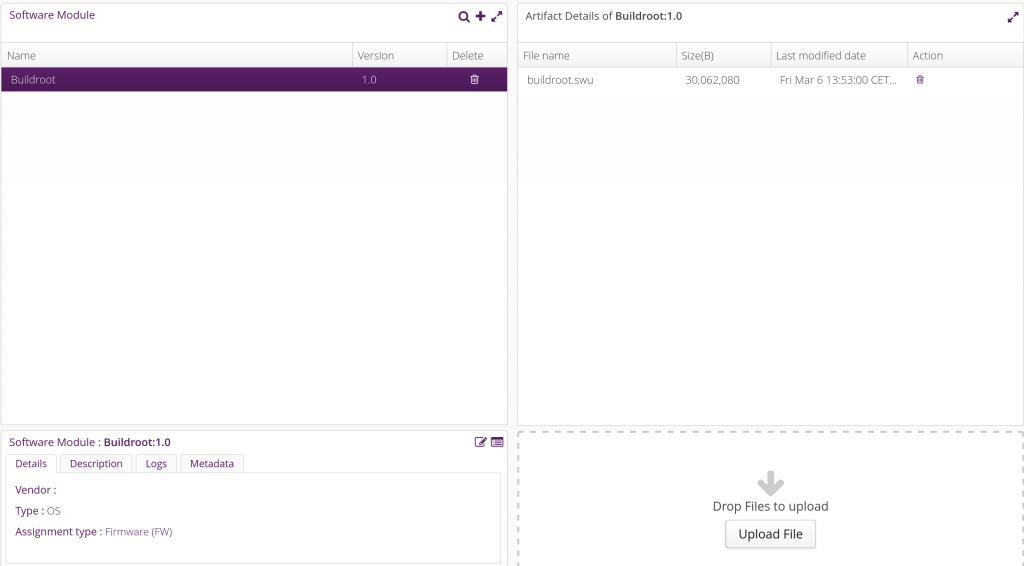
Now, go to the Upload tab, select the Buildroot software module, and click on Upload File. Upload the buildroot.swu file here:
Back into the Deployment tab, drag and drop the Buildroot distribution into the DEV001 device. A pending update should appear in the Action history for DEV001:

The swupdate on your target will poll regularly the server (by default every 300 seconds, can be customized in the System config tab of the hawkBit interface) to know if an update is available. When that happens, the update will be downloaded and applied, the system will reboot, and at the next boot the update will be confirmed as successful, showing this status in the hawkBit interface:

If you’ve reached this step, your system has been successfully updated, congratulations! Of course, there are many more things to do to get a proper swupdate/hawkBit deployment: assign unique device IDs (for example based on MAC addresses or SoC serial number), implement proper authentication between the swupdate client and the server, implement image encryption if necessary, improve the upgrade validation mechanism to make sure it detects if the new image doesn’t boot properly, etc.
Conclusion
In this blog post, we have learned about firmware upgrade solutions, and specifically about swupdate. We’ve seen how to set up swupdate in the context of Buildroot, first for local updates, and then for remote updates using the hawkBit management interface. Hopefully this will be useful for your future embedded projects!
As usual, the complete Buildroot code to reproduce the same setup is available in our branch 2019.02/stm32mp157-dk-blog-7, in two commits: one for the first step implementing support just for local updates, and another one for remote update support.

 Like most of us, due to the Covid-19 epidemic, you may be forced to work from home. To take advantage from this time confined at home, we are now proposing all our training courses as online seminars. You can then benefit from the contents and quality of Bootlin


 Bootlin will be preent at