Introduction
 Flutter is an open source UI framework, released in 2017 by Google, that allows the creation of multi-platform applications, without having to worry about constraints related to supported platforms.
Flutter applications are written in a programming language called Dart, then compiled and run as a native applications, to be efficiently executed on Linux, Android, iOS or Windows platforms, but also as Web applications.
On Linux platforms, Flutter can be used on top of several graphic back-ends:
Flutter is composed of four main parts:
- the embedder (C++, Java…): the glue for specific platforms that provides surface rendering, vsync.
- the engine (C/C++): the graphic engine based on Skia, that provides asset resolution, graphics shell, Dart VM…
- the framework (Dart): to create UI by using widgets, animation…
- the applications (Dart)
 In this article, we show how to build a custom Linux distribution that includes a Flutter Embedder that uses the DRM/EGLStream backend, in order to run the Flutter Gallery application on the NVIDIA Tegra Xavier NX platform.
In addition, we will also extend a Yocto SDK to embed the Flutter toolchain, to be able to build Flutter applications directly with the SDK.
Configure Yocto and build an image
To build our Flutter-enabled Linux distribution, we have chosen to use OpenEmbedded, driven through the Kas utility. Kas is a tool developed by Siemens to facilitate the setup of projects based on Bitbake, such as OpenEmbedded or Yocto.
Kas relies on a YAML file that indicates the information required to:
- clone bitbake and required layers
- configure the build environment
- launch bitbake process
Below is the Kas YAML file that we created for this example:
header:
  version: 11

build_system: oe

machine: jetson-xavier-nx-devkit

distro: nodistro

target:
 - core-image-minimal

repos:

  bitbake:
    url: https://git.openembedded.org/bitbake
    refspec: "2.0"
    layers:
      .: excluded

  openembedded-core:
    url: https://git.openembedded.org/openembedded-core
    refspec: kirkstone
    layers:
      meta:

  meta-clang:
    url: https://github.com/kraj/meta-clang.git
    refspec: kirkstone
    layers:
      .:

  meta-flutter:
    url: https://github.com/meta-flutter/meta-flutter.git
    refspec: kirkstone
    layers:
      .:

  meta-tegra:
    url: https://github.com/OE4T/meta-tegra.git
    refspec: kirkstone
    layers:
      .:

local_conf_header:
  standard: |
    FLUTTER_RUNTIME = "release"
    FLUTTER_SDK_TAG = "3.0.1"

    DISTRO_FEATURES:append = " opengl wayland"
    REQUIRED_DISTRO_FEATURES:append = " opengl wayland"

    IMAGE_INSTALL:append = " flutter-drm-eglstream-backend flutter-gallery-release tegra-udrm-probeconf"

    TOOLCHAIN_HOST_TASK:append = " nativesdk-flutter-sdk"
    TOOLCHAIN_TARGET_TASK:append = " gtk+3-dev"

    CLANGSDK = "1"
    INIT_MANAGER ?= "systemd"
Several OpenEmbedded layers are used:
- Obviously the openembedded-core layer, the base
- The meta-flutter layer, which contains all the Flutter related recipes
- The meta-tegra layer, which is our BSP layer containing all the bootloader/kernel and machine-specific recipes for the Nvidia Jetson Xavier NX platform
- The meta-clang layer, which is needed by the meta-flutter layer, as Flutter is built using the Clang compiler
As we chose to use a DRM/EGLStream backend of Flutter we extend the DISTRO_FEATURES to enable the support of OpenGL and Wayland:
DISTRO_FEATURES:append = " opengl wayland"
In addition, we extend the list of packages that will be installed in the image with the ones that provide the Flutter embedder and the Gallery application:
IMAGE_INSTALL:append = " flutter-drm-eglstream-backend flutter-gallery-release"
Moreover, as we want to use the release 2.10.5 of Flutter, and without debug support:
FLUTTER_RUNTIME = "release"
FLUTTER_SDK_TAG = "3.0.1"
Finally, we also install the package that provides a configuration to set the correct modeset when the Tegra direct rendering module is probed.
IMAGE_INSTALL:append = " tegra-udrm-probeconf"
Using this YAML file, we can instruct Kas to launch the build:
kas build kas-flutter-example.yml
Storage flash process
Images and Nvidia tools to flash Jetson platforms are packaged into a tarball built and deployed as a target image into the folder build/tmp-glibc/deploy/images.
The SD card image for the Jetson Xavier NX can be flashed in two different ways:
- from the target board,
- from the host.
Here, we explain how to flash it from the target board.
Note: Each Jetson model has its own particular storage layout.
First, we need to extract the tegraflash archive:
mkdir tegraflash
cd tegraflash
tar -xvzf ../build/tmp-glibc/deploy/images/jetson-xavier-nx-devkit/core-image-minimal-jetson-xavier-nx-devkit.tegraflash.tar.gz
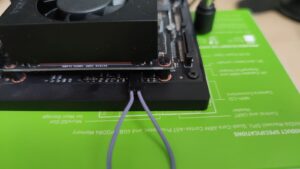
Moreover, to be able to flash the Jetson Xavier NX, it is required to switch it in recovery mode. For that it is necessary to connect a jumper between the 3rd and 4th pins from the right hand side of the “button header” underneath the back of the module (FRC and GND; see the labeling on the underside of the carrier board).

With this done, the module will power up in recovery mode automatically and will be visible from the host PC as an additional USB device:
lsusb |egrep 0955
Bus 003 Device 047: ID 0955:7e19 NVIDIA Corp.
Overall, here are the steps to follow to flash the SD card and the SPI Nand:
- Start with your Jetson powered off.
- Enable the recovery mode, as indicated above.
- Connect the USB cable from your Jetson to your development host.
- Insert an SD card into the slot on the module.
- Power on the Jetson and put it into recovery mode.
- Execute
./doflash.sh from the extracted tegraflash archive.
Finally, the target will boot.
Launch the Flutter application
Now, it is possible to start the Flutter Gallery application which is part of the core-image-minimal image, together with the Flutter stack, with the following command:
flutter-drm-eglstream-backend -b /usr/share/gallery

Customize a Yocto SDK
The OpenEmbedded build system can also be used to generate an application development SDK, that is a self-extracting tarball containing a cross-development toolchain, libraries and headers. This allows application developers to build, deploy and debug applications without having to do the OpenEmbedded build themselves.
It is possible to enrich the SDK’s sysroots with additional packages, through the variables TOOLCHAIN_HOST_TASK and TOOLCHAIN_TARGET_TASK.
That allows for example to extend the SDK with for example profiling tools, debug tools, symbols to be able to debug offline.
So, we used these variables to append the Flutter SDK and required dependencies to the Yocto SDK, to be able to cross-build Flutter applications with it.
TOOLCHAIN_HOST_TASK:append = " nativesdk-flutter-sdk"
TOOLCHAIN_TARGET_TASK:append = " gtk+3-dev"
To build the SDK with the same setup as the image previously built, we invoke Kas as follows:
kas shell kas-flutter-example.yml -c "bitbake -fc populate_sdk core-image-minimal"
Deploy the SDK
The SDKs built by OpenEmbedded are deployed in the folder build/tmp-glibc/deploy/sdk, so they can be extracted as follows to a folder:
build/tmp-glibc/deploy/sdk/oecore-x86_64-armv8a-toolchain-nodistro.0.sh -y -d ${destination}
To use the SDK, it is required to source the environment setup script that will set some cross-compile variables, like CC, LD, GDB, in the shell environment to develop or debug applications with SDK’s sysroots:
source <destination>/environment-setup-armv8a-oe-linux
Cross-build the Flutter gallery application
To illustrate how to use the SDK, let’s see how to build the Gallery Flutter application with the Yocto SDK. Before calling the flutter command, the SDK environment-setup script has been sourced and the following environment variables have been set:
FLUTTER_SDK: the path to the Flutter SDK into the Yocto SDK,ENGINE_SDK: where the Flutter engine shall be built,PATH: to extend the shell environment with Flutter tools provided by the SDK.
We can then retrieve the application source code:
git clone git@github.com:flutter/gallery.git
cd gallery
git checkout 9eb785cb997ff56c46e933c1c591f0a6f31454f6
Here, it is a workaround, that allows the flutter command line to correctly find the version of Flutter SDK:
export SDK_ROOT=/sysroots/x86_64-oesdk-linux/usr/share/flutter/sdk
git config --global --add safe.directory $SDK_ROOT
chmod a+rw $SDK_ROOT -R
rm -rf ${SDK_ROOT}/bin/cache/pkg/sky_engine/
Without the workaround above, the following error is raised:
The current Flutter SDK version is 0.0.0-unknown.
[...]
Failed to find the latest git commit date: VersionCheckError: Command exited with code 128: git -c log.showSignature=false log -n 1 --pretty=format:%ad --date=iso
Standard out:
Standard error: error: object directory build/downloads/git2/github.com.flutter.flutter.git/objects does not exist; check .git/objects/info/alternates
fatal: bad object HEAD
Returning 1970-01-01 01:00:00.000 instead.
[...]
Set the required environment variables and build the application for Linux:
export FLUTTER_SDK="${destination}/sysroots/x86_64-oesdk-linux/usr/share/flutter/sdk"
export PATH=${FLUTTER_SDK}/bin:$PATH
export ENGINE_SDK="./engine_sdk/sdk"

flutter config --enable-linux-desktop
flutter doctor -v
flutter build linux --release
flutter build bundle
This gives you the Flutter application, ready to run on the target!
Conclusion
In this blog post, we have shown that deploying Flutter on an OpenEmbedded distribution was a relatively easy process, and that the SDK can be extended to allow building Flutter applications.
 The X.Org Developer’s Conference (XDC) is the key annual event for developers shaping the future of Open Graphics technologies, including the Linux kernel, Mesa, DRM, Wayland, and X11. It is taking place on Sep 29, Sep 30 and Oct 1 in Vienna, Austria.


