![]() Linux 5.1 was released a a few days ago by Linus Torvalds. As usual, LWN covered the major new features of this release by looking at what got merged during the merge window: part 1 and part 2. KernelNewbies also has a nice summary.
Linux 5.1 was released a a few days ago by Linus Torvalds. As usual, LWN covered the major new features of this release by looking at what got merged during the merge window: part 1 and part 2. KernelNewbies also has a nice summary.
Bootlin contributed 181 commits to this release, making us the 14th contributing company by number of commits. Taking the entire Git history of the kernel, Bootlin has contributed a total of 6256 patches, making us the 15th contributing company by number of commits: a demonstration of our long-term involvement in the upstream Linux kernel community.
For Linux 5.1, our significant contributions have been:
- In the RTC subsystem
- Alexandre Belloni contributed a new RTC driver for the RV3028 RTC
- Alexandre Belloni, as the maintainer of the RTC subsystem, continued to contribute a number of fixes/improvements in various RTC drivers
- As part of a customer project in which we ported a modern U-Boot and Linux to a custom NXP LPC3250 platform, Alexandre Belloni contributed a fix for the LPC3250 serial port driver, and Grégory Clement moved the LPC3250 Analog-to-Digital converter Device Tree binding out of staging. We have other patches/fixes related to LPC3250 in the pipeline.
- In the support for Marvell platforms
- Antoine Ténart contributed numerous improvements to the mvpp2 driver, especially to properly handle the reset state of the different hardware blocks depending on how a particular Ethernet port is configured.
- Grégory Clement contributed a new cpufreq driver to support CPU frequency scaling on Marvell Armada 8K
- Maxime Chevallier contributed numerous improvements to the marvell10g Ethernet PHY driver, mainly to support 2.5G and 5G speeds, and to support the 88E2110 PHY. He also enabled 2.5G support in the
mvpp2Ethernet MAC driver. - Miquèl Raynal continued his work to bring suspend/resume support to the Armada 37xx platform: he added support for the Armada 37xx COMPHY and Armada 37xx USB UTMI PHY, added suspend/resume in ehci-orion, improved the USB core code to use the generic PHY API, and did a number of related Device Tree changes.
- In the support for RaspberryPi platforms
- Boris Brezillon made some fixes in the vc4 display controller driver: support for X/Y reflection was added, negative X/Y positioning was fixed, and support for margins on HDMI displays was added.
- In the support for Allwinner platforms
- Maxime Ripard made a number of small improvements to the Allwinner display controller driver
- Paul Kocialkowski contributed a number of improvements to the support of YUV planes in the Allwinner display controller driver, in relation to our work on the Allwinner VPU support.
- Paul Kocialkowski contributed some Device Tree changes to enable the Allwinner VPU on Allwinner A10, as well as a few fixes for the Allwinner VPU driver itself.
- As listed below, Boris Brezillon converted the Allwinner NAND controller driver to the
exec_opinterface.
- After extending the generic PHY subsystem in Linux 5.0 with two new hooks
phy_configure()andphy_validate(), Maxime Ripard used this extension to add a driver for the Cadence D-PHY (used in combination with Cadence MIPI DSI and CSI transceivers), to convert the Allwinner A31 DSI D-PHY handling to the generic PHY subsystem, and converted the Cadence DSI driver to use the generic PHY API. - In the MTD subsystem
- The NAND controller driver for Allwinner platform was converted to the use the new
exec_opinterface by Boris Brezillon.
- The NAND controller driver for Allwinner platform was converted to the use the new
- In the GPIO subsystem
- Thomas Petazzoni added support in the core GPIO subsystem to enable pull-up/pull-down resistors available in some GPIO controllers. It was contributed together with an implementation for the PCA953x family of I2C GPIO expanders.
In addition to writing code and submitting patches, a number of Bootlin engineers are also maintainers of various areas in the Linux kernel. As part of their maintainer duties, they review and merge patches from other developers:
- Maxime Ripard, as the Allwinner platform maintainer, merged 76 patches from other developers
- Alexandre Belloni, as the RTC subsystem maintainer and Atmel/Microchip platform co-maintainer, merged 53 patches from other developers
- Miquèl Raynal, as the NAND subsystem maintainer, merged 38 patches from other developers
- Grégory Clement, as the Marvell platform maintainer, merged 18 patches from other developers
And finally, here is as usual the detailed list of each patch we contributed:
- Alexandre Belloni (27):
- rtc: pcf8523: Add rv8523 compatible
- arm64: dts: fsl: use a generic node name for m25p80 flashes
- arm64: dts: fsl: ls1046a: disable the flash controller by default
- arm64: dts: fsl: ls1046a: disable uarts by default
- tty: serial: lpc32xx_hs: fix missing console boot messages
- rtc: imx-sc: depend on HAVE_ARM_SMCCC
- rtc: meson: remove useless rtc_nvmem_unregister call
- rtc: rv3028: add new driver
- rtc: hid-sensor-time: stop selecting IIO
- rtc: remove rtc_class_ops.read_callback
- rtc: imx-sc: use rtc_time64_to_tm
- rtc: zynqmp: fix possible race condition
- rtc: zynqmp: let the core handle range
- rtc: tx4939: remove useless test
- rtc: tx4939: set range
- rtc: tx4939: switch to rtc_time64_to_tm/rtc_tm_to_time64
- rtc: tx4939: use .set_time
- rtc: tx4939: convert to SPDX identifier
- rtc: rv8803: let the core handle range
- rtc: rv8803: convert to SPDX identifier
- rtc: update my email address
- rtc: pic32: convert to devm_rtc_allocate_device
- rtc: pic32: let the core handle range
- rtc: pic32: convert to SPDX identifier
- rtc: sd3078: fix manufacturer name
- checkpatch: add %pt as a valid vsprintf extension
- rtc: da9063: set uie_unsupported when relevant
- Antoine Tenart (15):
- net: mvpp2: fix a typo in the header
- net: mvpp2: update the port documentation regarding the GoP
- net: mvpp2: fix alignment of MVPP2_GMAC_CONFIG_MII_SPEED definition
- net: mvpp2: a port can be disabled even if we use the link IRQ
- net: mvpp2: reconfiguring the port interface is PPv2.2 specific
- net: mvpp2: fix validate for PPv2.1
- net: mvpp2: fix the computation of the RXQs
- net: mvpp2: some AN fields require the link to be down when updated
- net: mvpp2: always disable both MACs when disabling a port
- net: mvpp2: only update the XLG configuration when needed
- net: mvpp2: force the XLG MAC link up or down when not using in-band
- net: mvpp2: rework the XLG MAC reset handling
- net: mvpp2: reset the MACs when reconfiguring a port
- net: mvpp2: set the XPCS and MPCS in reset when not used
- net: mvpp2: set the GMAC, XLG MAC, XPCS and MPCS in reset when a port is down
- Boris Brezillon (21):
- drm/vc4: Fix negative X/Y positioning on SAND planes
- drm/vc4: Add support for X/Y reflection
- drm/connector: Fix drm_mode_create_tv_properties() doc
- drm/connector: Clarify the unit of TV margins
- drm/connector: Allow creation of margin props alone
- drm/vc4: Take margin setup into account when updating planes
- drm/vc4: Attach margin props to the HDMI connector
- mtd: Implement mtd_{read,write}() as wrappers around mtd_{read,write}_oob()
- mtd: rawnand: sunxi: Use a consistent name for sunxi_nand_chip objects
- mtd: rawnand: sunxi: Use struct_size()
- mtd: rawnand: sunxi: Name nand_chip objects consistently
- mtd: rawnand: sunxi: Stop passing mtd_info objects around
- mtd: rawnand: sunxi: Add an SPDX tag
- mtd: rawnand: sunxi: Migrate to ->exec_op()
- mtd: rawnand: sunxi: Fix kernel doc headers
- mtd: rawnand: sunxi: Handle the tREA > tRC / 2 case
- mtd: rawnand: mtk: Use nand_controller_init() instead of open-coding it
- mtd: rawnand: tmio: Do not abuse nand_controller->wq
- mtd: rawnand: omap2: Use nand_controller_init()
- mtd: rawnand: Stop using chip->state in drivers
- mtd: rawnand: Simplify the locking
- Gregory CLEMENT (9):
- pinctrl: armada-37xx: add missing pin: PCIe1 Wakeup
- pinctrl: dt-bindings: Fix the armada-37xx documentation
- MAINTAINERS: add new entries for Armada 8K cpufreq driver
- cpufreq: ap806: add cpufreq driver for Armada 8K
- phy: armada375-usb2: switch to SPDX license identifier
- arm64: dts: marvell: Remove unnecessary #address-cells/#size-cells under flashes
- dt-bindings: iio: adc: move lpc32xx-adc out of staging
- iio:adc:lpc32xx use SPDX-License-Identifier
- arch: arm: dts: kirkwood-rd88f6281: Remove disabled marvell,dsa reference
- Maxime Chevallier (15):
- net: phy: Mask-out non-compatible modes when setting the max-speed
- net: phy: Move of_set_phy_eee_broken to phy-core.c
- net: phy: Extract genphy_c45_pma_read_abilities from marvell10g
- net: phy: Add generic support for 2.5GBaseT and 5GBaseT
- net: phy: marvell10g: Don’t explicitly set Pause and Asym_Pause
- net: phy: marvell10g: Use get_features to get the PHY abilities
- net: phy: marvell10g: Use linkmode_set_bit helper instead of __set_bit
- net: phy: marvell10g: Use 2500BASEX when using 2.5GBASET
- net: phy: marvell10g: Use a #define for 88X3310 family id
- net: phy: marvell10g: Force reading of 2.5/5G
- net: mvpp2: Add 2.5GBaseT support
- net: phy: marvell10g: add support for the 88×2110 PHY
- net: phy: marvell10g: Let genphy_c45_pma_read_abilities set Aneg bit
- net: phy: marvell10g: Use the generic C45 helper to read the 2110 features
- packets: Always register packet sk in the same order
- Maxime Ripard (18):
- ARM: dts: sun7i: bananapi: Add GPIO banks regulators
- drm/sun4i: Move access control before setting the register as documented
- drm/sun4i: frontend: Add a quirk structure
- drm/sun4i: Set the coef_rdy bit right after the coef have been set
- drm/sun4i: Make COEF_RDY conditional
- drm/sun4i: frontend: Move the FIR filter phases to our quirks
- phy: dphy: Remove unused header
- phy: dphy: Change units of wakeup and init parameters
- phy: dphy: Clarify lanes parameter documentation
- dt-bindings: phy: Move the Cadence D-PHY bindings
- phy: Add Cadence D-PHY support
- sun6i: dsi: Convert to generic phy handling
- phy: Move Allwinner A31 D-PHY driver to drivers/phy/
- drm/bridge: cdns: Separate DSI and D-PHY configuration
- drm/bridge: cdns: Convert to phy framework
- drm/sun4i: dsi: Fix unitialized variable warning
- mfd: sun6i-prcm: Allow to compile with COMPILE_TEST
- dt-bindings: cpu: Fix JSON schema
- Miquel Raynal (26):
- pinctrl: armada-37xx: change suspend/resume time
- usb: core: comply to PHY framework
- usb: ehci-orion: avoid double PHY initialization
- usb: ehci-orion: add S2RAM support
- arm64: dts: marvell: add interrupt support to ap806 thermal node
- arm64: dts: marvell: add interrupt support to cp110 thermal node
- arm64: dts: marvell: armada-37xx: fix SATA node scope
- arm64: dts: marvell: armada-37xx: declare SATA clock
- arm64: dts: marvell: armada-37xx: fix USB2 memory region
- arm64: dts: marvell: armada-37xx: declare USB2 UTMI PHYs
- arm64: dts: marvell: armada-37xx: declare PCIe reset pin
- arm64: dts: marvell: armada-3720-espressobin: declare PCIe warm reset pin
- net: dsa: mv88e6xxx: Prevent suspend to RAM
- phy: mvebu-cp110-comphy: fix port check in ->xlate()
- phy: add A3700 COMPHY support
- dt-bindings: phy: mvebu-comphy: extend the file to describe a3700 bindings
- MAINTAINERS: phy: add entry for Armada 3700 COMPHY driver
- phy: add A3700 UTMI PHY driver
- dt-bindings: phy: mvebu-utmi: add UTMI PHY bindings
- MAINTAINERS: phy: fill Armada 3700 PHY drivers entry
- arm64: dts: marvell: armada-37xx: declare the COMPHY node
- arm64: dts: marvell: armada-3720-espressobin: declare PCIe PHY
- arm64: dts: marvell: armada-3720-espressobin: declare SATA PHY property
- arm64: dts: marvell: armada-37xx: link USB hosts with their PHYs
- clk: core: clarify the check for runtime PM
- mtd: rawnand: marvell: Clean the controller state before each operation
- Paul Kocialkowski (34):
- drm/vc4: Limit SAND tiling support to semiplanar YUV420 formats
- drm: Auto-set allow_fb_modifiers when given modifiers at plane init
- drm/fourcc: Add format info helpers for checking YUV planes disposition
- drm/fourcc: Add format info helpers for checking YUV sub-sampling
- drm/sun4i: backend: Use explicit fourcc helpers for packed YUV422 check
- drm/sun4i: frontend: Pass DRM format info to input format helpers
- drm/sun4i: frontend: Determine input format based on colorspace
- drm/sun4i: Move the BT.601 CSC coefficients to the frontend
- drm/sun4i: frontend: Configure and enable YUV to RGB CSC when needed
- drm/sun4i: frontend: Add support for packed YUV422 input formats
- drm/sun4i: frontend: Add support for semi-planar YUV input formats
- drm/sun4i: frontend: Add support for planar YUV input formats
- drm/fourcc: Add definitions for Allwinner vendor and VPU tiled format
- drm/sun4i: frontend: Add support for tiled YUV input mode configuration
- drm/sun4i: Add buffer stride and offset configuration for tiling mode
- drm/sun4i: frontend: Add and use helper for checking tiling support
- drm/sun4i: layer: Add tiled modifier support and helper
- drm/sun4i: drv: Allow framebuffer modifiers in mode config
- ARM: dts: sun4i: Add support for the C1 SRAM region with the SRAM controller
- ARM: dts: sun4i-a10: Add Video Engine and reserved memory nodes
- drm/sun4i: frontend: Hook-in support for the A10, with specific quirks
- drm/sun4i: frontend: Hook-in support for the A20
- media: cedrus: Cleanup duplicate declarations from cedrus_dec header
- media: cedrus: Allow using the current dst buffer as reference
- media: Revert “media: cedrus: Allow using the current dst buffer as reference”
- media: cedrus: Remove completed item from TODO list (dma-buf references)
- media: cedrus: Forbid setting new formats on busy queues
- media: cedrus: mpeg2: Use v4l2_m2m_get_vq helper for capture queue
- usb: chipidea: Grab the (legacy) USB PHY by phandle first
- usb: chipidea: Refactor USB PHY selection and keep a single PHY
- drm/sun4i: Add missing drm_atomic_helper_shutdown at driver unbind
- drm/sun4i: Set device driver data at bind time for use in unbind
- drm/sun4i: Fix component unbinding and component master deletion
- drm/sun4i: Unbind components before releasing DRM and memory
- Thomas Petazzoni (16):
- gpio: pca953x: reduce indentation level in pca953x_irq_setup()
- gpio: pca953x: use a per instance irq_chip structure
- dt-bindings: gpio: document the new pull-up/pull-down flags
- gpio: rename gpio_set_drive_single_ended() to gpio_set_config()
- gpio: use new gpio_set_config() helper in more places
- gpio: add core support for pull-up/pull-down configuration
- gpio: pca953x: add ->set_config implementation
- gpio: zynq: properly support runtime PM for GPIO used as interrupts
- dt-bindings: gpio: pca953x: document the nxp,pcal6416
- gpio: pca953x: add support for pcal6416 type
- clk: clk-gpio: add support for sleeping GPIOs in gpio-gate-clk
- PCI: pci-bridge-emul: Create per-bridge copy of register behavior
- PCI: pci-bridge-emul: Extend pci_bridge_emul_init() with flags
- mmc: sdhci: use WP GPIO in sdhci_check_ro()
- mmc: sdhci-omap: drop ->get_ro() implementation
- mmc: sdhci-tegra: drop ->get_ro() implementation
 Bootlin has been for many years a key contributor to the
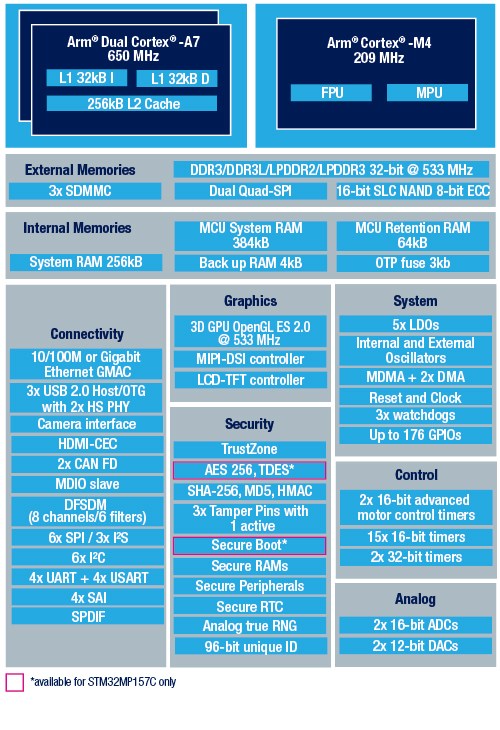
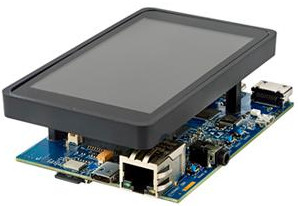
  In addition, the board used in the course has been changed to the
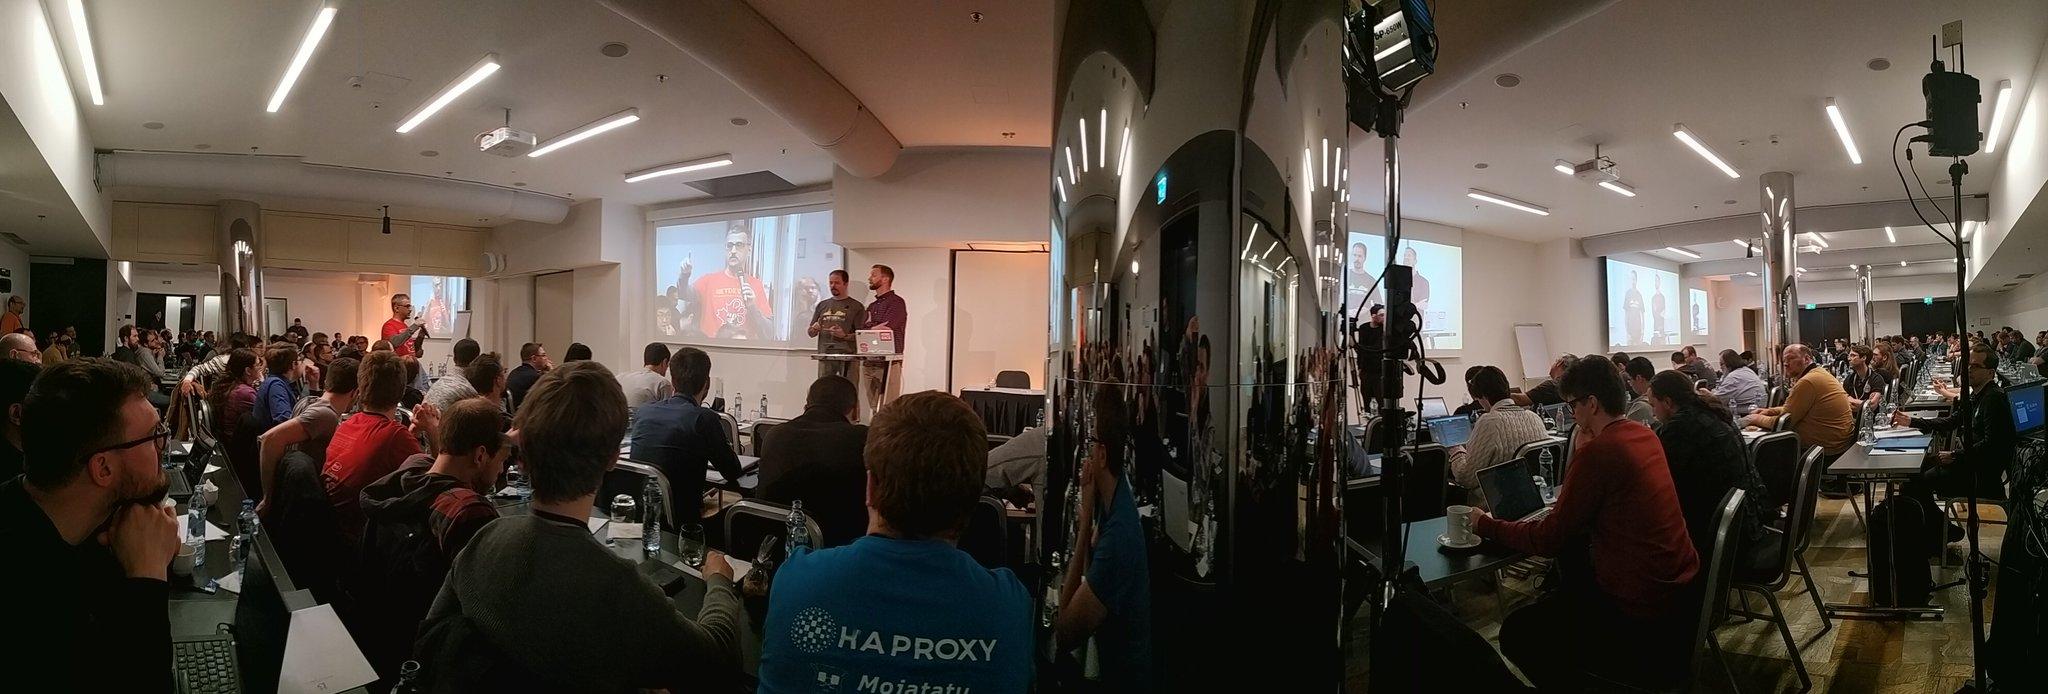


 It’s now a tradition: the
 At Bootlin, we owe a lot to the Free Software community, and we’re doing our best to give back