Bootlin establishes a strategic partnership with Ratiotech, an expert in electronics and hardware design

For close to 20 years, Bootlin has offered to companies around the world its expertise in embedded Linux system development, with engineering and training services covering low-level software development in the Linux kernel and open-source bootloaders, as well as embedded Linux system integration and build systems.

Bootlin’s expertise is obviously tightly coupled with hardware engineering, as the low-level software we develop runs on a wide variety of hardware platforms, sometimes with complex designs. As experts in low-level software, our team possesses a robust understanding of the hardware used in embedded systems, including SoCs, board design, hardware interfaces, and protocols.

Today, we are delighted to announce a strategic partnership with Ratiotech, marking a significant expansion of our collective expertise. Ratiotech brings an impressive 25 years of experience in hardware design, electronic systems, signal integrity, and EMC.

Bootlin / Ratiotech partnership

This partnership enables:

  • Bootlin to offer significantly deeper and broader expertise in investigating, debugging, and resolving issues during the bring-up of our customers’ hardware platforms
  • Ratiotech to leverage Bootlin’s solid expertise in embedded Linux development, providing customers with a comprehensive range of services covering both hardware development and Linux operating system integration
  • A collaboration that allows Bootlin and Ratiotech to provide turn-key solutions, encompassing the entire development of hardware/software solutions: hardware design, industrialization, low-level software development on microcontrollers, porting and integration of embedded Linux systems, and application development

Commencing in early 2024, Bootlin and Ratiotech will share offices near Toulouse, France, facilitating a seamless collaboration between the teams of both companies to ensure the success of this partnership.

Ratiotech’s CEO, Fabien Hue, states, “This strategic partnership is an excellent step to accelerate the development of Ratiotech and offer our customers a broader expertise, fully complementing Bootlin’s expertise in embedded Linux systems.”

Thomas Petazzoni, Bootlin’s CEO, adds, “The expertise and offerings provided by Bootlin to its customers will be significantly enhanced through this partnership with Ratiotech. This close relationship will not only expedite the bring-up of new hardware platforms but also enable us to offer essential hardware development, debugging, and investigation expertise that many of our customers require. We are eagerly looking forward to further assisting our customers with Ratiotech’s expertise.”

For more details on this partnership, check our hardware expertise, and for more details about Ratiotech, visit their website at Ratiotech.

The quest for Linux friendly embedded board makers

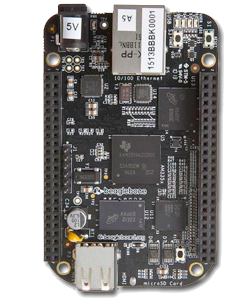
Beagle Bone Black boardWe used to keep a list of Linux friendly embedded board makers. When this page was created in the mid 2000s, this page was easy to maintain. Though more and more products were created with Linux, it was still difficult to find good hardware platforms that were supported by Linux.

So, to help community members and system makers selecting hardware for their embedded Linux projects, we compiled a first selection of board makers that were meeting the below criteria:

  • Offering attractive and competitive products
  • At least one product supported Free Software operating systems (such as Linux, eCos and NetBSD.
  • At least one product meeting the above requirements, with a public price (without having to register), and still available on the market.
  • Specifications and documentation directly available on the website (no registration required). Engineers like to study their options on their own without having to share their contact details with salespeople who would then chase them through their entire life, trying to sell inappropriate products to them.
  • Website with an English version.

In the beginning, this was enough to reduce the list to 10-20 entries. However, as Linux continued to increase in popularity, and as hardware platform makers started to understand the value of transparent pricing and technical documentation, the criteria were no longer sufficient to keep the list manageable.

Therefore, we added another prerequisite: at least one product supported (at least partially) in the official version of the corresponding Free Software operating system kernel. This was a rather strong requirement at first, but only such products bring a guarantee for long term community support, making it much easier to develop and maintain embedded systems. Compare this with hardware supporting only a very old and heavily patched Linux kernel, for example, which software can only be maintained by its original developers. This also reveals the ability of the hardware vendor to work with the community and share technical information with its users and developers.

Then, with the development of low-cost community boards, and chip manufacturers efforts to support their hardware in the mainline Linux kernel, the list again became difficult to maintain.

The next prerequisite we could add is the availability as Open-source hardware, allowing customers to modify the hardware according to their needs. Of course, hardware files should be available without registration.

However, rather than keeping our own list, the best is to contribute to Wikipedia, which has a dedicated page on Open-Source computing hardware. At least, all the boards we could find are listed there, after adding a few.

Don’t hesitate to post comments to this page to share information about hardware which could be worth adding to this Wikipedia page!

Anyway, the good news is that Linux and Open-Source friendly hardware is now easier and easier to find than it was about 10 years back. Just have a preference for hardware that is supported in the mainline Linux kernel sources, or at least from a maker with earlier products which are already supported. A git grep -i command in the sources will help.

Bootlin customer project on Kickstarter!

For about 6 months, we’ve been working with Crystalfontz America on an imx28-based board, targeted at the hackers and DIYers. We’ve been working on the BSP, adding support to Linux and in Buildroot for this board. Support in the mainline Linux kernel is also in pretty good shape, and we continue to post patches to improve it.

The CFA-10036 is actually a computer-on-module with a small OLED display, and comes with two (for now) breakout boards, the CFA-10037, which adds USB and Ethernet connectivity, and an awful lot of exposed GPIOs, and the soon-to-be announced CFA-10049, which is more targeted to industrial or robotic uses, with additional ADCs, fan controller, 1-wire, LCD, rotary encoder, and so on. See more details.

The project is getting close to completion, since Crystalfontz started its funding campaign on Kickstarter.

For those who are not familiar with Kickstarter, it’s a way for creators to get funding and sense customer interest in their projects. If you find the device interesting you can either make a small pledge to show that you like the project, or make a bigger one and will receive board(s) and accessories corresponding to how much you pledged. If the project doesn’t meet its funding goals, you won’t be charged at all. I advise you to read the Kickstarter FAQ to understand Kickstarter better.

Embedded Linux training: switch to the IGEPv2 board

Since early 2009, our training sessions have been using the USB-A9263 board from Calao Systems as the hardware platform for the practical labs. However, this AT91-based platform was getting older, and we therefore started the process of switching our training sessions to a new hardware platform, the IGEPv2 board from ISEE.

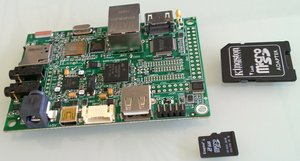
IGEPv2 board
IGEPv2 board

The IGEPv2 platform is very similar to the popular BeagleBoard and BeagleBoard-XM platforms, and has the following technical characteristics :

  • TI DM3730, which is the latest OMAP3 processor from Texas Instruments, clocked at 1 Ghz, and including a DSP for signal processing, an IVA block for audio/video decoding and the PowerVR SGX for 3D/OpenGL. This processor offers far more possibilities than the AT91 one, especially for multimedia applications.
  • 512 MB of RAM and 512 MB of OneNAND flash.
  • Integrated Ethernet connector, Wifi and Bluetooth connectivity.
  • One USB OTG port and one USB host port.
  • A microSD connector.
  • A DVI-D connector (HDMI), stereo input and ouput
  • RS232 connector
  • Multiple expansion ports to access LCD, camera, I2C, SPI, JTAG, etc. signals

Compared to the BeagleBoard-XM, this board has the following advantages:

  • it has a OneNAND Flash device, which allows us to demonstrate and practice the usage of MTD and Linux flash-specific filesystems such as JFFS2 and UBIFS in our training sessions. Even though block-based storage such as SD and eMMC is more and more popular in consumer-electronic devices, usage of raw NAND flash is still very common in industrial applications, and we therefore wanted to keep presenting those devices and their usage in embedded Linux
  • ISEE, the company manufacturing the IGEPv2, is located in Spain, which makes it easier for us to regularly order boards from them, since we are also located in Europe
  • the board provides Bluetooth and Wifi connectivity, which is nice

We have already given two sessions of our Embedded Linux system development training with the IGEPv2, and all our future sessions of this training will use this hardware platform, so the participants will benefit from a more modern platform, with far more capabilities than our previous AT91-based training hardware. This is also the board we are now giving to the participants to our public training sessions, so those participants come back home with a very nice and powerful platform which allows countless experiments around embedded Linux. Note that we also intend to port our Embedded Linux kernel and driver development training session to the IGEPv2 platform in the near future.

Faster boot: starting Linux directly from AT91bootstrap

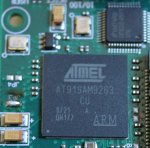
Reducing start-up time looks like one of the most discussed topics nowadays, for both embedded and desktop systems. Typically, the boot process consists of three steps: AT91SAM9263 CPU
  • First-stage bootloader
  • Second-stage bootloader
  • Linux kernel

The first-stage bootloader is often a tiny piece of code whose sole purpose is to bring the hardware in a state where it is able to execute more elaborate programs. On our testing board (CALAO TNY-A9260), it’s a piece of code the CPU stores in internal SRAM and its size is limited to 4Kib, which is a very small amount of space indeed. The second-stage bootloader often provides more advanced features, like downloading the kernel from the network, looking at the contents of the memory, and so on. On our board, this second-stage bootloader is the famous U-Boot.

One way of achieving a faster boot is to simply bypass the second-stage bootloader, and directly boot Linux from the first-stage bootloader. This first-stage bootloader here is AT91bootstrap, which is an open-source bootloader developed by Atmel for their AT91 ARM-based SoCs. While this approach is somewhat static, it’s suitable for production use when the needs are simple (like simply loading a kernel from NAND flash and booting it), and allows to effectively reduce the boot time by not loading U-Boot at all. On our testing board, that saves about 2s.

As we have the source, it’s rather easy to modify AT91bootstrap to suit our needs. To make things easier, we’ll boot using an existing U-Boot uImage. The only requirement is that it should be an uncompressed uImage, like the one automatically generated by make uImage when building the kernel (there’s not much point using such compressed uImage files on ARM anyway, as it is possible to build self-extractible compressed kernels on this platform).

Looking at the (shortened) main.c, the code that actually boots the kernel looks like this:

int main(void)
{
/* ================== 1st step: Hardware Initialization ================= */
/* Performs the hardware initialization */
hw_init();

/* Load from Nandflash in RAM */
load_nandflash(IMG_ADDRESS, IMG_SIZE, JUMP_ADDR);

/* Jump to the Image Address */
return JUMP_ADDR;
}

In the original source code, load_nandflash actually loads the second-stage bootloader, and then jumps directly to JUMP_ADDR (this value can be found in U-Boot as TEXT_BASE, in the board-specific file config.mk. This is the base address from which the program will be executed). Now, if we want to load the kernel directly instead of a second-level bootloader, we need to know a handful of values:

  • the kernel image address (we will reuse IMG_ADDRESS here, but one could
    imagine reading the actual image address from a fixed location in NAND)
  • the kernel size
  • the kernel load address
  • the kernel entry point

The last three values can be extracted from the uImage header. We will not hard-code the kernel size as it was previously the case (using IMG_SIZE), as this would lead to set a maximum size for the image and would force us to copy more data than necessary. All those values are stored as 32 bits bigendian in the header. Looking at the struct image_header declaration from image.h in the uboot-mkimage sources, we can see that the header structure is like this:

typedef struct image_header {
uint32_t    ih_magic;    /* Image Header Magic Number    */
uint32_t    ih_hcrc;    /* Image Header CRC Checksum    */
uint32_t    ih_time;    /* Image Creation Timestamp    */
uint32_t    ih_size;    /* Image Data Size        */
uint32_t    ih_load;    /* Data     Load  Address        */
uint32_t    ih_ep;        /* Entry Point Address        */
uint32_t    ih_dcrc;    /* Image Data CRC Checksum    */
uint8_t        ih_os;        /* Operating System        */
uint8_t        ih_arch;    /* CPU architecture        */
uint8_t        ih_type;    /* Image Type            */
uint8_t        ih_comp;    /* Compression Type        */
uint8_t        ih_name[IH_NMLEN];    /* Image Name        */
} image_header_t;

It’s quite easy to determine where the values we’re looking for actually are in the uImage header.

  • ih_size is the fourth member, hence we can find it at offset 12
  • ih_load and ih_ep are right after ih_size, and therefore can be found at offset 16 and 20.

A first call to load_nandflash is necessary to get those values. As the data we need are contained within the first 32 bytes, that’s all we need to load at first. However, some space is required in memory to actually store the data. The first-stage bootloader is running in internal SRAM, so we can pick any location we want in SDRAM. For the sake of simplicity, we’ll choose PHYS_SDRAM_BASEhere, which we define to the base address of the on-board SDRAM in the CPU address space. Then, a second call will be necessary to load the entire kernel image at the right load address.

Then all we need to do is:

#define be32_to_cpu(a) ((a)[0] << 24 | (a)[1] << 16 | (a)[2] << 8 | (a)[3])
#define PHYS_SDRAM_BASE 0x20000000

int main(void)
{
unsigned char *tmp;
unsigned long jump_addr;
unsigned long load_addr;
unsigned long size;

hw_init();

load_nandflash(IMG_ADDRESS, 0x20, PHYS_SDRAM_BASE);

/* Setup tmp so that we can read the kernel size */
tmp = PHYS_SDRAM_BASE + 12;
size = be32_to_cpu(tmp);

/* Now, load address */
tmp += 4;
load_addr = be32_to_cpu(tmp);

/* And finally, entry point */
tmp += 4;
jump_addr = be32_to_cpu(tmp);

/* Load the actual kernel */
load_nandflash(IMG_ADDRESS, size, load_addr - 0x40);

return jump_addr;
}

Note that the second call to load_nandflash could in theory be replaced by:

load_nandflash(IMG_ADDRESS + 0x40, size + 0x40, load_addr);

However, this will not work. What happens is that load_nandflash starts reading at an address aligned on a page boundary, so even when passing IMG_ADDRESS+0x40 as a first argument, reading will start at IMG_ADDRESS, leading to a failure (writes have to aligned on a page boundary, so it is safe to assume that IMG_ADDRESS is actually correctly aligned).

The above piece of code will silently fail if anything goes wrong, and does no checking at all – indeed, the binary size is very limited and we can’t afford to put more code than what is strictly necessary to boot the kernel.

The Bifferboard: tiny, low power embedded x86 board

A nice, cheap and tiny x86 embedded board that runs Linux and just consumes 1W. It has all the basic connectivity you need in an embedded system.

As you may already know, we maintain a list of attractive and Linux friendly embedded boards. Whenever we find a new board that is attractive and meets our strict criteria (supporting Linux or other free kernels, public pricelist, public documentation and website with an English version), we add this board to our list. This way, we don’t forget about any useful board, and we can offer useful guidance to our customers and to any embedded system developer looking for a suitable hardware platform.

Somebody at Bifferos.com has just contacted us to let us know about their Bifferboard product. Here are its announced features:

  • Bifferboard150MHz RDC CPU, Intel 486SX compatible
  • 1 watt power consumption (200mA @5v)
  • 68mm x 28mm x 19mm
  • 32MB SDRAM/1MB Flash
  • OHCI/EHCI USB 2.0
  • 10/100 Ethernet
  • Serial console 115200 baud
  • 4-pin JTAG (can be used as GPIO)
  • 2 GPIO (1 LED, 1 button)
  • Linux 2.6.27.5 + OpenWrt
  • 29 UK pounds

The board has two components: the CPU board, and the I/O one, offering Ethernet and USB host connectivity. For a serial port, you can order a special cable from their shop, which connects to a USB port on your workstation.

Thanks to its low power consumption, the Bifferboard can even be powered by USB. According to its makers, the board can do anything a NSLU2 device can do. It is just cheaper (approximately 33 EUR at the time of this writing).

Last but not least, most Bifferboard hardware can be emulated with QEMU.

While it could also be suitable for mass production projects, it can be at least a nice platform for prototypes, hobby, research and educational projects.

Of course, if you know about other attractive boards that we could add to our list, please post a comment or send us e-mail.

USB-Ethernet device for Linux

Useful device when you work with an embedded development board

For our Embedded Linux training sessions, I was looking for a USB to Ethernet device. Since Linux supported devices are often difficult to find, I’m glad to share my investigations here.

When you use an embedded development board, you must connect it to your computer with an Ethernet cable, for example to transfer a new kernel image to U-boot through tftp, or to make your board boot on a directory on your workstation, exported with NFS.

You could connect both the board and computer to your local network, which would still allow your computer to connect to the Internet while you work with the board. However, you may create conflicts on your local network if you don’t use DHCP to assign an IP address to your board (if your DHCP server even accepts this new device on the network). In a training environment, you are also likely to run out of Ethernet outlets in the training room if you have to connect 8 such boards. Hence, a direct connection between the board and your workstation’s Ethernet port is often the most convenient solution.

If you can’t use WIFI to keep your computer connected to the outside world, a good solution is to add an extra Ethernet port to your computer by using an USB-to-Ethernet device.

My colleague Thomas and I started looking for such devices that would be supported by Linux. Here are a few that we found:

  • D-Link DUB-E100. Supported by the USB_NET_AX8817X driver. However, this product is bulky and quite heavy (at least 100 grams).
  • TRENDnet TU2-E100. Supported by the same driver, but still bulk (August 2015 update: now replaced by a more recent version, now almost as small as the Apple one, and supported out of the box in Linux. See the comment about this device.)
  • Linksys USB 200m. Supported by the same Linux driver and has a much more acceptable size, but customer reviews complain that its connector can break easily.
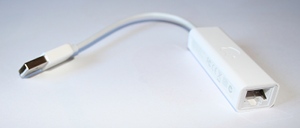
  • Apple USB Ethernet Adapter. This should be working out of the box in Linux. At least the MB442Z/A or MC704ZM/A references did, but Apple now sells a new reference that might have a different chipset. It is beautiful, small and light. Support for this device (at least the references I mentioned) was added to Linux 2.6.26 through the same driver. You should be able to use it in recent distros.

Apple USB to EthernetSo, I recommend the Apple device. I event posted a comment on the Apple Store, titled “Perfect for Linux”! I hope the Apple droids won’t censor it. Don’t hesitate to buy it, so that we can confirm that the latest reference is supported too.

I can’t tell whether this could happen with Apple. This was the first Apple device I ever bought…