Qt goes LGPL

The next release of Qt will be released under the LGPL license

Good news for people developing graphical applications for embedded Linux systems. Nokia, the new owners of Trolltech, announced they will release the next version of the Qt graphical library under the LGPL license. This means that developers will be able to create applications based on the Qt library, with the license of their choice, free software / open source or proprietary.

As we explained in our Choosing graphical libraries for embedded systems presentation, Qt is more than a graphical library. It also offers a complete development framework, with development tools, data structures, threads, networking, XML parsing utilities making application development easier. All these features, and the fact that Qt directly run on top of the Linux framebuffer, also make it possible to create systems with a feature-rich interface without having to drag and build numerous dependencies.

Another bonus is that Qt supports multiple operating systems, making your applications easily portable. If you’ re not allowed to use Linux yet, write your applications with Qt, and once all OS related dependencies are removed, switch to your favorite OS without even letting your boss know wink.

See WikiPedia for details about Qt.

Kernel 2.6.28 is out with a few Bootlin contributions

A few hours before Christmas, Linus Torvalds released the latest stable version of the Linux kernel, 2.6.28. Jake Edge from LWN sums up the major highlights of this new release: « Some of the highlights of this kernel are the addition of the GEM GPU memory manager, the ext4 filesystem is no longer “experimental”, scalability improvements in memory management via the reworked vmap() and pageout scalability patches, moving the -staging drivers into the mainline, and much more ». As usual, the Kernel Newbies website offers an excellent human-readable summary of the changes.

Of particular interest to embedded developers will be the new boot tracer facility, which allows to draw SVG graphs of the kernel initialization procedures execution time, in order to analyze the boot time and possibly reduce it. Of course, a lot of architecture-dependent improvements have also been made (for example OProfile support for ARMv7 CPUs but also new supported boards) and a lot of drivers have been merged or improved, as usual.

Bootlin has contributed a few patches that have been merged and released in 2.6.28. While being a small contribution compared to the 9.000+ patches added to the kernel between 2.6.27 and 2.6.28, they still slightly improve the kernel for embedded users. Part of the Linux-Tiny efforts, these patches allow to reduce the size of the kernel by disabling features that may not be necessary on embedded systems. More specifically, these patches allow :

From the existing Linux Tiny patch ideas, the only one left in the feature removal area are the multicast support removal and ethtool removal. They have already been submitted a few months ago, but got rejected by the network maintainers. I will work on them again to fix the issues and try to re-submit them later.

Finally, Jonathan Corbet has published an analysis of the 2.6.28 developement cycle in terms of contributors and changes. An interesting reading.

New LXR website

I am pleased to announce that our https://elixir.bootlin.com website is back on line.

As some of you probably noticed, our service had been down for several months. When it was working, it was based on LXR 0.9.5. This version had nice improvements over the stable release (0.3.1), like better display of the kernel sources, but on the other hand, it also had ugly drawbacks. In particular, it stored data in an SQL database. This made the server consume more CPU resources, and made it very long to index a new kernel version (about 10 hours instead of just a few minutes). Disk space was also multiplied by 3 or 4, if I recall correctly. Anyway, the major problem was that that version didn’t scale: the service was getting slower each time a new version was added. Apparently, the bigger the database, the slower the server got.

Eventually, that 0.9.5 based server just died. I didn’t change anything before this happened and everything looked all right. I checked configuration files and packages, but there seemed to be no way to make it run again. The only solution left was a brand new install from scratch.

I first evaluated the LXRng, a new fork of the software on the http://lxr.linux.no website. This new version looks nice. In particular, though it’s still using a database, this new branch seems to withstand a greater number of kernel source versions, as http://lxr.linux.no answers pretty fast now and indexes a pretty long list of versions. However, I found its interface confusing and not as convenient as it was in the original branch, especially for identifier search. It could be because this new version is not mature enough yet, or just because I was too familiar with the original interface. The best is to try by yourself!

I also tried to make a new installation of the latest CVS sources of the main branch. However, this didn’t work as expected, as I wanted to run the new service on a recent distro with long term support (Ubuntu Gutsy Gibbon). Gutsy Gibbon only supports MySQL 5.0, but LXR-CVS proved to be only compatible with MySQL 4.0. I did apply some patches, but still got SQL query errors with MySQL 5.0.

I eventually decided to go back to the good old 0.3.1 stable version, and I don’t regret it:

  • This version is extremely simple. You just need a web server with CGI scripts. No trouble with Apache2, no need to make modperl work. No need to install database software.
  • This version is extremely fast too. It just takes a few minutes to add a new version, and serving identifier searches is very fast. Just try with a widely used function, like outb. With LXR 0.9.5, it could take up to 1 minute to display all the files in which the symbol was found.
  • This version scales by design. Each supported source version has its own index files, and there is no central blob getting bigger and bigger. This simple design also makes it very easy to remove or to update source versions (like upgrading 2.6.28 sources to 2.6.28.1). With LXR 0.9.5, you had to make your own SQL queries to remove a version from the database!
  • This version lacks a few features (like direct links to C include files, or like file descriptions), but hey, the main features are there: source navigation and identifier search. The only significant feature that is kind of missing in our site is freetext search. Version 0.3.1 only supported a proprietary searching tool, so we decided to rely on Google’s search instead. This is not perfect as we won’t have version-specific search, but freetext search is a secondary feature for us anyway. We wanted to have this service back on line, with at least its main features.
  • Note that I had to make minor changes to make the website XHTML 1.0 Transitional compliant and pass the W3C Markup Validation Service checks I also fixed a bug in the diff markup script. Here is an archive of our install. Don’t hesitate to compare it with the original code and templates, and reuse our modified templates if you like them.

Thanks to this, the code hyperlinks in our kernel training slides work again at last! Every time we mention the name of a kernel source file or quote example code, you can click on the file name or on each function or structure type name, and you will be taken to the corresponding page on our LXR site!

Don’t forget that other valuable LXR websites exist for the Linux kernel. See our LXR websites list. Don’t hesitate to post a comment if you know other useful ones.

Choosing graphical libraries for embedded systems

The free software community offers many solutions to embedded system developers willing to add graphical applications to their project. This variety of choice, typical from the free software world, has the advantage of giving several solutions, which increases the chance of finding the solution that bests suits your need, but at the same time, might confuse to choose the right one.

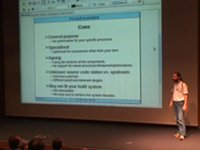
I made experiments with the major graphical libraries available, and reported these experiments during the Embedded Linux Conference Europe event, which took place early November 2008 in Ede, The Nederland. My presentation « Choosing graphical libraries for embedded systems » discussed DirectFB, X.org and its Kdrive variant, SDL, Nano-X, Gtk, Qt, FLTK and WxEmbedded, detailing the features, specifities, size of each solution and suitability to various use cases.

The slides are available under the Creative Commons BY-SA license : graphical-libraries.pdf (PDF), graphical-libraries.odp (Open Document Format).

While experimenting with these graphical libraries, I made a few contributions to the Buildroot project, which was used to build root filesystems including these libraries. I hope to release soon several root filesystems allowing an easy testing of these solutions, through Qemu.

uClibc 0.9.30 is available

About one year and a half after the release of the previous stable version, the release of uClibc 0.9.30 is a great event in the embedded Linux community. uClibc is a replacement for the glibc C library, implementing most of the features of glibc, while retaining a much smaller size and an incredible level of configurability.

The only changelog available is a list of Subversion commits that occurred between the 0.9.29 and the 0.9.30 releases, so it is quite difficult to extract what are the important bits. However, a news from August 2008 on uClibc.org website gives an idea of what happened in the 0.9.30 version :

  • a lot of fixes for the various architectures, and other tweaks and improvements
  • an improved configurability that allows to enable/disable a larger number of features, now including
    • Realtime-related family of SUSv functions (option UCLIBC_HAS_REALTIME, which enables aio_*() functions, mq_*() functions, mlock() family of functions, sched_*() functions, sem_*() functions, a few signal-related functions and the timer_*() functions). Threading support requires the realtime functions, so it depends on this option.
    • Advanced realtime-related family of SUSv functions (option UCLIBC_HAS_ADVANCED_REALTIME, which enables a few advanced clock_*() and mq_*() functions, and a large number of posix_spawnattr_*() and posix_spawn_*() functions)
    • epoll (option UCLIBC_HAS_EPOLL)
    • extended attributes (option UCLIBC_HAS_XATTR)
    • other options to enable/disable compatibility/deprecated APIs
  • it is now possible to build uClibc without network support at all. The global option is UCLIBC_HAS_NETWORK_SUPPORT, and can be further refined with UCLIBC_HAS_SOCKET to enable just the socket support (for example if only Unix sockets are used), UCLIBC_HAS_IPV4 to get IPv4 functionality, which of course requires the socket support, and UCLIBC_HAS_IPV6 for IPv6.

A quick look at the differences between the available options allows to see another set of features:

  • Support for the AVR32 and Xtensa architecture has been added
  • A configuration option to enable non-functional stubs for features that are not implemented on a given architecture. This option for example enables a stub fork() function on non-MMU architectures so that applications can easily be recompiled, without checking all the fork() sites from the beginning
  • Options to enable/disable Linux-specific or BSD-specific functions

The allnoconfig setup with shared library is reported to have been reduced by 30%, though the allnoconfig setup doesn’t necessarily correspond to a classical usage of uClibc.

The tarball is available here.

Crosstool-ng 1.3.0 released!

Crosstool-ng is a tool that allows automated building of cross-compiling toolchain, easing a process known to be very difficult. Crosstool-ng has been started as a rewrite of Crosstool, the famous tool authored by Dan Kegel. Now Crosstool-ng offers several improvements over Crosstool: an active development community, stable releases, support of uClibc, glibc and eglibc, a menuconfig configuration interface, a good documentation, etc.

Yann Morin, the lead developer of Crosstool-ng announced today the release of Crosstool-ng 1.3.0. He says: « There has been many improvements, new features and bug fixes all around. If I had to, my pick would be the support for the gcc 4.3 series. But I would also have to tell you about the latest uClibc version, support for eglibc, and the ability to build bare-metal compilers, and the list would not yet be complete… »

He also mention that SuperH and IA-64 can now build a minimalist C-only toolchain, so the support for these architectures is not complete yet, but progressing. Of course, most components have been updated: new versions, new features, updated patchsets, etc. It for example include support for the latest version of uClibc, 0.9.30, released only two weeks ago.

The Changelog is available, as is a tarball of the new release.

If you need to build some cross-compiling toolchain, you definitely should take a look at Crosstool-ng. It’s great, and well supported: Yann is both very responsive and very helpful when problems are being reported.

Update on flash filesystems

Reviewing new possibilities for flash filesystems – My slides at ELCE 2008

With the release of Linux 2.6.27, including the new UBIFS filesystem for MTD storage, embedded Linux system developers now have multiple choices for their flash storage devices. As far as it is concerned, JFFS2 has also been improved and now has support for LZO compression, which makes uncompressing faster. So, how to choose between JFFS2, YAFFS2, and UBIFS?

To help our customers and the community make the right decision, I measured how these filesystems compare in terms of mount time, access time, read and write speed, as well as CPU usage in several corner cases and with different flash chip sizes.

I showed the results during the Embedded Linux Conference Europe event. Besides sharing lessons learned from these experiments, my presentation also introduced each filesystem and its implementation. I also gave advice for flash based block storage (such as Compact Flash and Solid State disks), to reduce the number of writes and avoid damaging flash blocks.

As usual, Bootlin slides are available under the Creative Commons BY-SA license: flash-filesystems.pdf (PDF), flash-filesystems.odp (Open Document Format).

The main finding is that UBIFS outperforms both JFFS2 and YAFFS2 in almost all corner cases. As shown by the benchmarks, it has consistently good mount time, and read/write performance. If your products are using a recent kernel, and are still based on JFFS2, you should definitely try UBIFS and get significant performance benefits, in particular for boot time, as mounting a JFFS2 root filesystem can take several seconds!

The advent of UBIFS also questions the relevance of YAFFS2. YAFFS2 used to be a good alternative to JFFS2, but unlike UBIFS, it doesn’t support compression. Then, why choose YAFFS2, when a apparently superior alternative is available?

The only case in which JFFS2 can still make sense if when you have very small partitions, sizing just a few megabytes. In this case, the overhead from UBI, the erase-block management layer below UBIFS, is no longer negligible. You will be able to pack much less data than with JFFS2. In this case, you can still improve JFFS2’s performance by using some of its new features (more details in the presentation).

SquashFS is also another great alternative, as shown by my benchmarks. It’s true it is a block filesystem, but since it is read-only, and there is no problem to use it on a write-once mtdblock device. You should really consider it for the read-only parts in your system, though it is advisable to use it on top of UBI, to make its blocks participate to wear-leveling and bad block management. Again, you will find more details in my presentation.

The presentation also mentions LogFS, which is also a promising filesystem for flash storage. Unfortunately, LogFS is not available yet for recent kernels. Stay tuned and I will benchmark it as soon this situation changes.

Ogg/Theora video mini howto

How to make your own Ogg/Theora videos

Here is how we created the free conference videos we are sharing with you.

Our goal is to show you that it is very easy and pretty cheap to create Ogg/Theora videos using only Free Software tools. It would be great if more people shared what they experience, in particular when they attend interesting presentations!

License

Creative commons

Copyright 2006-2008, Bootlin.
This mini-howto is released under the terms of the Creative Commons Attribution-ShareAlike 2.5 license.

Requirements

A mini-DV camcorder.

Such a device costs approximately 500 US dollars / euros. Mini-dv tapes cost about 5 US dollars / euros.

Note that other devices may be used, such as DVD or harddisk camcorders.

Harddisk camcorders are not a very good solution, because video is stored with a high compression rate (MPEG-4 format). You will not get the best results if you encode from MPEG-4 to Theora, because you will be using low bitrate input compressed with another codec.

A DVD camcorder is fine (MPEG-2 compression), because the input quality would be much better. The best is still DV input, which has very little compression, and allows to get the best of the Theora codec.

Camcorder accessories

A tripod is a must-have. Without one, your image will not be very stable (even with image stabilization), and above all, you will be exhausted after one hour.

An external microphone is nice to have, but not mandatory at all. You still
get pretty good quality audio with the built-in one. So, if you are satisfied
by the audio that you get, you do not have to buy such a microphone. However,
the best solution for top quality audio is to connect you audio input to the
room audio system (if any, and if the speaker is using a microphone).

Computer connectivity

You need a GNU/Linux computer with FireWire input (aka IEEE 1394 or iLink).
If you have a notebook with a PCMCIA adaptor, you best option is to get a
FireWire PCMCIA card which doesn’t need any special driver. This should mean
that it is compliant with the 1394 OHCI standard, which is fully supported by
Linux. Note that recent distributions (at least Fedora Core) automatically
load the right drivers when such a card is plugged in.

It may be possible to use USB connectivity too to get the video from the
camcorder. We just do not know how yet. Any resources are welcome!

Storage

The DV files are huge (roughly 15 GB per hour). As intermediate processing
steps are used in our flow, intermediate files of similar size will be
created. Hence, you will need at least 30 GB of free space to process 1 video.
Anyway, it’s much better to have 100 GB or more to store and process several
videos in a row. For notebook owners, external hard drives (typically
high-speed USB 2.0) are your friends.

An external microphone is nice to have, but not mandatory at all. You still get pretty good quality audio with the built-in one. So, if you are satisfied by the audio that you get, you do not have to buy such a microphone. However, the best solution for top quality audio is to connect you audio input to the room audio system (if any, and if the speaker is using a microphone).

Shooting the video

Before or right after filming, make sure that you ask the speaker(s) for permission to publish the video! Make sure you mention the license that you are going to use.

Video capture

Connect the camera to the computer with the FireWire cable.

If you are using a PCMCIA FireWire adaptor, all the modules should have been loaded automatically at module load time.

If you have a legacy FireWire input, you may have to do a few things by hand (logged as root):

modprobe dv1394
chmod a+rw /dev/dv1394/0

You will now use dvgrab
to get the video through the FireWire link and save it to a file. This tool is shipped by most distributions.

dvgrab --size 0 --format raw <output-file-prefix>

Note: --size 0 means that the output file is not split into many smaller ones, when they exceed a given size.

Now that you’re done, let’s assume that you created a video.dv file.

Video trimming

When you read reused tapes, it’s hard to avoid video frames from the previous recordings at the begining or at the end. Before compressing, you first have to trim out the unwanted frames.

This is pretty easy to do with the kino tool, available in all recent distros.

Make sure you export the trimmed video in DV format, to avoid losing quality.

We will soon post kino usage screenshots on this page, to get you started faster with kino.

Quick Ogg/Theora generation

That’s very easy to do. Get the latest version of the ffmpeg2theora package.

ffmpeg2theora -o video.ogv video.dv

You’re done!

You can use the -v and -a parameters to control video and audio quality. The defaults (5 and 2) should be fine for average quality requirements. With -v 7, we already get very good video quality, but the output file size is roughly double. As far as audio quality is concerned, keep in mind the source quality. Unless your audio input is high quality (audio in directly connected to the conference room sound system), there is no need for high bitrate audio compression (-a setting greater than 4).

Deinterlacing?

If the output video quality is poor, it could be because your video needs deinterlacing. In particular, this happens when you record your video in long play mode. Interlaced video is very easy to identify: you just need to find a sequence with motion (camcorder or character motion). Pause the video and interlaced lines will show up.

So, if you source video is interlaced, use the --deinterlace parameter of ffmpeg2theora:

ffmpeg2theora --deinterlace -o video.ogv video.dv

Denoising the video

Look carefully at the generated Ogg/Theora video. Do you see MPEG-like squares moving on surfaces which shouldn’t change at all (walls, sky, board, etc.)?

If this happens, this means that your original video contained noise. This is very frequent with digital camcorders, in particular in low light conditions (when you amplify a weak signal, noise gets more significant). Such noise, though it is not obvious on the source video, can get amplified in the compression process.

Hence, it’s best to remove noise before compressing, so that pixes in still surfaces do not change at all in the source video. Follow the below instructions and compare the output Ogg/Theora video size. You will find that the output file is smaller that what you got by just running ffmpeg2theora on the raw DV video.

Fortunately ffmpeg2theora now supports denoising filters: we contracted Jan Gerber, its developer, to add such filters to his tool. First make sure you have at least version 0.20 (otherwise, download the latest version).

The implementation is based on ffmpeg / mplayer‘s postproc library. Available filter settings are detailed by ffmpeg2theora --pp help, or can be found by looking for tmpnoise in mplayer’s manual page. Filter settings are not easy to choose, however. For your convenience, here are the settings we chose after multiple experiments: --pp de,tn:256:512:1024. At least with our videos, they produce good quality output without significant side effects.

Ogg/Theora video with metatags

It’s possible and useful to add metainformation (title, author, location, license) to the ogv video files.

This can be done thanks to ffmpeg2theora parameters:

ffmpeg2theora -a 3 -v 7 --pp de,tn:256:512:1024 \
--artist "Michael Opdenacker" --title "Fosdem 2006" \
--date "February 2006" --location "ULB, Brussels, Belgium" \
--organization "Bootlin (https://bootlin.com)" \
--copyright "Copyright 2006, Michael Opdenacker" \
--license "Creative Commons Attribution-ShareAlike 2.5" \
-o video.ogv video.dv

If you need to mass encode several videos in a script, it is now possible to add the metatags by hand after encoding. This can be done with the TagTheora tool.

Going further

Run ffmpeg2theora --help for details about more possibilities like live encoding and streaming.

Thanks

  • To Diego Rondini, for letting us know about TagTheora

RAID + Xen on Ubuntu Edgy

Using Xen on Ubuntu 6.10 (Edgy), using RAID storage.

License

Creative commons

Copyright 2006, Bootlin.
This mini-howto is released under the terms of the Creative Commons Attribution-ShareAlike 2.5 license.

Credits

Thanks to:

  • Sébastien Chaumat, for making me feel like using Xen.
  • Eric-Olivier Lamey, for sending feedback and making useful suggestions,

Introduction

In this document, we share our experience using Xen on Ubuntu 6.10 (Edgy), using RAID storage.

Ubuntu 6.10 was used because it was the first Ubuntu version with Xen support. In earlier Ubuntu versions (in particular 6.06 LTS), you have to install Xen from sources, and do manual C library tweaks (for TLS support issues). The advantage of packages is that you can easily know about and deploy security updates!

Another reason for using version 6.10 is that it uses the Linux kernel version supported by the latest Xen version (3.0.3 when we installed it). With Ubuntu 6.06, we would have needed to upgrade the kernel version, or to use an earlier Xen version.

Kernel configuration files are provided for the Via C7 based Dedibox servers available in France. Of course, these instructions should be useful for anyone trying to use Xen, whatever the server hardware, and even if RAID storage is not used.

We wanted to share our experience because we spent a significant amount of time looking for correct kernel configuration settings, bootloader settings (in particular for RAID), as well as Xen network and tuning settings. We hope that this document will save some of your time, in particular if you have a Dedibox server!

Note that this HOWTO may not given enough details for unexperienced system administrators, who are unlikely to fiddle with Xen and RAID anyway.

Ubuntu 6.10 installation

For Dedibox users, we chose the below partition settings in the Dedibox installation interface:

  • 1st partition: /boot, 256 MB, RAID1, ext3
  • 2nd partition: /, 4096 MB, RAID1, ext3
  • 3rd partition: /xen, 146225 MB, RAID1, ext3
  • 4th partition: Linux swap, 2048 MB (2 separate partitions on sda and sdb)

Note that when using Xen, the swap space will only be used by Domain0, which is not supposed to run any services, except a ssh server. The 2048 MB maximum size is definitely much more than needed. 512 MB may be more than enough. We kept 2048 MB in case we decide to stop using Xen and run all our services on a single, real server.

By default, the Dedibox or Edgy install only took the first partition into account. However, Linux fully supports several swap partitions (max 2GB per partition). If these partitions are on different disks as in our case, this is even better for performance, as Linux can access those 2 partitions in parallel.

To make the second swap partition work, we added it to /etc/fstab file, ran mkswap /dev/sdb4 and then rebooted to check that everything was correctly set up.

For Dedibox users, note that the server doesn’t seem to boot if you do not choose a separate boot partition.

Adding packages

Uncomment all universe lines in /etc/apt/sources.list.

Install the packages we are going to need in the next sections:

apt-get update
apt-get install xen-hypervisor-3.0-i386 xen-source-2.6.17 xen-tools xen-utils-3.0 libc6-xen
apt-get install build-essential libncurses5-dev ccache

Kernel compiling

Of course, you may choose to use a generic Linux kernel provided by Ubuntu (such as xen-image-xen0-2.6.17-6-server-xen0). Follow the below instructions if you want to tune your kernel according to your exact hardware.

cd /usr/src
tar jxf xen-source-2.6.17.tar.bz2
cd xen-source

To speed up recompiling, you can add ccache support in the kernel makefile. Change the lines defining CC and CROSS_COMPILE:

HOSTCC          = ccache gcc
CC              = ccache $(CROSS_COMPILE)gcc

Dedibox users can use our custom configuration file. We derived it from the Ubuntu Xen kernel and used the settings used in the official Dedibox kernel configurations. You may still check that you have all the features you need, as we removed the features we do not use at the moment (such as NFS, ReiserFS, FAT…).

Compile your kernel:

make
make install
make modules_install

Bootloader configuration

The Grub bootloader configuration file needed to be updated to be able to load the Xen hypervisor kernel. Here’s what we added to our /boot/grub/menu.lst file before the ## ## End Default Options ## line:

title XEN/2.6.17-bootlin
root (hd0,0)
kernel /xen-3.0-i386.gz
module /vmlinuz-2.6.17.11-ubuntu1-xen0-dedibox-bootlin1 root=/dev/md1 md=1,/dev/sda2,/dev/sdb2 ro quiet splash

You can see that Grub loads files from the first raw partition (not using RAID), while Linux directly boots from the RAID device. In this case, files paths are taken from the /boot partition. You will have to adjust file patches in case /boot is part of the / partition.

Note that there is no clear documentation on the minimum of memory needed for dom0, the privileged Xen domain, from which you are going to control the standard Xen domains. We found that many sites use 128 MB, but other ones seem to be working fine with 64 MB. Just try by yourself if physical RAM is scarse!

Testing dom0

You are now ready to test dom0!

Just reboot and hope that your new kernel boots well. In case you administrate a remote server and this doesn’t work, debugging is tricky (believe us!), because you have no access to the system console. If this happens to you, we advise you to start from a working configuration, like ours or the default Ubuntu kernel, and apply your changes little by little.

Once you access a working shell, you can run top and check that you are no longer running on your regular server. In particular, you will only see the amount of RAM that you attributed to dom0 in the Grub configuration file. You can also run uname -r to check that you are running your new kernel, and xm info to get more information about the Xen hypervizor running on your machine.

Configuring regular Xen domains

To configure networking between dom0 and regular domains, we decided to use regular routing and NAT. Xen uses bridging by default, but we are less familiar with this method.

Set this in the /etc/xen/xend-config.sxp file, by making sure that bridge settings are commented out, and by uncommenting the below 2 lines:

(network-script network-nat)
(vif-script     vif-nat)

We also commented out domain migration settings, as we are not using them (yet).

Creating a new domU domain

Create a 1 GB (for example) sparse file for dom1 system files and format it:

dd if=/dev/zero of=/xen/dom1.img bs=1024k seek=1024 count=0
mkfs.ext3 -F dom1.img

Sparse files are particular files containing holes filled with zeros. No space is used on real storage until the empty blocks are written to. In a few words, they just use the size of their contents.

Create a swap partition image file:

dd if=/dev/zero of=dom1-swap.img bs=128M count=1
mkswap dom1-swap.img

We also created a special 8 MB filesystem for data files for dom1 (not belonging to the operating system):

dd if=/dev/zero of=/xen/dom1-data.img bs=1024k seek=8192 count=0
mkfs.ext3 -F dom1.img

Populate the root filesystem for dom1:

mkdir /mnt/dom1
mount -o loop dom1.img /mnt/dom1
debootstrap edgy /mnt/dom1

Copy the kernel modules too:

rsync -a /lib/modules/2.6.17.11-ubuntu1-xen0-dedibox-bootlin1/ /mnt/dom1/lib/modules/2.6.17.11-ubuntu1-xen0-dedibox-bootlin1/

Copy the /etc/apt/sources.list and /etc/resolv.conf files too.

Configuring domU

Declare the new domain in a /etc/xen/dom1.cfg file:

kernel = "/boot/vmlinuz-2.6.17.11-ubuntu1-xen0-dedibox-bootlin1"
memory = 96
name = "dom1"
vcpus = 1
disk = [ 'file:/xen/dom1.img,ioemu:hda1,w','file:/xen/dom1-data.img,ioemu:hda2,w','file:/xen/dom1-swap.img,ioemu:hda3,w' ]
root = "/dev/hda1 ro"

vif = [ 'ip=10.0.0.1' ]
dhcp = "off"
hostname = "dom1.bootlin.com"
ip = "10.0.0.1"
netmask = "255.0.0.0"
gateway = "10.0.0.254"

Of course, replace dom1 by a meaningful name!

Here, you can see that we assign 10.0.0.x to domx domains.

You can also see that we are using the same kernel as the one we use for dom0. This is not required at all, and we will soon propose a slightly lighter domU kernel without things which are not needed in unprivileged domains (no RAID, no netfilter…).

Booting and configuring domU

Start the new virtual machine and access a console:

xm create /etc/xen/dom1.cfg
xm console dom1

We gave you both instructions, as the second one is useful to access the console of an already running domain. However, you can create a domain and access its console in a single command, using the -c option:

xm create -c /etc/xen/dom1.cfg

You are connected to your new virtual system, with minimum Ubuntu server packages. There are still a few things to adjust though:

Set the root password, otherwise there is no password!

passwd

Fill up the /etc/fstab file as follows:

# /etc/fstab: static file system information.
#
#                
/dev/hda1       /       ext3    defaults,errors=remount-ro   0  1
/dev/hda2       /data   ext3    defaults        0       2
/dev/hda3       none    swap    sw      0       0

Fill up the /etc/network/interfaces file as follows:

# Used by ifup(8) and ifdown(8). See the interfaces(5) manpage or
# /usr/share/doc/ifupdown/examples for more information.

# The loopback network interface
auto lo
iface lo inet loopback

auto eth0
iface eth0 inet static
        address 10.0.0.1
        netmask 255.0.0.0
        broadcast 10.0.0.255
        gateway 10.0.0.128

Edit the /etc/hosts file as follows:

127.0.0.1       localhost localhost.localdomain
127.0.0.1       dom1

Fill up the /etc/hostname file as follows:

dom1

Exit the dom1 console by typing exit followed by Ctrl ], and reboot dom1:

xm reboot dom1

Back to the dom1 console, check networking with dom0 and with the outside world:

ping 10.0.0.128
ping bootlin.com

Install extra packages:

apt-get install libc6-xen deborphan psutils wget rsync openssh-client

Remove packages we will not need in the Ubuntu distribution:

apt-get remove --purge wireless-tools wpasupplicant pcmciautils libusb-0.1-4 alsa-base alsa-utils dhcp3-common dmidecode linux-sound-base x11-common eject libconsole aptitude groff-base

Keep your current configuration as a reference starting point for other domU domains you will create:

cp dom1.img domu.img.ref

Now we are going to create NAT (Network Address Translation) rules to forward incoming Internet packets to the right server on your virtual local network. Write your own rules in /etc/network/if-up.d/iptables in dom0 (make sure you make this file executable!). Here’s an example for an http server and a BitTorrent seed server.

#!/bin/sh

### Port Forwarding ###
iptables -A PREROUTING -t nat -p tcp -i eth0 --dport 80 -j DNAT --to 10.0.0.1
iptables -A PREROUTING -t nat -p tcp -i eth0 --dport 6881:6889 -j DNAT --to 10.0.0.2

Now, make sure your domain is started when your server is started, by adding a link in /etc/xen/auto/:

cd /etc/xen/auto/
ln -s ../dom1.cfg .

Ubuntu Edgy fixes

tty fixes

If you are using only xm console to connect to dom1, and do not plan to use ssh, you will notice that there are 5 getty processes running all the time waiting for a terminal connection on /dev/tty2 to /dev/tty6, while you just use /dev/tty0.

This does not only waste some CPU cycles and a few MB of RAM, but these getty processes keep failing and get respawned by the upstart init process. This causes a log of writes to the /var/log/daemon.log file, which could eventually fill up your root filesystem.

Here’s a quick fix for this:

rm /etc/event.d/tty2
rm /etc/event.d/tty3
rm /etc/event.d/tty4
rm /etc/event.d/tty5
rm /etc/event.d/tty6

Note that you may need to run this again each time the initscripts package is updated.

Configuring CPU sharing

With Xen, it’s not only possible to set the amount of physical RAM used by each domain. You can also set kind of CPU priorities for more critical domains needing fast response times.

Of course, you could also set the vcpus setting to values greater than one, but this has several drawbacks:

  • You would need an SMP enabled kernel.
  • This method also allows discrete settings, and you would need quite big numbers of vcpus to have a 45% / 65% cpu share, for example.
  • No easy way to add more CPU power to a domain without rebooting it (you may try Linux CPU hotplugging capa bilities, though).

Fortunately, the "xm sched-credit" command lets you change the weight and cap settings of each domain. See the Credit based CPU scheduler page for details about this command.

What’s good is that you can change those settings on the fly, according to actual server loads, without having to restart the corresponding domain. Unfortunately, Xen 3.0.3 doesn’t let you configure initial weight and cap settings at domain creation time through the domain configuration file (such a feature should be available in Xen 3.0.4, as a patch has been committed in the development version). Until such a feature is available, here’s an example implementation:

Create a /etc/init.d/xen-sched-credits file with execute permissions:

#!/bin/sh
# Sets initial weight and cap for xen domains
# In xen 3.0.4, this should be possible
# to set these values in the domain configuration files

# dom1 domain
xm sched-credit -d dom1 -w 64
xm sched-credit -d dom1 -c 25

# dom2 domain
xm sched-credit -d dom2 -w 256
xm sched-credit -d dom2 -c 50

Add this file to init runlevel 2 in dom0:

cd /etc/rc2.d/
ln -s ../init.d/xen-sched-credits S99xen-sched-credits

Useful tips

Making changes in a domain

What’s good with Xen as opposed to a real server is that you don’t need the domain to be running to make changes, even to upgrade packages!

mkdir /mnt/dom1
mount -o loop /xen/dom1.img /mnt/dom1
chroot /mnt/dom1

Further tasks

Congratulations! You are now ready to create more domains, and fine tune Xen according to your exact requirements.

Have fun! We hope that this HOWTO saved some of your time, anticipated some of your questions, and hopefully made you feel like sharing what you learn on your turn too.

Useful links

On-line resources that we used to configure Xen:

LXR websites

Important update: we are proposing a more modern engine to index big projects like the Linux kernel. Check out Elixir.

LXR (Linux Cross Reference) is a great source indexing tool, particularly useful for big projects like the Linux kernel.

Here are Internet sites that make it easy to explore the Linux sources thanks to the LXR engine:

Please let us know if you know about other LXR sites!

You can also browse Linus Torvalds’ GIT tree.