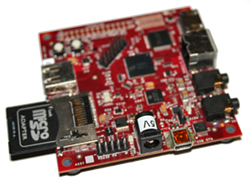
CALAO boards supported in mainline U-Boot

I’m happy to announce that a couple days ago, support for the CALAO SBC35-A9G20, TNY-A9260 and TNY-A9G20 boards made its way into the U-Boot git repository. Sadly, it’s not possible to boot from an MMC/SD card with the SBC35 yet, but it’s something I’m currently working on.

Support for all these cards will be available in the next U-Boot release, due in November.

The Bifferboard: tiny, low power embedded x86 board

A nice, cheap and tiny x86 embedded board that runs Linux and just consumes 1W. It has all the basic connectivity you need in an embedded system.

As you may already know, we maintain a list of attractive and Linux friendly embedded boards. Whenever we find a new board that is attractive and meets our strict criteria (supporting Linux or other free kernels, public pricelist, public documentation and website with an English version), we add this board to our list. This way, we don’t forget about any useful board, and we can offer useful guidance to our customers and to any embedded system developer looking for a suitable hardware platform.

Somebody at Bifferos.com has just contacted us to let us know about their Bifferboard product. Here are its announced features:

  • Bifferboard150MHz RDC CPU, Intel 486SX compatible
  • 1 watt power consumption (200mA @5v)
  • 68mm x 28mm x 19mm
  • 32MB SDRAM/1MB Flash
  • OHCI/EHCI USB 2.0
  • 10/100 Ethernet
  • Serial console 115200 baud
  • 4-pin JTAG (can be used as GPIO)
  • 2 GPIO (1 LED, 1 button)
  • Linux 2.6.27.5 + OpenWrt
  • 29 UK pounds

The board has two components: the CPU board, and the I/O one, offering Ethernet and USB host connectivity. For a serial port, you can order a special cable from their shop, which connects to a USB port on your workstation.

Thanks to its low power consumption, the Bifferboard can even be powered by USB. According to its makers, the board can do anything a NSLU2 device can do. It is just cheaper (approximately 33 EUR at the time of this writing).

Last but not least, most Bifferboard hardware can be emulated with QEMU.

While it could also be suitable for mass production projects, it can be at least a nice platform for prototypes, hobby, research and educational projects.

Of course, if you know about other attractive boards that we could add to our list, please post a comment or send us e-mail.

Building Android on Beagle

Note: these instructions are now out of date and refer to URLs which no longer exist. See the elinux.org wiki for more recent instructions.

These instructions are derived from Embinux.org’s Android Porting Guide to Beagle Board (the corresponding web page no longer exists), based on their work to port Android on the Beagle board. They correct multiple inaccuracies in this guide, and also add many useful details.

These instructions were tested on xubuntu 9.04. There shouldn’t be many differences if you use other recent Ubuntu or Debian versions.

Install needed software packages

At the time of this writing, note that Android requires Sun’s Java5 JDK, and doesn’t support the Java6 one.

apt-get update
apt-get dist-upgrade
apt-get install git-core bison sun-java5-jdk flex g++ zlib1g-dev
apt-get install  libx11-dev libncurses5-dev gperf uboot-mkimage

Android also uses its own repo script as a git front-end:

mkdir -p ~/bin
cd ~/bin
curl https://dl-ssl.google.com/dl/googlesource/git-repo/repo > repo
chmod +x repo

We are also going to need a 2007q3 toolchain from Code Sourcery

cd
wget http://www.codesourcery.com/sgpp/lite/arm/portal/package1787/public/arm-none-linux-gnueabi/arm-2007q3-51-arm-none-linux-gnueabi-i686-pc-linux-gnu.tar.bz2
cd /opt
sudo tar jxf arm-2007q3-51-arm-none-linux-gnueabi-i686-pc-linux-gnu.tar.bz2

You could also get this toolchain from our website:

cd
wget /pub/demos/beagleboard/android/arm-2007q3-51-arm-none-linux-gnueabi-i686-pc-linux-gnu.tar.lzma
cd /opt
sudo tar --lzma -xf ~/arm-2007q3-51-arm-none-linux-gnueabi-i686-pc-linux-gnu.tar.lzma

Download sources

Our instructions create a directory in your home directory, but of course, it can be placed anywhere!

 mkdir ~/beagledroid
 cd ~/beagledroid
 repo init -u git://labs.embinux.org/repo/android/platform/beaglemanifest.git/
 repo sync

Caution: this can take a lot of time, as this downloads and extracts 2.4 GB of data. On a fast workstation with a 500KB/s Internet connection, it took about 90 minutes.

Building Android

make

If your workstation has multiple CPUs, you could save a lot of time by running multiple jobs in parallel:

make -j 4

On our machine, this took about 4 hours!

Building the kernel

export CC_PATH=/opt/arm-2007q3/bin/arm-none-linux-gnueabi-
cd ~/beagledroid/kernel
../vendor/embinux/support-tools/beagle_build_kernel.sh

Copying the Android root filesystem

Android’s root file system is generated in ~/beagledroid/out/target/product/generic

cd ~/beagledroid/out/target/product/generic
mkdir ~/beagledroid/rootfs
cp -a root/* ~/beagledroid/rootfs/
cp -a system/* ~/beagledroid/rootfs/system/
cd ~/beagledroid/rootfs
sudo chown -R root.root .
sudo chmod -R a+rwX data system 

Formatting an MMC/SD card

First connect your card reader to your workstation, with the MMC/SD card inside. Type the dmesg command to see which device is used by your workstation. Let’s assume that this device is /dev/sdb

Type the mount command to check your currently mounted partitions. If MMC/SD partitions are mounted, unmount them.

In a terminal edit partitions with fdisk:

sudo fdisk /dev/sdb

Delete any existing partition with the d command.

Now, create the boot partition:

Command (m for help): n 
Command action 
   e   extended 
   p   primary partition (1-4) 
p 
Partition number (1-4): 1 
First cylinder (1-239, default 1): 1 
Last cylinder, +cylinders or +size{K,M,G} (1-239, default 239): +64M

Change its type to FAT32:

Command (m for help): t
Selected partition 1
Hex code (type L to list codes): c
Changed system type of partition 1 to c (W95 FAT32 (LBA))

Using the n command again, create a second partition filling up the rest of your card (just accept default values).

Now, format the partitions in your card:

sudo mkfs.vfat -n beagleboot -F 32 /dev/sdb1
sudo mkfs.ext3 /dev/sdb2

Remove and insert your card again. Your new partitions should be mounted automatically.

Copying data to the MMC/SD card

Start by copying the X-loader and U-boot on the first partition.

cd /media/beagleboot
wget /pub/demos/beagleboard/android/MLO
/pub/demos/beagleboard/android/u-boot.bin
cp ~/beagledroid/kernel/arch/arm/boot/uImage .

Now copy the Android root filesystem to the second partition (assuming it is mounted on /media/disk:

sudo rsync -a ~/beagledroid/rootfs/ /media/disk/

Finish by unmounting your MMC/SD partitions:

sudo umount /media/beagleboot
sudo umount /media/disk

Boot setup

The last thing left to do is to specify how the board boots Linux.

Plug the Beagle board on your computer, and also connect it to a DVI-D monitor. Start minicom (corresponding to Hyperterminal in Windows) on /dev/ttyS0, or on /dev/ttyUSB0 if you are using a serial to USB adapter. Power up the board.

First, stop Minicom from truncating long lines by typing [Ctrl] [a] followed by z and w.

In the U-boot prompt, make the board boot automatically on the MMC/SD card:

setenv bootcmd 'mmc init;fatload mmc 0 80000000 uImage;bootm 80000000'
saveenv

Now set the kernel command line arguments:

setenv bootargs console=ttyS2,115200n8 noinitrd root=/dev/mmcblk0p2 video=omapfb.mode=dvi:1280x720MR-24@50 init=/init rootfstype=ext3 rw rootdelay=1 nohz=off androidboot.console=ttyS2

You may need to adapt the video settings to the capabilities of your DVI display. You should now see Android boot!

Beagle board MMC boot myths?

Booting a Beagle board from an MMC/SD should be easier than what people tell you

Beagle boardAt the time of this writing, most documentation that you can find on the web about the Beagle board will tell you that you need to take special preparation steps if you wish to boot your board on an MMC/SD card:
  • The card requires a special geometry: 255 heads and 63 sectors per track
  • The first partition on the card, with a FAT type, must be marked as bootable
  • The X-loader (MLO file), must be copied to the first sectors of the first partition. As a consequence, you should copy this file first.

As my colleague Florent Peyraud and TI engineers started to suspect, all this is not always required. I’ve just made tests with my Rev C2 Beagle board:

  • I took a brand new MMC/SD card. fdisk showed that it had 57 heads and 56 sectors per track.
  • I created the partitions again, and didn’t flag the first one as bootable.
  • After formatting the first partition in FAT32 format, I first copied the u-boot.bin and uImage files, and then the MLO one.

After all this, I had no problem booting my Beagle board on the MMC/SD card. At least with my Rev C2 board, what TI engineers expected was true: the board romcode understood the FAT format, and therefore just needed a file with the MLO name, whatever its physical location on the card.

Does anyone know whether the requirements used to be true with earlier Beagle board romcode releases, or in special cases?

USB-Ethernet device for Linux

Useful device when you work with an embedded development board

For our Embedded Linux training sessions, I was looking for a USB to Ethernet device. Since Linux supported devices are often difficult to find, I’m glad to share my investigations here.

When you use an embedded development board, you must connect it to your computer with an Ethernet cable, for example to transfer a new kernel image to U-boot through tftp, or to make your board boot on a directory on your workstation, exported with NFS.

You could connect both the board and computer to your local network, which would still allow your computer to connect to the Internet while you work with the board. However, you may create conflicts on your local network if you don’t use DHCP to assign an IP address to your board (if your DHCP server even accepts this new device on the network). In a training environment, you are also likely to run out of Ethernet outlets in the training room if you have to connect 8 such boards. Hence, a direct connection between the board and your workstation’s Ethernet port is often the most convenient solution.

If you can’t use WIFI to keep your computer connected to the outside world, a good solution is to add an extra Ethernet port to your computer by using an USB-to-Ethernet device.

My colleague Thomas and I started looking for such devices that would be supported by Linux. Here are a few that we found:

  • D-Link DUB-E100. Supported by the USB_NET_AX8817X driver. However, this product is bulky and quite heavy (at least 100 grams).
  • TRENDnet TU2-E100. Supported by the same driver, but still bulk (August 2015 update: now replaced by a more recent version, now almost as small as the Apple one, and supported out of the box in Linux. See the comment about this device.)
  • Linksys USB 200m. Supported by the same Linux driver and has a much more acceptable size, but customer reviews complain that its connector can break easily.
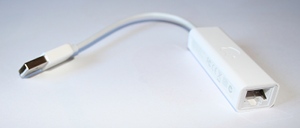
  • Apple USB Ethernet Adapter. This should be working out of the box in Linux. At least the MB442Z/A or MC704ZM/A references did, but Apple now sells a new reference that might have a different chipset. It is beautiful, small and light. Support for this device (at least the references I mentioned) was added to Linux 2.6.26 through the same driver. You should be able to use it in recent distros.

Apple USB to EthernetSo, I recommend the Apple device. I event posted a comment on the Apple Store, titled “Perfect for Linux”! I hope the Apple droids won’t censor it. Don’t hesitate to buy it, so that we can confirm that the latest reference is supported too.

I can’t tell whether this could happen with Apple. This was the first Apple device I ever bought…

Real hardware in our training sessions

At last, real hardware in our training sessions

If you haven’t had a look at our new training agendas, you may not have noticed that we now use real hardware in our embedded Linux and kernel training sessions. For 4 years, we had been using the QEMU emulator on the x86, arm and mips platforms. While this simplified training session logistics, and avoided any trouble due to hardware failures, this was not close enough to the real world situations that our customers face.

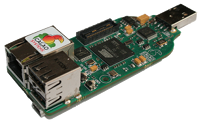
We chose the nifty boards from Calao Systems. They have great features that make them very attractive for training and prototyping purposes

  • AT91SAM9263 ARM CPU from ATMEL, running at 200 MHz
  • 64 MB of RAM and 256 MB of flash, which are more than enough for any embedded system we can think of.
  • Small and light (30 g), with a USB connector replacing power, serial and JTAG connectors, making it easy to travel with several of these devices without having to carry many heavy accessories. Carrying convenience was a key decision factor.
  • 100 Mbit Ethernet port, allowing to practice with root filesystems on NFS, and with tftp from the U-boot command line.
  • CALAO USB 92632 USB 2.0 host ports, allowing to connect any type of device. In particular, we are thinking about USB mass storage and webcam devices.
  • 1 USB device port, allowing to experiment with Linux USB gadget drivers.
  • Very affordable price (less than 160 €).

On the software side, this board is also very attractive:

  • It is supported by the mainline Linux kernel, since version 2.6.27.
  • A bricked board can be reflashed without ever needing to use Windows, thanks the Linux version of Atmel’s SAM-BA utility.
  • It will soon be supported by the mainline version of U-boot. We are contributing to this.
  • It should also be directly supported in the mainline version of Buildroot in the next months, making it easy to build complete root filesystems for it. We will also work on this.

We will also soon offer training cost options that include these boards. This way, customers can walk away with their own device and easily continue to practice with the training hardware and make prototypes, without having to go through an extra purchasing process.